How to Calibrate iPhone Battery: A Practical Guide
Learn how to calibrate iPhone battery to refresh the gauge and improve remaining-portion accuracy. This expert guide from Calibrate Point covers safe steps, required tools, common myths, and a clear, tested procedure.

You can calibrate iphone battery by performing a full charge cycle to refresh the gauge, then using the device normally until it shuts down, and charging back to 100%. This helps the battery gauge reflect remaining capacity more accurately. You’ll need a charged iPhone, a reliable charger, and time for a complete cycle.
What calibration actually changes
Calibrating the battery gauge on an iPhone is about aligning the software's perception of remaining power with the battery's actual capacity. It does not restore capacity or slow wear, and it won't extend the life of an aged battery. According to Calibrate Point, the goal is to allow the device to learn a fresh gauge under real-world usage. This means a controlled full-charge cycle followed by a period of normal operation to gather usage data that the system can reference. When you perform a calibration, you’re essentially giving iOS an accurate map of how long the battery lasts at different states of charge, so you see a more honest percentage on-screen.
Before you begin, recognize that not all devices need recalibration, and continuous battery cycles (heavy gaming sessions, extreme heat, or rapid charging) will still wear lithium-ion chemistry over time. Calibration isn’t a magic fix for degraded capacity; it’s a gauge-alignment technique that, when combined with good charging habits, provides more reliable battery reporting. Many users worry that calibration can harm the battery; in practice, the recommended procedure is gentle and non-invasive, designed to minimize additional stress on the pack. Emphasize safety: avoid charging in extreme heat, remove iPhone from cases that trap heat during full charging, and never leave the device unattended if it becomes warm.
When to consider calibration and how often
Not every user needs to calibrate immediately. If your iPhone shows a stable gauge and long-term health is acceptable (battery health at or near peak), calibration may not help much. Consider calibration if you notice discrepancies, like the phone shutting down at 20% while the battery indicator shows 1–2%. In practice, calibrating every 6–12 months is enough for most users, unless you operate devices in extreme conditions. The Calibrate Point guidance emphasizes that a single full cycle is usually sufficient to refresh the gauge; after that, resume normal usage. This process takes a few hours, but you won’t lose data if you back up first. Start with a fresh backup to iCloud or Finder, because long cycles involve extended power use.
Before you start, prepare a stable charging setup and ensure your iPhone isn’t running heavy apps as the cycle begins. Avoid placing the device in direct sun or near heat sources. A cool, ventilated environment helps protect the battery during a full charge. If you accidentally interrupt the cycle, restart the procedure from Step 1 to avoid skewing results. The goal is to create a single, unbroken charging period, followed by a controlled discharge. Do not attempt to calibrate multiple devices in parallel on the same outlet; distribute the load to keep chargers cool.
Step-by-step overview
Here is a high-level overview of the calibration sequence, mapped to steps you will perform in the STEP-BY-STEP section. The core idea is a single, full-charge cycle followed by a controlled discharge, then a full recharge. This sequence helps the battery gauge recalibrate to real-world conditions. You should observe safety considerations: avoid forcing the device to drain when hot or when the battery indicator is unstable. After the process, monitor the gauge for a few days. If necessary, repeat after a longer interval. The action plan aligns with best practices from Calibrate Point and other calibration guides:
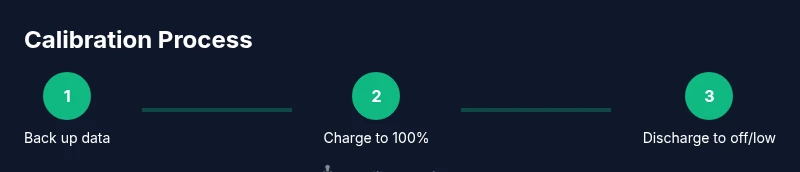
- Step A: Back up data and prepare the charging setup.
- Step B: Charge uninterrupted to 100%.
- Step C: Use the device until it powers off or reaches a minimal charge.
- Step D: Recharge to 100% without interruption.
- Step E: Restart and observe gauge accuracy over the next few days.
- Step F: Decide whether to repeat after a month or longer.
Safety, myths, and optimization tips
Myth: Calibrating battery life can restore original capacity. Reality: Calibration only improves gauge accuracy and reporting. Myth: You must drain to 0% every time. Reality: If the device turns off near 5–10%, this provides a good reference; forcing a 0% discharge is unnecessary and potentially stressful for the battery. Safety: never perform calibration while the device is overheating; stop if the screen becomes unresponsive or the battery looks swollen. Pro tips: keep the iPhone out of direct sun, use a stable charger, and avoid rapid-charging sessions during the calibration window. After calibrating, avoid heavy gaming or bright high-load tasks for a few hours to allow the system to adjust. Finally, the most reliable path to longer-term battery health remains using iOS features like Optimized Battery Charging and battery health management; calibration is a gauge technique, not a silver bullet for battery aging.
Tools & Materials
- iPhone with latest iOS(Back up before starting)
- Apple-certified charger(Use original or certified accessories)
- Charging cable(Non-frayed, reliable connection)
- Stable power outlet(Avoid heat sources and direct sun)
- Backup method (iCloud or Finder)(Full backup before long cycles)
- Quiet environment (optional)(Helps monitor gauge during discharge)
Steps
Estimated time: 3-4 hours
- 1
Back up your data
Create a fresh backup via iCloud or Finder to guard against data loss during a long calibration cycle. This ensures you can restore apps, photos, and settings if anything goes wrong. Verify the backup completed before proceeding.
Tip: Encrypt local backups for additional security; confirm you can see the latest backup entry. - 2
Charge to 100% with a stable setup
Connect the iPhone to a wall outlet and charge uninterrupted to 100%. Remove any case that might trap heat, and place the device in a well-ventilated area. A steady, cool charging environment reduces thermal stress during the cycle.
Tip: Disable unnecessary features that heat the device (e.g., high brightness, active gaming) during charging. - 3
Discharge until the device powers off
Use the iPhone normally until it powers off due to battery depletion, or bring it to around 5–10% if it won’t shut down on its own. Avoid forcing a full 0% discharge if the device remains warm or unstable.
Tip: If the device shuts down early, reboot and resume use only when cool. - 4
Recharge to 100% without interruption
Reconnect to the charger and allow a continuous charge back to 100%. Don’t unplug early; interruptions can skew gauge recalibration. Ensure the charger remains stable for the entire recharge period.
Tip: Keep the device on a flat, cool surface to promote even charging. - 5
Restart and monitor gauge after calibration
Power the iPhone back on and observe the battery indicator over the next few days. Compare actual usage against the gauge to confirm improvement in reporting accuracy.
Tip: Keep a rough log of battery percent during typical daily use to assess changes. - 6
Decide on a follow-up calibration
If gauge accuracy remains inconsistent after a few days, consider repeating the cycle after several weeks. Do not over-calibrate; one well-timed cycle is sufficient for most users.
Tip: Avoid performing back-to-back calibrations; give the battery time to settle.
Questions & Answers
Does calibrating the iPhone battery improve actual battery health?
No. Calibration primarily improves gauge accuracy. It does not restore degraded capacity or reverse wear.
Calibration improves gauge accuracy, not battery health.
Will calibration damage my device or data?
No inherent damage if you follow safe steps and back up first. Data safety is ensured by a prior backup.
If you back up first, calibration won’t put your data at risk.
Is calibration safe for all iPhone models?
Generally safe, but avoid if you notice swelling, abnormal heat, or other battery issues. In such cases, seek service.
Generally safe, but stop if you see swelling or overheating.
How long does the calibration take?
Plan for a window of about 3 to 4 hours, allowing for a full charge and a planned discharge.
Most calibrations take about three to four hours.
Should I calibrate if my battery health is already poor?
Calibration can help the gauge, but it won’t reverse aging. If health is poor, consider a battery replacement for meaningful improvement.
Calibration helps the gauge; replacing the battery yields real gains in usable capacity.
Can I calibrate multiple devices at once?
Calibrate one device at a time to avoid heat buildup and ensure each cycle completes properly.
Do one device at a time to prevent overheating.
Watch Video
Key Takeaways
- Back up data before calibration.
- Calibration improves gauge accuracy, not battery health.
- Use a stable charger and cool environment during the full cycle.
- Monitor gauge after calibration and decide on a potential follow-up cycle.