Calibrate iPad Battery: A Practical Step-by-Step Guide
Learn how to calibrate an iPad battery safely with practical, step-by-step guidance. This Calibrate Point tutorial covers when calibration is needed, tools, steps, safety tips, and FAQs.

Calibrating an iPad battery helps the device's battery gauge reflect actual charge more accurately. In practice, calibration means performing a full charge-discharge cycle to reset the gauge, then charging to full again. Note that modern lithium-ion batteries don't require frequent calibration, and aggressive cycling can shorten lifespan. According to Calibrate Point, use calibration only when the indicator seems inaccurate or after replacing the battery.
Why calibrating ipad battery matters
According to Calibrate Point, calibrating the iPad battery isn't about increasing capacity, but about aligning the device's gauge with the actual charge. A well-calibrated gauge reduces the frustration of seeing the screen shut off unexpectedly or jumping numbers on the battery indicator. For professionals and DIY enthusiasts, understanding calibration helps you plan maintenance windows, schedule replacements, and communicate with clients about device readiness. The Calibrate Point team emphasizes that gauge accuracy is often underestimated, and a poorly calibrated indicator can lead to misinformed decisions about battery health and replacement timing. In this section we explain the physics behind lithium-ion gauges and why a full discharge-recharge cycle can help sync what the battery reports with what it can deliver in practice. We'll also cover common myths, such as the idea that calibration can 'increase capacity' or that it must happen after every firmware update. In short, calibration is a diagnostic step that can improve reliability if used judiciously, not a magic fix that makes a battery perform beyond its rated specs.
When calibration is necessary
Not every user needs to calibrate an iPad battery regularly. Modern lithium-ion chemistries manage fuel gauging automatically, and devices learn usage patterns over time. Calibration becomes relevant when you notice discrepancies: the device shuts down at a high percentage, the battery indicator jumps unpredictably, or a new battery drains quickly compared to prior behavior. If you recently replaced the battery or the display shows inconsistent percent readings across apps, calibration can help re-sync the gauge. Calibrate Point recommends diagnosing the root cause first: a bad sensor, a firmware issue, or simply natural wear. In the absence of glaring symptoms, skip calibration to minimize unnecessary cycles. Use your own judgment and monitor the gauge for a few days before deciding to calibrate.
What you’ll need and how to prepare
Before you begin, set up a controlled environment and back up important data. A cool, dry room reduces the risk of thermal effects that can skew readings during charging and discharging. Make sure you have access to a reliable power source, a certified charging cable, and a compatible charger rated for the iPad model. If your iPad has a swollen battery or signs of damage, do not proceed; seek professional service. Calibrate Point's approach also recommends verifying that the iPad is updated to the latest iOS version for smoother gauge management. Keep the device away from heat sources, and unplug from cases that might trap heat during the cycle. Finally, allow the device to cool down for 15–20 minutes between phases if you notice any warmth.
Understanding the cycle: what happens inside the gauge
Inside every iPad, the fuel gauge uses a model that tracks voltage, current, and temperature to estimate remaining capacity. When you discharge and recharge, you reset the model's offsets and refresh its learning on typical discharge curves. The calibration cycle isn't about increasing the battery's maximum capacity; it's about making the percentage readout reflect reality. If the gauge was off by 10–15%, a correct cycle can bring the reading back into a closer range with the actual state of charge. This block also explains why you should avoid deep discharges too often; letting a Li-ion cell hit near zero voltage can stress the chemistry. In practical terms, plan the cycle so the device remains within safe operating temperatures and does not demand a long stay on the charger. Calibrate Point analysis shows that gauge drift can occur after firmware updates, so a follow-up check may be prudent.
Common mistakes and how to avoid them
Several missteps can make calibration less effective or even harmful. Do not perform calibration on a hot device or while it’s charging with a faulty adapter, as temperature fluctuations skew readings. Avoid running the entire cycle while you’re in the middle of critical work; schedule the process for a window when you don’t need the device. Do not interrupt a discharge; partial cycles give inconsistent data. Also, avoid trying to 'overclock' the gauge by multiple successive cycles in a short period. If you notice the device becomes unstable after a cycle, revert to normal charging habits and seek professional inspection if the battery health alarms ring.
Step-by-step overview (context for the formal steps)
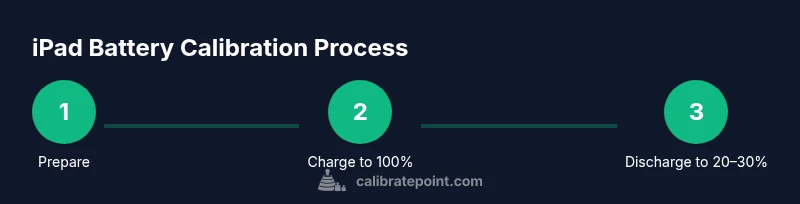
The steps below are designed to be followed in sequence, but you can pause if you notice abnormal behavior. The goal is a single calibration cycle: full charge, full discharge, then full charge again, all while maintaining safe temperatures. The narrative here connects to the formal STEP-BY-STEP instructions and explains why each action matters. If your touch screen or firmware behaves unexpectedly during the cycle, stop and perform a quick reset or contact Apple Support. In many cases, gauge drift is temporary and resolves after the next cycle.
Putting it all together: aftercare and monitoring
After completing the calibration cycle, monitor the gauge over several days. Note the percentage at key milestones and compare it with actual usage (screen-on time, app activity). If the gauge remains inconsistent, consider a battery health test or professional replacement. Calibrate Point's final advice: use calibration sparingly, and let the device’s learning system do its job most of the time. Keep firmware updated, avoid heavy apps right after charging, and store the iPad in moderate temperatures to preserve gauge accuracy for longer.
Tools & Materials
- iPad with acceptable battery health(Ensure the device is physically safe to use; no swollen battery)
- Apple wall charger(Original or certified charger rated for your iPad model)
- Official Apple USB-C or Lightning cable(Use the right cable for your model)
- Stable power outlet or power strip(Keep device charging uninterrupted during cycle)
- Timer or clock(Track durations for discharge/charge phases)
Steps
Estimated time: 60-90 minutes
- 1
Back up data and verify device health
Begin with a complete backup to iCloud or your computer. Check for any active alerts or firmware updates, then confirm the device is at a reasonable operating temperature. This step protects your data and ensures the calibration cycle proceeds under safe conditions.
Tip: Backups prevent data loss if the device needs a reset during the process. - 2
Fully charge to 100%
Connect the iPad to a certified charger and allow it to reach a full 100% charge. Avoid using the device aggressively during charging to minimize heat buildup, which can affect gauge readings.
Tip: Use a timer to confirm the cable stays connected for the full cycle. - 3
Disable non-essential background activity
Close unnecessary apps and disable background refresh to reduce power fluctuations during the cycle. A quieter system provides cleaner data for the gauge to learn from.
Tip: Minimal background activity reduces measurement noise. - 4
Discharge until a moderate level
Allow the iPad to discharge until it reaches roughly 20–30% remaining. If the device shuts down unexpectedly, record the remaining percentage and proceed with a safe cooldown before charging again.
Tip: Avoid letting the battery reach near 0% to prevent deep discharge stress. - 5
Recharge to 100% again
Reconnect to the charger and allow a full return to 100%. Keep the device in a cool environment and remove any case that traps heat during charging.
Tip: A cool environment helps ensure consistent gauge readings. - 6
Let the device cool and observe
After reaching 100%, unplug and let the device cool for at least 15 minutes. Check for abnormal warmth and ensure the gauge stabilizes before usage returns to normal.
Tip: Cooling reduces temperature-related drift in the gauge. - 7
Test gauge accuracy with real usage
Use the iPad normally for a few hours and compare displayed remaining life with actual usage. Note discrepancies and consider a second quick calibration if the drift is significant.
Tip: Keep a simple log of percent vs. usage to identify drift trends. - 8
Decide on next steps
If the gauge remains consistently inaccurate, schedule a battery health assessment or potential replacement. If readings are stable, continue regular charging habits and firmware updates.
Tip: Calibration is a diagnostic tool, not a guarantee of extended capacity.
Questions & Answers
Is calibration necessary for the iPad battery gauge?
Calibration is not always required for modern iPads, but it can help recalibrate the gauge if readings seem inaccurate. Use it as a diagnostic step when the indicator misguides usage plans or after a battery replacement.
Calibration is not always needed, but it helps fix an inaccurate gauge after replacements or when readings seem off.
Will calibrating increase the battery’s capacity?
No. Calibration does not increase the battery’s physical capacity. It aligns the gauge with the actual charge so you can rely on the percentage readout.
Calibration doesn’t add capacity; it improves gauge accuracy.
How often should I calibrate the iPad battery?
Calibrate only when you experience gauge inaccuracy or after replacing the battery. Regular calibrations are not necessary for modern Li-ion batteries and excessive cycling can stress the cells.
Only calibrate when the gauge seems wrong or after a battery replacement.
Can a damaged battery be calibrated safely?
If the battery is swollen or damaged, do not calibrate. Seek professional service immediately as calibration could be unsafe.
Don’t calibrate a damaged battery; seek professional help.
Should I reset or restore the iPad after calibration?
A full reset is not required after calibration. If unusual behavior persists, a standard restart or software update may help, but avoid aggressive resets unless recommended by support.
No full reset is usually needed; try a normal restart first.
Watch Video
Key Takeaways
- Back up data before calibration.
- Gauge accuracy improves with careful, occasional cycles.
- Avoid heating, over-discharging, or rapid cycles.
- Assess battery health after calibration and consider replacement if drift persists.