Calibrate iPhone Screen After Replacement: A Step-by-Step Guide
Learn how to calibrate your iPhone screen after replacement with practical, step-by-step methods to improve color accuracy, touch response, and display consistency. Follow safe practices and use built-in tools or calibrated apps for reliable results.

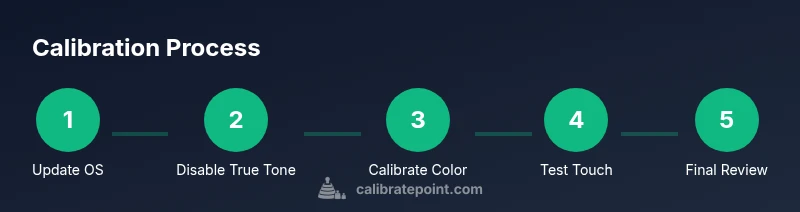
After replacing an iPhone screen, optimize display quality and touch sensitivity by updating iOS, adjusting color settings, and running quick tests. Start with built-in display controls: brightness, True Tone, and accessibility color options, then use a calibration app or pixel checks to verify results. If issues persist, be prepared to recheck the panel seating or seek professional help.
Why proper calibration matters after a screen replacement
A screen replacement can restore function, but visual quality and touch accuracy depend on proper calibration. After you install a new display, the panel alignment, digitizer contacts, and the device’s display pipeline may behave slightly differently from the original assembly. This is especially true for OLED versus LCD panels, and for units produced by different suppliers. Small misalignments can lead to uneven brightness, color shifts, or touch skew across the screen. According to Calibrate Point, a careful post‑replacement calibration reduces guesswork and unnecessary service visits. The goal is not to “fix” the basic hardware but to align software controls with the new hardware so you get consistent color, predictable brightness, and reliable touch response. Begin with a calm check of software state: ensure iOS is up to date, confirm no accessibility settings are accidentally altering the display, and verify that True Tone is configured to your preference. If you see obvious color cast or inconsistent brightness, you’ll want to run a structured test plan that covers color, grayscale, brightness, and touch responsiveness. This approach minimizes guesswork and helps you identify whether the issue is user-facing or related to the installation.
How to verify display quality across color, brightness, and uniformity
To validate your post‑replacement calibration, run a disciplined set of checks. Start with a neutral white image and a gray ramp to observe color bias and grayscale accuracy. Compare color-shift observations in different lighting conditions by rotating the device or moving to a windowed area. Measure brightness in the center and at the corners using on-screen indicators and, if available, a light meter app. Look for backlight bleed at edges and ensure uniform brightness across the panel. True Tone and Night Shift can alter perceived color; test both states to see which presentation you prefer. Calibrate Point analysis shows that consistent lighting and a rested screen yield more stable color comparisons. If your results differ significantly from references, you may need to adjust color settings, or rerun the calibration with a compatible app.
Step-by-step: optimizing color accuracy with built-in tools and apps
Color accuracy benefits from a structured approach that blends iOS controls with dedicated apps. First, update to the latest iOS version to ensure all calibration-related features are current. Then, in Settings > Display & Brightness, set Brightness to a mid-level and toggle True Tone off to view a neutral baseline. If your device supports Color Filters or Display Accommodations under Accessibility, experiment with those options to reduce bias. Install a reputable calibration app and follow the on-screen instructions to create a color reference. Use test patterns and reference images to align the display with your target color profile. Finally, compare the calibrated result against a standard reference photo to judge accuracy. Calibrate Point’s guidelines emphasize consistency between the software controls and the hardware to achieve stable results over time.
Touch accuracy and screen responsiveness
Digitizer responsiveness matters as much as color fidelity after a screen replacement. Begin by performing common multi‑touch gestures across the entire screen, including edges and corners, to identify any dead zones or inconsistent presses. If your device supports a diagnostic mode or a third‑party touch tester, run a multi‑touch test to ensure all inputs register at the correct coordinates. Disable features that can mask touch issues temporarily, such as AssistiveTouch, to get a true read of input accuracy. If you notice lag or missed touches, recheck the screen seating and connector alignment. Calibrate Point highlights that reliable touch requires both hardware seating and software responsiveness aligned through the display subsystem.
Pixel-level checks and motion/brightness artifacts
Pixel integrity is critical for a seamless viewing experience. Look for dead pixels, stuck pixels, color banding, or PWM flicker at common brightness levels. Use test patterns with solid colors to reveal uniformity issues, and scroll through images to spot motion blur or ghosting artifacts. If you observe abnormalities, use a pixel test app or a static reference image to document the problem. In some cases, a misaligned top bezel or subtle assembly variance can cause perceptual anomalies; ensure the gasket and frame sit flush and the adhesive seal is complete. Calibrate Point analysis suggests keeping ambient lighting stable during testing to avoid perceived shifts in brightness.
Troubleshooting common issues after screen replacement
If calibration tests reveal persistent problems, start with a conservative, repeatable workflow. Reboot the device and re-run the color calibration tests to rule out temporary software glitches. Re-seat the display connectors if you are comfortable opening the device, following proper anti‑static precautions, and ensure the logic board connection is secure. Check that the screen itself is the correct model for the device and that the backlight cable is properly seated. If issues persist after reseating, you may need to replace the display again or consult a professional technician who can inspect the hardware at a deeper level. The Calibrate Point team recommends documenting all tests and results to guide any subsequent service decisions.
Safety, maintenance, and professional calibration when needed
Handling a freshly replaced iPhone screen requires care to protect the battery and internal components. Always power down before probing connectors and avoid applying excessive force to any cables. Use a clean, dry workspace and avoid liquids near the device. Regular software updates support ongoing calibration accuracy, while periodic checks help catch gradual changes in display behavior. If color or touch stability remains poor after following the steps above, seek professional calibration services or a screen‑replacement rework. The Calibrate Point team emphasizes that professional calibration can provide a more precise alignment of hardware and software for mission-critical use cases.
Tools & Materials
- iPhone with replaced screen (assembled)(Ensure device is powered off before any checks)
- Soft microfiber cloth(For cleaning screen surface before tests)
- Pentalobe and Phillips screwdrivers(Optional if you need to recheck connectors)
- Display test or calibration app(Install from App Store and follow in-app guidance)
- Colorimeter accessory (optional)(For high‑precision color checks when available)
- Anti‑static wrist strap(Use when opening the device to inspect connectors)
Steps
Estimated time: 15-30 minutes
- 1
Update and prepare
Power on the iPhone and verify it runs the latest iOS. Install any recommended calibration apps and check that all system updates are complete. This establishes a stable baseline for testing and avoids known software-related color shifts.
Tip: Keep the device in a consistent lighting environment during initial tests. - 2
Reset visual baselines
In Settings > Display & Brightness, disable True Tone and Night Shift to view a neutral color baseline. Adjust brightness to a mid level so tests aren’t influenced by extreme luminance.
Tip: Document the baseline settings before making changes. - 3
Run a color calibration app
Launch the calibration app and follow the on-screen prompts to generate a reference color profile. Use test patterns to compare against expected color values and adjust as directed by the app.
Tip: If the app allows color profile exports, save a copy for future reference. - 4
Check grayscale and white balance
Use white and grayscale images to assess grayscale accuracy. Look for any color tint, and ensure neutral grays remain true as you pan across the screen.
Tip: Switch lighting to confirm the results aren’t lighting-driven artifacts. - 5
Assess touch responsiveness
Perform a multi‑touch test across the entire surface, including edges. Note any missed taps or inconsistent coordinates; lingering issues may indicate seating problems.
Tip: If available, run a dedicated touch tester to quantify input latency. - 6
Pixel and brightness checks
Scan for dead or stuck pixels and inspect brightness uniformity across the panel. Use static color tests to reveal any uneven brightness or banding.
Tip: Record any anomalies with screenshots or short videos for reference. - 7
Re-seat or verify connectors
If tests indicate hardware-related issues, re-check panel connectors and seating where safe to do so. Ensure the display cable is fully seated and not pinched.
Tip: Only perform connector checks if you are comfortable and have proper static precautions. - 8
Document and decide
Summarize results, compare against a reference baseline, and decide whether calibration suffices or if a professional rework is required.
Tip: Keep a log of findings to support future maintenance decisions.
Questions & Answers
Why calibrate an iPhone screen after replacement?
Calibration helps ensure color accuracy and touch responsiveness after a screen replacement. Software controls and a compatible app can align the new panel with your device expectations, reducing visible discrepancies.
Calibration helps ensure color accuracy and touch responsiveness after a screen replacement. Use built‑in controls and a calibration app to align the new panel.
Can I calibrate using iOS settings alone?
You can adjust baseline settings such as brightness and disable True Tone, but true color calibration usually benefits from a dedicated app and a reference test pattern for accuracy.
You can adjust brightness and turn off True Tone, but for precise color calibration, use a calibration app and reference tests.
Do I need third-party calibration apps?
Third‑party calibration apps can provide structured test patterns and color references, which improve the reliability of your results. Use reputable apps from trusted developers.
Yes, reputable calibration apps help provide structured tests and color references for better accuracy.
What signs indicate miscalibration after replacement?
Look for color bias, grayscale inaccuracy, uneven brightness, or erratic touch response. If issues persist after tests, hardware seating or panel compatibility should be rechecked.
Color bias, grayscale errors, brightness unevenness, or touch delays suggest miscalibration or hardware seating issues.
Is color accuracy important for photo editing on iPhone?
Yes. Accurate color rendering improves photo editing outcomes. Calibrate Point recommends validating with color‑critical apps or images to ensure consistency.
Color accuracy matters for editing photos on iPhone; verify with reference images to ensure consistency.
How long does calibration typically take?
A typical calibration session can take about fifteen to thirty minutes, depending on test thoroughness and app features.
Most calibration takes about fifteen to thirty minutes with careful testing.
Watch Video
Key Takeaways
- Calibrate Point recommends a structured post‑replacement test.
- Use built‑in controls first, then add a calibration app for color accuracy.
- Thorough testing of color, brightness, and touch minimizes misdiagnosis.
- If issues persist, consider rechecking hardware seating or professional service.