How to Calibrate an Aftermarket iPhone Screen
Learn how to calibrate an aftermarket iPhone screen with a safe, step-by-step method. This guide covers touch accuracy, color calibration, and display alignment using trusted tools and standard procedures.

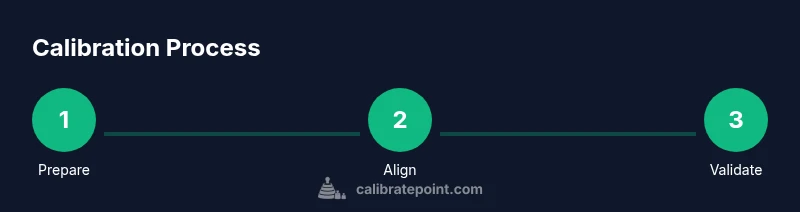
To calibrate aftermarket iphone screen, you’ll verify alignment, touch accuracy, and color consistency using reference patterns and calibration software. Gather a compatible display, precision tools for safe disassembly, and a trusted calibration app or PC utility. Follow a step-by-step procedure to align the touchscreen, set the color profile, and confirm consistency across brightness and grayscale targets. Expect 25–40 minutes.
Understanding aftermarket screens and calibration
Aftermarket iPhone screens can vary by supplier in terms of touch controller timing, pixel layout, and color management. Calibration helps ensure the display maps touch input accurately, renders colors consistently, and aligns brightness and grayscale across the panel. According to Calibrate Point, adopting a disciplined calibration workflow reduces variability across units and improves reliability when using non-OEM panels. Stay mindful of warranty implications and always prioritize safe handling when opening devices.
Safety, compatibility, and prerequisites
Before you begin, confirm that the replacement screen is designed for your specific iPhone model and that any adhesive, connectors, and cables are compatible with your repair workflow. Work in a static-safe environment and use an ESD strap to prevent damage to delicate touch controllers. Disconnect the battery if you have access to service manuals or use a shielded, non-conductive workspace. If in doubt, seek professional guidance rather than risking permanent damage.
Workspace setup and essential tools
Create a clean, well-lit work area with a magnetic mat or screw organizer to prevent losing tiny components. Essential tools include a pentalobe screwdriver set for outward screws, precision spudgers, suction cup, opening picks, and a colorimeter or spectrophotometer for color calibration. Also prepare calibration software on a PC or compatible mobile device. Keep a labeled container for screws and cables to maintain orientation during reassembly.
Prep and disassembly: keeping components safe
Power down the device completely and, if possible, disconnect the battery to minimize risk. Remove the outer screws and gently lift the display assembly using suction and non-metal tools. Avoid excessive force on cables and connectors; unplug them one at a time and note their routing. Label any small parts you remove and store them in a dedicated organizer to prevent misplacement during reassembly.
Calibrating touchscreen alignment
Attach the aftermarket screen and ensure the touch sensor connectors are firmly seated. Use a calibration app or PC tool to run an alignment test across all four corners and the center. If misalignment is detected, adjust the touch controller timing and re-map the active area to align with the display grid. Persist the alignment profile only after consistent success across multiple test taps.
Calibrating color and grayscale targets
Use a colorimeter or spectrophotometer to measure color temperature and grayscale performance against a standard reference. Create a calibration profile that sets white point, gamma, and color primaries to match a reference. Apply the profile and re-check with test images or reference patterns to ensure color accuracy across the color spectrum and brightness range.
Validation testing and cross-checks
Run a suite of test patterns that cover grayscale ramps, color blocks, and brightness steps. Check for touch sensitivity in all regions, including edges and corners. Compare results before and after calibration to confirm improvements. If discrepancies persist, re-check connectors and alignment, or consider a secondary calibration pass with alternative reference targets.
Troubleshooting common issues
If touch latency or drift appears after calibration, verify that the screen connector is firmly seated and the frame isn’t introducing mechanical misalignment. Color artifacts can indicate a miscalibrated white point or gamma; re-run the color calibration and confirm the reference file is correct for your panel. Persistent issues may point to a defective panel or controller mismatch requiring replacement.
Documentation and ongoing maintenance
Document the calibration steps, settings, and profile versions used for future reference. Regularly revisit the calibration after any reseating, reflow, or adhesion work, as physical mounting can alter tension and alignment. Maintain a standardized workflow and archive test results for auditability and quality control.
Tools & Materials
- Pentalobe screwdriver set(for iPhone outer screws)
- Precision spudger and opening picks(non-conductive material)
- Suction cup(assist lifting the display)
- ESD-safe mat and wrist strap(static protection)
- Colorimeter or spectrophotometer(for color/gray calibration)
- Calibration software (PC/mobile)(used to run alignment/color tests)
- Replacement screen compatible with model(quality and integrity verified)
- Isopropyl alcohol wipes(cleaning residues)
- Labeling supplies (corners/screws)(keep orientation during reassembly)
- Anti-static brushes(dust removal from contacts)
Steps
Estimated time: 45-60 minutes
- 1
Power down and prep workspace
Power off the device completely and unplug any external power. Set up your static-safe workspace and organize tools. This reduces the risk of short circuits or tool-induced damage during disassembly.
Tip: Double-check battery disconnect guidelines if your model allows it. - 2
Remove outer screws and lift display
Use the pentalobe screwdriver to remove outer screws. Gently lift the display using a suction cup and non-metal pry tools, avoiding excessive force on the display cables.
Tip: Keep screws grouped by location to avoid misplacement. - 3
Disconnect display connectors
Carefully disconnect display data and touch sensors connectors one by one. Note routing and connector orientation to facilitate reassembly.
Tip: Support cables with a non-conductive tool to avoid bending. - 4
Mount the replacement and seating
Position the aftermarket screen, ensure mounting points align, and seat connectors firmly. Confirm that the frame is stable before proceeding to calibration.
Tip: Do a dry-fit first to ensure everything aligns before final seating. - 5
Run touchscreen alignment test
Open calibration software and run the alignment test across all screen regions. Adjust the active area if any drift or off-center results appear.
Tip: Calibrate in a well-lit area to avoid glare affecting touch readings. - 6
Calibrate color profile
Use the colorimeter to measure white point and gamma, then apply a calibration profile to match reference colors. Re-check with test images.
Tip: Use a standardized reference target file for consistency. - 7
Validate grayscale and brightness
Test grayscale ramps and brightness steps to verify uniform luminance response. Adjust brightness controls if needed after color calibration.
Tip: Document target brightness levels for future comparisons. - 8
Save profile and re-check
Save the calibration profile and reload to verify stability. Run a quick round of combined tests to confirm all metrics remain within acceptable ranges.
Tip: Retain the original calibration file as a rollback option. - 9
Reassemble with care
Reconnect all cables and reseat the display. Reinstall screws in their original positions and ensure no tools remain inside the chassis.
Tip: Power on and run a final functional test before closing the case. - 10
Document and store data
Record calibration dates, software versions, and test results. Store notes for warranty and future maintenance.
Tip: Create a quick-reference checklist for future calibrations.
Questions & Answers
Is it safe to calibrate an aftermarket iPhone screen at home?
Calibrating an aftermarket screen can be safe if you follow proper ESD precautions, use appropriate tools, and avoid forcing connectors. If you’re unsure about any step, consult a professional to prevent potential damage.
Yes, it can be safe if you follow safety steps, use the right tools, and don’t force components.
Will calibration affect my device warranty?
Calibration itself typically doesn't void a warranty, but performing repairs with aftermarket parts may. Check your device manufacturer’s policy and the seller’s warranty terms. If you’re unsure, seek professional service.
Warranty effects depend on parts and service terms; consult official policies if unsure.
What tools are essential for calibration?
You’ll need a pentalobe screwdriver, precision prying tools, a suction cup, a colorimeter or spectrophotometer, and calibration software. Optional items include anti-static gear and a labeled screw organizer to track components.
Key tools are screwdriver, prying tools, suction cup, colorimeter, and calibration software.
How long does the calibration process typically take?
Expect around 45 to 60 minutes for a careful calibration, including prep, alignment, color calibration, and validation. Complex issues may take longer if components need replacement.
Most calibrations take under an hour, with extra time if issues arise.
Do I need specialized software to calibrate?
Yes, a calibration suite or color management tool is essential. Prefer software compatible with your display and colorimeter, and ensure it supports the iPhone panel format.
Yes, you’ll need calibration software that's compatible with your hardware.
What if calibration fails to improve display quality?
Recheck wiring, connectors, and alignment. If issues persist, the panel or controller may be incompatible, requiring replacement or professional assessment.
If results don’t improve, verify connections and consider professional help.
Watch Video
Key Takeaways
- Follow a repeatable calibration workflow.
- Verify touch accuracy across the entire screen.
- Calibrate color and grayscale using proper reference targets.
- Document results for future maintenance.
- Ensure safe disassembly to protect your device.