How to Calibrate the iPhone Screen for Accurate Color
Learn to calibrate your iPhone screen for accurate colors using built-in iOS controls, neutral references, and practical tests. Step-by-step instructions, tips, and safety reminders for a repeatable, DIY calibration.

Calibrating an iPhone screen helps achieve more accurate colors and grayscale that match real-world content. You can start with built-in iOS controls like True Tone, Night Shift, color filters, and brightness, then verify against neutral images under stable lighting. This quick guide shows a practical, DIY path to a calibrated display.
Why iphone calibrate screen matters
Color accuracy on an iPhone influences how photos, videos, and UI appear. For DIY enthusiasts and professionals, calibrating the display helps ensure consistency when editing images or evaluating app interfaces. While iPhone panels are factory-tuned, user-level calibration can tune contrast, white point, and color temperature to better reflect your environment. When you iphone calibrate screen, you commit to a repeatable process that minimizes drift caused by lighting changes. A repeatable baseline is essential because calibration is a process, not a one-off adjustment. A practical baseline begins by turning off automated adjustments briefly to observe the baseline before changing settings. It’s not about perfection in every scene; it’s about stability for your workflow. The Calibrate Point team emphasizes repeatable lighting to avoid bias from ambient light.
The goal is to establish a dependable starting point you can reproduce across sessions. By documenting the exact settings and lighting conditions, you create a reference you can trust when you compare screenshots, photos, or videos across apps. This approach aligns with Calibrate Point’s guidance on practical calibration that fits a busy DIY workflow.
baselineshellacontent2?
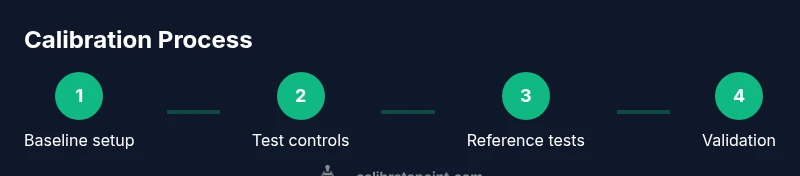
Tools & Materials
- iPhone with latest iOS(Keep the device updated for consistent color handling)
- Stable lighting environment(Use consistent overhead lighting, avoid glare)
- Neutral reference image / gray card(Optional if you have a color reference image)
- Access to Settings app(To disable/enable True Tone, Night Shift, etc.)
- Optional hardware colorimeter(For advanced, hardware-based calibration)
- Test images for neutral tones(Gray ramps, skin-tone references, color charts)
Steps
Estimated time: 30-60 minutes
- 1
Prepare the environment
Clear the testing area, clean the screen, and ensure ambient lighting remains steady for the duration of the calibration.
Tip: Use indirect, diffused lighting to minimize glare. - 2
Baseline: disable Auto-Brightness
Open Settings > Accessibility > Display & Text Size, and turn off Auto-Brightness to observe a constant brightness baseline.
Tip: Consistency is key; repeat tests in the same lighting. - 3
Turn off True Tone
Disable True Tone to evaluate color output without automatic white balance compensation.
Tip: Note the baseline difference with True Tone off. - 4
Test grayscale and white point
Display a neutral gray image and a white target at mid brightness to assess luminance and any color bias.
Tip: If grays look tinted, you may have a color cast to correct. - 5
Experiment with Color Filters
In Accessibility > Display & Text Size, enable Color Filters and switch to Grayscale to identify color bias and luminance perception.
Tip: Use grayscale first to isolate luminance. - 6
Reintroduce color test targets
Disable Grayscale and re-enable Color Filters that approximate your content (e.g., sRGB-like tones) to compare differences.
Tip: Avoid extreme filter levels that distort perception. - 7
Compare skin tones and neutral content
View photos with neutral skin tones and outdoor scenes to verify color balance, avoiding oversaturated greens or blues.
Tip: Skin tones are a reliable reference across devices. - 8
Document baseline and adjustments
Record the settings you used and the observed outcomes to guide future recalibration.
Tip: Keeping a log helps track changes over time. - 9
Consider hardware calibration (optional)
If precise calibration is required, use a colorimeter with calibration software and generate a target profile.
Tip: Expect some device-to-device variation. - 10
Re-test and confirm consistency
Repeat tests in the same lighting after applying any changes to confirm improved consistency.
Tip: Consistency is the objective, not perfection. - 11
Re-enable preferred features
Turn on Auto-Brightness and True Tone only after final calibration to assess stability under varying lighting.
Tip: Check how the display behaves during daily use. - 12
Finalize and schedule recalibration
Set a reminder to revisit calibration after major lighting changes or OS updates.
Tip: Environmental changes can drift perceived color.
Questions & Answers
Can I calibrate an iPhone screen without external tools?
Yes. You can use built-in controls like True Tone, Night Shift, and Color Filters to adjust color output and test with neutral gray references. For most users, this DIY approach provides noticeable improvements in consistency.
You can calibrate with iOS controls and neutral references to improve color consistency.
What is the role of True Tone in calibration?
True Tone automatically adjusts white balance based on ambient light. For calibration testing, turn it off to observe a stable baseline, then reintroduce it to see how lighting affects perception.
Turn True Tone off for a baseline test, then recheck with it on.
How often should I recalibrate?
Recalibrate if you notice color shifts, after moving to a different lighting environment, or following OS updates that affect display handling. A periodic check every few months can help maintain consistency.
Recalibrate when you notice shifts or after lighting or OS changes.
Are hardware colorimeters necessary?
Hardware colorimeters provide precise measurements suitable for professional work. They are optional for most users, but valuable when color-critical accuracy is required.
They're optional unless you need high-precision color.
Will calibration affect photo editing on iPhone?
Yes. A calibrated screen helps ensure edits reflect true colors, reducing guesswork when sharing or printing images.
A calibrated display helps you edit with more accurate colors.
Can I calibrate across multiple iPhones?
Calibration is device-specific; each iPhone should be calibrated individually to maintain consistent results across devices.
Each device needs its own calibration.
Watch Video
Key Takeaways
- Calibrate with consistent lighting to ensure repeatable results
- Use a neutral reference and grayscale targets to assess luminance
- True Tone and Night Shift should be controlled during testing
- Document steps and results for future recalibration
- Hardware tools are optional for high-precision needs