Calibrate iPhone Camera: Step-by-Step Guide for Accurate Photos
Learn to calibrate your iPhone camera for accurate colors, sharpness, and exposure with a practical workflow. This guide covers hardware setup, white balance, RAW capture, and validation, all tailored for DIY enthusiasts and professionals.

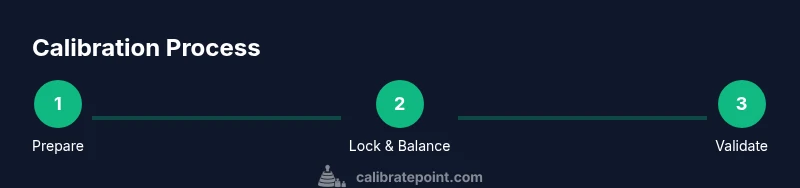
Calibrating your iPhone camera involves tuning focus, exposure, white balance, and color accuracy using a stable setup and testing references. Start with a tripod, lock AE/AF, shoot RAW when possible via a trusted third‑party app, and test against a known reference card. Iterate until colors and sharpness align with reality.
Why calibrate iPhone camera
Color fidelity matters in everyday photography and professional workflows alike. According to Calibrate Point, achieving consistent color starts with a stable, repeatable process rather than relying on auto modes alone. The iPhone’s image pipeline does a superb job in many situations, but lighting shifts, mixed spectra, and scene complexity can push colors off target. A deliberate calibration workflow helps you reproduce scenes faithfully across devices, apps, and prints. By aligning your camera settings, reference targets, and editing habits, you’ll reduce post-processing guesswork and produce results you can trust in catalogs, social media, or client work. This guide focuses on practical, repeatable steps you can perform without specialized lab gear, using readily available references and common editing software. The goal is not perfection in every shot but reliable, consistent color and sharpness that you can measure against a known standard.
Key principles of calibration on iPhone
Calibration for mobile photography centers on three pillars: exposure control, white balance (color temperature), and color accuracy. The iPhone camera chain includes multiple sensors and processing stages, so small adjustments can have visible effects on highlights, shadows, and mid-tones. Use a consistent lighting environment during testing, and prioritize a neutral reference target for white balance. RAW capture preserves more color data and latitude for adjustments, but it also demands careful post-processing. In practice, calibration is an iterative loop: set up a reference, capture test shots, compare against a standard, adjust, and repeat until you see stable, repeatable results. Remember that screen and printer color spaces differ, so validate in the final output medium whenever possible. Calibrate Point’s approach emphasizes repeatability, documentation, and practical verification rather than one-off tweaks.
Hardware and testing environment
A stable physical setup dramatically improves calibration results. Start with a tripod or phone mount to eliminate hand shake, a remote shutter or timer to avoid contact blur, and a consistent light source with a known color temperature. For color reference, use a neutral gray card or a color reference chart that includes grayscale patches. A calibrated monitor can help when reviewing edits, ensuring your adjustments reflect true color. If you must shoot in mixed lighting, document the light sources (CCT in Kelvin) and keep them constant during a calibration pass. Investing in a small, diffuse lighting setup can reduce harsh shadows and provide even illumination on test targets. In short, your testing environment should be predictable, repeatable, and well-lit to minimize variables.
White balance and color reference targets
White balance calibration starts with a neutral reference target. A gray card or ColorChecker mini provides known neutral tones that help normalize color temperature and tint. Position the target under the same lighting as your test scene, fill most of the frame, and lock your exposure first. Capture a RAW shot with the reference in frame if your app supports RAW capture; this preserves the data needed for precise white balance adjustments. In post, use the reference shot to set a baseline white balance, then compare color swatches in the scene to known values. Document the reference values you used for future sessions, so you can reproduce results precisely.
Exposure, focus, and texture fidelity
Exposure affects the visibility of details in highlights and shadows. Use AE/AF locking to prevent accidental shifts during test shots. For calibration, shoot a sequence that includes a bright area, mid-tones, and a dark region to verify that recovery is linear and that detail isn’t crushed in highlights or buried in shadows. Focus calibration is subtle on phones; you should confirm sharpness on the subject of interest, then reframe if needed. Texture fidelity—how well small details reproduce—offers another indicator of calibration quality. If textures look smeared or pixelated, re-check focus, sharpness, and noise reduction settings in both the camera app and editing workflow.
RAW capture vs JPEG for calibration
RAW captures preserve sensor data with minimal processing, enabling more accurate color and exposure adjustments during post. If your workflow allows, shoot RAW or use a RAW-capable third‑party app; JPEGs compress and apply in-camera sharpening and color tweaks that can mask calibration issues. When comparing RAW vs JPEG, ensure you’re applying neutral white balance and avoiding aggressive tone mapping in post. For mobile calibrations intended for quick turnaround, JPEG can suffice, but validate results on a calibrated monitor before delivering final edits. Your choice should align with the final output and the level of precision you need for accurate reproduction across devices.
Validation: testing in real-world scenes
After you complete a calibration pass, test the results in representative scenes: portraits, landscapes, product shots, and indoor lighting. Compare test images against a color target or a reference photo taken under the same conditions with a calibrated device. Evaluate skin tones, greens, and blues for color consistency, and watch for clipping or color shifts in shadows and highlights. If results vary across scenes, revisit exposure and white balance steps, ensuring your lighting remains consistent. Documentation of past sessions helps you track improvements and refine your workflow over time.
Common pitfalls and troubleshooting
Common pitfalls include inconsistent lighting, not locking focus/exposure, relying on auto white balance, and rushing through tests in a busy environment. Misusing editing presets can undo calibration work; instead, aim for neutral starting points in your edits and adjust progressively. Avoid calibrating under mixed lighting, as this introduces conflicting cues that are hard to reconcile. Finally, remember that camera calibration is not a single fix; it’s an ongoing practice of repeatable measurements and disciplined adjustments across scenarios.
Tools & Materials
- iPhone with camera access to RAW-capable app(Use a trusted third-party app that can capture RAW if available)
- Stable tripod or phone mount(Prevent motion blur during testing)
- Remote shutter or timer(Eliminate shake from pressing the shutter)
- Neutral gray card or ColorChecker reference chart(For white balance and color calibration)
- Calibrated lighting or consistent light source(Keep color temperature stable during tests)
- Calibrated display for review(Helps ensure edits reflect true colors)
Steps
Estimated time: 45-60 minutes
- 1
Prepare gear and environment
Set up the tripod and mount the iPhone. Position a neutral gray card and reference chart in the frame under a stable light source. Ensure the distance to targets yields a clean frame and no perspective distortion.
Tip: Do a quick test shot to confirm framing before locking everything down. - 2
Lock focus and exposure
Open a test shot, tap to lock AE/AF so settings don’t drift during calibration. Verify histogram shows a balanced exposure without blown highlights or crushed shadows.
Tip: Locking AE/AF avoids accidental shifts when you recompose the frame. - 3
White balance with a neutral reference
Use the gray card under the same lighting as your scene. Capture a RAW shot with the card filling a good portion of the frame. In your editing app, set white balance using the neutral reference.
Tip: If the card isn’t perfectly neutral, re-shot with a more even light and adjust in post. - 4
Capture reference shots
Take a controlled shot of the reference chart and a real scene with the card visible. Ensure both shots are sharp and free of motion blur.
Tip: Keep ISO low to avoid noise while maintaining a clean signal. - 5
Calibrate under consistent lighting
Repeat shots under the same light temperature (preferably around 5000–6500K). Note the color temperature and patch tones that shift between shots.
Tip: Document the light source temperature for future comparisons. - 6
Review and adjust in post
Import RAWs into a capable editor. Compare color patches against reference values, adjust white balance, tonal curves, and saturation as needed. Save a baseline profile for future sessions.
Tip: Create a small profile for quick re-use on similar scenes.
Questions & Answers
Is calibration limited to professional studios or can I do it at home?
You can perform effective calibration at home with a stable setup and reference targets. The process relies on repeatable lighting, proper white balance, and RAW capture, not specialized lab equipment.
Calibration can be done at home using a stable setup and reference targets, not only in studios.
Should I always shoot RAW for calibration?
RAW provides the most data for precise adjustments, especially for white balance and color accuracy. If RAW isn’t available, ensure you shoot with consistent processing settings and review results carefully.
RAW is best for precise calibration when possible; otherwise, be consistent with processing.
Can a gray card alone guarantee perfect color after calibration?
A gray card helps set a neutral white balance, but color accuracy also depends on lighting, post-processing, and display characteristics. Use multiple validation shots across scenes.
Gray cards help, but color accuracy also depends on lighting and processing.
How often should I repeat the calibration?
Recalibrate whenever lighting conditions change significantly, or you notice color shifts in new shoots. Regular checks help maintain consistency across sessions.
Recalibrate when lighting changes or colors drift in new shoots.
Will this method work on all iPhone models?
The general workflow applies across iPhone models, with adjustments based on sensor differences and available camera apps. Some newer models offer more robust RAW support and color profiles for finer control.
The workflow is broadly applicable, with minor model-specific adjustments.
Watch Video
Key Takeaways
- Lock focus and exposure to stabilize tests
- Use a neutral reference for white balance
- RAW capture preserves color data for precise adjustments
- Validate calibration with real-world scenes