How to calibrate iPhone 12 camera
Learn how to calibrate the iPhone 12 camera with a practical, step-by-step approach. Improve color accuracy, exposure, and focus using built-in tools, neutral lighting, and test shots for reliable results.

Calibrating the iPhone 12 camera improves color accuracy, exposure, and sharpness. Start by updating iOS, resetting camera-related defaults, and shooting a neutral reference scene under consistent lighting. Then adjust exposure, test auto-focus, and compare results against a known reference. This practical setup yields noticeable improvements without additional hardware, and it scales across different shooting conditions.
How to calibrate iphone 12 camera
In this guide, we focus on a practical approach to calibrating the iPhone 12 camera using built-in tools and widely available references. The goal is to achieve more accurate color rendition, stable exposure, and reliable focus across a variety of scenes. By following a repeatable process, you’ll minimize random variations and create a dependable baseline for future photos. This section introduces the core ideas behind calibration and explains why consistent lighting and test shots matter for long-term photo quality.
What affects photo quality on iPhone cameras
Photo quality on modern iPhones is a blend of hardware and software decisions. Sensor sensitivity, lens optics, and image processing algorithms work together to produce the final image. However, even small inconsistencies in white balance, exposure, or autofocus can yield noticeable shifts between shots taken in the same scene. Calibration helps align the camera system with your expectations by standardizing how the device interprets color, brightness, and sharpness. For professionals and DIY enthusiasts alike, a disciplined approach to calibration reduces guesswork and improves repeatability across shoots.
Prerequisites: what you need before you start
Before you begin, ensure you have a clear plan and the right references. A recent iOS update is helpful because calibration workflows can change with software revisions. You will benefit from a neutral color reference card (gray or white) to anchor color balance, a controlled lighting environment to minimize drift, and a stable mounting method to keep shots consistent. If you don’t own a color reference target, a well-lit gray card or a plain white card can serve as a practical substitute for most tests.
How we test calibration: test scenes and references
Quality calibration relies on repeatable test scenes. Start with a neutral gray card or white balance target placed in the center of the frame. Use daylight-balanced lighting when possible and avoid mixed or shifting light sources during testing. Capture a base shot under fixed settings, then adjust exposure and focus in subsequent frames. Compare the results to a reference image captured under the same conditions to gauge color accuracy, brightness, and edge clarity. This process creates a reference library you can reuse for future recalibration.
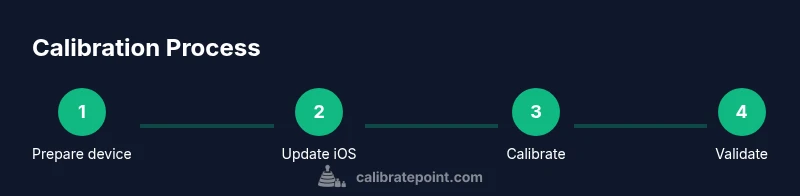
How to calibrate iphone 12 camera: Step-by-step practical actions
This section lays out a concrete workflow you can follow, with emphasis on reproducibility and safety. The steps below align with common calibration practices while staying accessible for DIY enthusiasts. Remember that the objective is to reduce color drift, stabilize focus, and maintain consistent exposure as you shoot in real-world conditions. By documenting each test, you’ll build a reliable baseline you can reference in the future.
Step 1: Update iOS and reset camera settings
Ensure your iPhone 12 runs the latest iOS version before starting. Go to Settings > General > Software Update and install any available updates. Then reset camera-related preferences by navigating to Settings > General > Transfer or Reset iPhone > Reset All Settings. This clears odd app-level tweaks that might skew calibration results. Do not erase data; this action resets system-level settings that influence the camera behavior.
Step 2: Create a controlled lighting environment and color target
A stable, neutral lighting setup is essential. Use daylight-balanced lighting or a steady artificial source with minimal flicker. Place your white balance target or gray card in the scene and ensure it remains stationary during captures. Avoid scenes that contain strong color casts (like sunset or colored walls) when performing the baseline test, as these can mislead your calibration results.
Step 3: Lock focus and exposure, then take baseline shots
Photograph the reference target using the camera’s AE/AF lock to stabilize exposure and focus. Keep the scene steady and maintain a fixed distance from the target. Capture several frames at the same settings to verify consistency. The goal is to establish a repeatable baseline that you can compare against after adjustments.
Step 4: Adjust exposure and white balance, then retake
Review the baseline shots and adjust exposure using the exposure slider, then re-capture with AE/AF lock engaged. If your target shows color bias, tweak white balance by comparing to the reference and taking another shot. Repeat this step until the shot near-perfectly matches the reference in brightness and color under your lighting.
Step 5: Capture diverse test scenes and expand your reference library
Extend calibration by shooting additional scenes that mirror your typical photography (indoor, outdoor, mixed lighting). Capture the target in each scenario to observe how the camera responds to different color temperatures and brightness levels. Add these results to your calibration reference library to improve future accuracy across environments.
Step 6: Validate calibration and maintain consistency over time
After completing the setup, revisit your reference shots after at least a few days or following any iOS update. Calibrations can drift with software changes and new camera features. If you notice drift, repeat the steps with updated targets and reference images. Documentation is key to long-term reliability.
How to calibrate iphone 12 camera: Troubleshooting and common pitfalls
Calibration success hinges on consistency. Common mistakes include changing lighting between shots, using flash, or moving the reference target during captures. Keep the setup stable, return to the baseline after adjustments, and document every parameter. If results diverge widely between shots, reassess whether the lighting balance or focus lock was properly maintained.
Tools & Materials
- iPhone 12 with the latest iOS(Charge to at least 50%, ensure stable network connection during updates)
- White balance target or gray card(Standard 18% gray or neutral white target preferred)
- Stable mounting option (tripod/phone holder)(Helps keep shots perfectly still during testing)
- Neutral lighting source(Daylight-balanced lamp or indirect daylight from a window)
Steps
Estimated time: 30-45 minutes
- 1
Update iOS and reset settings
Update iOS to the latest version and reset camera-related defaults to eliminate software drift. This ensures calibration is performed on a clean baseline.
Tip: Back up important data before resetting, and note any personalized camera presets you want to reapply later. - 2
Set up a controlled lighting environment
Arrange a neutral, stable lighting setup and place a color reference card in the frame. Avoid mixed color temperatures to prevent biased results.
Tip: If possible, use daylight-balanced lighting and avoid fluorescent flicker by testing at a steady power level. - 3
Lock focus and exposure on the reference target
Aim the camera at the reference card and lock AE/AF to stabilize exposure and focus across shots.
Tip: Hold still, tap and hold on the target until you see AE/AF Lock confirmation. - 4
Capture the baseline reference shot
Take multiple shots of the reference card with identical settings to establish a reliable baseline.
Tip: Review for consistent brightness and color across the captured frames. - 5
Adjust white balance and exposure, then retake
If color cast or brightness seems off, adjust white balance and exposure, then retake the shot with AE/AF Lock engaged.
Tip: Document each adjustment so you can reproduce the result later. - 6
Validate with additional scenes
Test with indoor and outdoor scenes to verify calibration holds across common shooting conditions.
Tip: Compare each scene against its own reference to detect drift early.
Questions & Answers
Can I calibrate the iPhone 12 camera without hardware?
Yes. Built-in tools and controlled lighting can establish a solid baseline for calibration. Hardware targets improve precision but are not strictly required for basic calibration. You’ll still benefit from consistent test scenes and documented steps.
Yes. You can calibrate using built-in tools and consistent lighting without extra hardware, though a color reference improves precision.
What is the best target for white balance testing?
A neutral gray or white balance target is ideal. It provides a stable reference to judge color accuracy across shots. If you don’t have one, a plain gray card is a reliable substitute.
A neutral gray or white balance target is best for white balance testing; a gray card works well as a substitute.
Does calibration affect all lenses on iPhone 12?
Calibration primarily improves color and exposure consistency across shots, which benefits all lenses. However, optical differences between wide, ultra-wide, and telephoto can still show lens-specific characteristics.
Calibration helps consistency across lenses, though each lens may still show unique traits.
How often should I recalibrate?
Calibrate after major software updates or noticeable drift in color or exposure. Regular checks after several months can help maintain accuracy in changing conditions.
Recalibrate after big software updates or if you notice color or exposure drift.
Will third-party apps improve calibration beyond built-in tools?
Some apps offer advanced tools for color grading and RAW workflows, but most smartphone calibration benefits come from controlled shooting conditions and consistent references. Use apps to augment, not replace, the core steps.
Third-party apps can help with color grading, but core calibration relies on controlled testing and references.
Why does calibration drift when lighting changes?
Color balance and exposure depend on lighting temperature. When lighting shifts, the camera’s automatic adjustments can introduce drift. Recalibration under the new lighting confirms the baseline remains accurate.
Different lighting changes color temperature; recalibrate under the new lighting to keep accuracy.
Is this process safe for iPhone optics?
Yes. The procedure uses normal camera functions and non-destructive settings. Avoid forcing extreme configurations that could cause distortion in long-term use.
The process is safe for your iPhone optics when you stay with standard camera settings and avoid extreme configurations.
Watch Video
Key Takeaways
- Update iOS before calibration.
- Use a white balance target for color accuracy.
- Lock exposure and focus during tests.
- Validate calibration across multiple scenes.