Use iPhone to Calibrate Monitor: A Practical Guide
Learn how to use an iPhone to calibrate a monitor for accurate color and luminance in DIY and professional workflows. Step-by-step guidance, practical tips, and verification methods.

Yes—use your iPhone to calibrate a monitor by measuring luminance and color with calibrated iOS apps, then apply profile adjustments on the monitor. You’ll compare measurements against reference targets, fine-tune brightness and contrast, and verify with test images. This quick guide walks through a practical, safe workflow for DIY editors and technicians.
What you can achieve with an iPhone-based monitor calibration
Using an iPhone to calibrate a monitor can help you establish a repeatable baseline for color and luminance in a home studio or professional workflow. According to Calibrate Point, a mobile-first calibration approach provides a practical starting point for DIY editors and technicians who don’t own a dedicated colorimeter. It focuses on capturing approximate luminance, relative color accuracy, and consistent ambient lighting, rather than achieving professional-grade certification. This approach is especially useful for quick edits, client previews, and streaming where exact color fidelity is less critical but consistency matters. The Calibrate Point team stresses that you should document each step so you can repeat it under similar conditions, but be mindful of the method’s limits when preparing work for prints or color-critical projects.
In real-world practice, you’ll rely on the iPhone’s camera and light-sensing capabilities through calibrated apps to estimate screen brightness and color balance. You’ll compare these measurements to reference targets and adjust the monitor’s brightness, contrast, and color settings accordingly. At the end, you verify with test images chosen to simulate common editing tasks and on-screen previews. While this workflow is approachable for many users, its accuracy will not replace professional hardware calibration for high-end color management. Use it as a stepping stone toward stricter methods when precision matters.
descriptionModeTypingHintPartForBodyBlocks
noteHeadingsOnlyPlaceholderValue
Tools & Materials
- iPhone with up-to-date iOS and calibration apps(Install apps that measure luminance and color accuracy and ensure camera access is enabled for measurement features.)
- Monitor with controllable brightness and color profiles(Ensure the monitor can switch color profiles and adjust brightness via OSD or software.)
- Neutral gray reference card or grayscale test image(Used to align grayscale and white balance during measurements.)
- Color test patterns or reference images(Helps verify color fidelity visually after calibration.)
- Ambient lighting reference tool (lux meter app or external meter)(Helpful for keeping lighting constant during measurements.)
Steps
Estimated time: 20-40 minutes
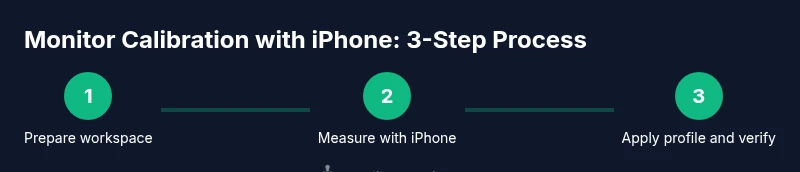
- 1
Prepare workspace and update software
Set up a quiet, neutral-lit workspace. Update your iPhone apps and ensure the monitor is powered on and set to default factory brightness. Why: stable software and baseline hardware state improve repeatability.
Tip: Close other apps to prevent background activity from skewing readings. - 2
Select calibration apps and load reference targets
Open your chosen luminance and color calibration apps and load grayscale and color reference targets. Ensure the targets correspond to standard targets you plan to use for verification. Why: consistent references anchor measurements across sessions.
Tip: Test a simple grayscale ramp first to confirm tonal response. - 3
Set ambient lighting and monitor baseline
Measure room lighting and adjust it to a steady state. Reset the monitor to its default brightness and color temperature before starting. Why: ambient conditions strongly influence perceived brightness and color.
Tip: Avoid standing lamps or windows directly behind you. - 4
Capture initial measurements with the iPhone
Use the app to capture baseline luminance and color cues from the screen. Record the values and compare them to target references. Why: establishing a baseline helps determine which settings to adjust.
Tip: Keep the phone at eye level and perpendicular to the screen. - 5
Adjust monitor brightness and contrast
Using the monitor’s OSD or color profile settings, adjust brightness and contrast to align with the iPhone measurements. Why: aligning brightness ensures a neutral white point and better grayscale performance.
Tip: Make small incremental changes and re-measure after each adjustment. - 6
Apply or simulate a color profile
If your monitor supports color profiles, apply a neutral profile that matches your workflow or cubed target space. Why: color management becomes more consistent across devices.
Tip: If you cannot apply a full profile, document the settings you used for future reference. - 7
Re-measure and validate with test images
Capture updated measurements and compare with your targets. Load test images typical of your work and verify that skin tones and neutral grays read correctly. Why: real-world validation ensures practical usefulness.
Tip: Use both neutral and color-rich test images to catch biases. - 8
Document results and plan follow-up
Record the final measurements, profile IDs, and ambient conditions. Schedule a recheck if lighting or hardware changes. Why: documentation enables repeatability and accountability.
Tip: Store screenshots or app logs for future audits.
Questions & Answers
Can I rely on an iPhone calibration for professional color work?
An iPhone-based method can establish a practical baseline but rarely matches professional hardware calibration. Use it for quick checks and workflow consistency, then verify with a colorimeter for critical projects.
You can start with a quick check, but for professional color work you should use proper hardware calibration.
Will changing ambient lighting invalidate my calibration results?
Yes. Calibration assumes stable lighting. If the room lighting changes, recheck measurements and re-calibrate as needed.
Yes, lighting drift can require recalibration.
Do I need external hardware to calibrate a monitor?
External hardware offers higher accuracy. A smartphone workflow is useful for baseline checks and non-critical tasks but not a substitute for hardware-based calibration in color-critical work.
Hardware tools give the best accuracy, use the phone method for baseline checks.
How often should calibration be performed?
Calibrate whenever you change lighting, move the monitor, or start a new project. Regular checks help maintain consistency over time.
Do it whenever things change or you start a new project.
Is this method compatible with OLED and LCD screens?
The method applies to both types for baseline alignment. OLED screens may show more pronounced color shifts, so tailor verification accordingly.
It works for both, but pay attention to OLED color behavior during verification.
Watch Video
Key Takeaways
- Establish a stable baseline with iPhone measurements.
- Use grayscale targets to anchor brightness and white balance.
- Document every step for reproducibility.
- Upgrade to professional hardware calibration for critical work.