How to Use iPhone to Calibrate TV: A Step-by-Step Guide
Learn how to use iPhone to calibrate TV displays with practical, test-pattern-based steps. A comprehensive guide for DIYers and technicians from Calibrate Point.

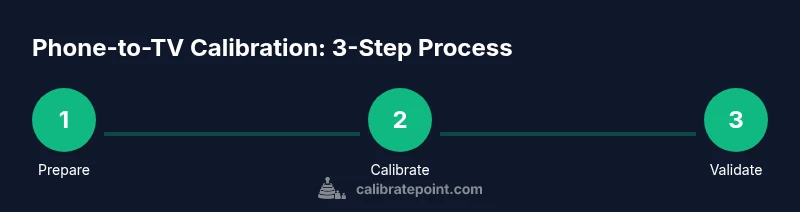
This guide shows how to use iPhone to calibrate TV displays using accessible test patterns, brightness and color adjustments, and grayscale checks. You’ll need a compatible iPhone, a TV with basic calibration controls, and a reliable test-pattern app. This approach gives a practical, low-cost baseline before investing in professional hardware.
Why smartphones are a practical starting point for display calibration
For many DIYers, the question of how to use iphone to calibrate tv is about getting a believable, repeatable starting point without buying expensive hardware. An iPhone can serve as a convenient reference device to check grayscale steps, white-balance baselines, and uniform brightness across the screen. According to Calibrate Point, starting with a phone-based baseline helps you compare results across different TVs and room lighting, before moving to professional tools. In 2026, this approach remains a popular first step for enthusiasts who want to understand how display signaling works without an upfront investment. This article walks you through a practical, safe workflow that uses an iPhone as a calibration companion rather than a replacement for pro equipment. Remember, the goal is consistency across content viewing, not perfect color science in a single room.
Core concepts: what you’re calibrating and why
Understanding calibration begins with recognizing a few core ideas: grayscale accuracy, color balance, and overall brightness response. When you ask how to use iphone to calibrate tv, you are essentially creating a repeatable baseline that helps you compare one TV to another in similar lighting. The Calibrate Point team emphasizes that while a phone-based reference isn’t a professional instrument, it provides valuable context for color shifts, gamma behavior, and white point consistency. Practically, you’re looking to minimize color casts, ensure uniform luminance across the screen, and keep shadows and highlights in a natural range. This foundation sets you up for reliable adjustments using the TV’s native menus and a dependable test-pattern app.
Setting up your iPhone and TV for calibration
Before you begin, ensure your iPhone is updated and has a reliable test-pattern app installed. Pair the phone with your TV’s screen in a comfortable, seated position to minimize movement during testing. Disable automatic adjustments on the TV such as dynamic contrast, ambient light sensing, and motion smoothing—these can mask true changes in grayscale and color balance. Use a darkened room with stable lighting to avoid glare and reflections. Calibrate Point’s guidance recommends starting with a neutral white pattern and grayscale ramp, then gradually introducing color targets to identify casts. This setup helps you create a consistent baseline that answers how to use iphone to calibrate tv in a practical, repeatable way.
Practical workflow: using iPhone as a reference tool
With your test-pattern app open, display a grayscale ramp and a color bar sequence on the TV. Use the iPhone camera to capture a frame for subjective comparison against reference images, then adjust the TV’s brightness and contrast to bring the grayscale steps into alignment. For color balance, compare skin tones and primary colors against neutral references. The key is iteration: make a small adjustment, re-check, then refine. Calibrate Point’s approach encourages documenting each change so you can reproduce results on future setups or share findings with colleagues. Remember, this method is a starting point, not a substitute for professional calibration hardware.
Common pitfalls and how to verify results
Common mistakes include relying on a phone’s screen as the sole reference, neglecting ambient light effects, and skipping the grayscale test. Always verify results by running through a range of patterns, not just a single frame. If possible, re-check after a few hours in the same room, as small changes in lighting or screen aging can shift calibration baselines. A careful review helps validate that the adjustments you made with the iPhone approach remain stable, which is crucial for long-term viewing consistency.
When to upgrade: knowing when a phone-based baseline isn’t enough
A phone-based calibration is a great learning tool and a practical baseline, but it isn’t a replacement for professional-grade instruments like colorimeters or spectrophotometers when exact color accuracy is required. If you work in video production, photography, or color-sensitive tasks, consider investing in dedicated hardware and professional workflows. The Calibrate Point team suggests using the phone method for education and routine maintenance, then upgrading as needed for precision tasks.
Tools & Materials
- iPhone (latest model)(iOS 16 or newer; ensure camera and screen are functioning)
- TV with basic calibration controls(Access brightness, contrast, color, and white-point menus)
- Test-pattern app(Must include grayscale, color bars, and gamma/pattern tests)
- Dark, stable viewing environment(Minimize glare and reflections)
- Tripod or stable stand for phone(Helps keep the phone steady during captures)
- Documentation notebook or digital notes(Record changes and reference patterns)
- Color reference (optional)(Printed color target or colorchart for reference comparisons)
- Colorimeter/spectrophotometer (optional)(For professional-grade precision)
Steps
Estimated time: 45-60 minutes
- 1
Prepare the workspace
Set the TV in a quiet, dim room and disable auto picture adjustments. Position the iPhone at about eye level facing the TV to capture an accurate frame of reference. Confirm both devices are connected to power or have enough battery life to complete the session.
Tip: Use a stable stand for the iPhone to prevent motion blur in captured frames. - 2
Install and configure test patterns
Install a reputable test-pattern app and load a grayscale ramp, color bars, and a simple gamma pattern. Ensure the app’s brightness settings are not auto-adjusting and that the TV’s picture mode is set to a neutral baseline (e.g., Movie or Custom).
Tip: Avoid using auto brightness on the iPhone; lock brightness to a mid-level to prevent fluctuations. - 3
Adjust basic brightness and contrast
Using the grayscale ramp on the TV, adjust brightness and contrast so you can clearly distinguish all grayscale steps without clipping highlights or crushing shadows. Compare live TV frames against the app’s reference grayscale levels, then refine until the ramp aligns closely.
Tip: Take short breaks between adjustments to avoid eye fatigue and maintain objectivity. - 4
Calibrate white point and color balance
Display a color-bar sequence and compare against reference colors. Use the iPhone camera to capture a frame and look for color casts in whites, grays, and skin tones. Fine-tune the TV’s color temperature or individual color channels until the colors resemble the reference.
Tip: Focus on neutral gray areas first before adjusting vibrant colors to avoid introducing new color casts. - 5
Validate with multiple patterns
Run a second pass using a gamma test and a uniform color patch to reveal subtle shifts. If any inconsistency appears between patterns, repeat the corresponding adjustment and re-verify until results stabilize.
Tip: Document each adjustment step so you can reproduce or audit changes later. - 6
Document and store your baseline
Save the final settings as a custom picture mode or note the exact values you changed. Keep a log of lighting conditions and device versions to contextualize your results for future calibration checks.
Tip: Create a simple checklist to ensure you re-create the same baseline on future setups.
Questions & Answers
Can I accurately calibrate my TV using just an iPhone?
A phone-based approach provides a practical baseline and helps you learn the process, but it is not a substitute for professional colorimeters when precise color accuracy is required. Treat it as an educational step and a baseline for further improvement.
You can learn and get a reasonable baseline with an iPhone, but for precise color accuracy you should consider proper calibration tools.
What apps are best for this method?
Choose apps that include grayscale ramps, color bars, and gamma tests. Look for apps with clear pattern references and minimal in-app calibration features that might bias the results.
Pick apps that show grayscale and color patterns clearly, and avoid apps that automatically adjust images.
Is this method suitable for professional color grading?
For professional color grading, dedicated hardware and calibrated workflows are recommended. A phone-based approach is helpful for learning and maintaining a reasonable baseline but won’t replace a colorimeter in production settings.
It's a great learning tool, but professionals should use proper calibration gear for production work.
Do I still need a colorimeter if I use an iPhone?
A colorimeter or spectrophotometer provides objective, repeatable measurements that smartphone methods can’t guarantee. Use it if you require precise color accuracy.
A colorimeter is recommended if you need exact color accuracy.
Will this affect HDR content calibration?
Phone-based calibration focuses on general grayscale and color balance. HDR involves wide color and dynamic range; dedicated HDR-specific calibration will typically require specialized patterns and tools.
This method helps with general calibration, but HDR requires more specialized approaches.
Watch Video
Key Takeaways
- Plan the environment first and set expectations.
- Use a trusted test-pattern app and neutral TV presets.
- Document changes for reproducibility.
- Upgrade to professional tools when precision is required.
- A phone-based baseline is a strong learning tool and starting point.