Apple TV Calibrate: A Practical Calibration Guide for Your Home Theater
Learn how to apple tv calibrate with a practical, step-by-step guide from Calibrate Point. Improve color accuracy, brightness, contrast, and audio sync for a consistent home cinema experience.

You will learn how to apple tv calibrate your display and audio setup to achieve accurate colors and proper lip-sync. This guide covers color calibration basics, brightness/contrast adjustments, and tone-mapping for common HDTVs and the Apple TV interface. Follow step-by-step actions with quick prerequisites and a troubleshooting checklist. Prepare a quiet room, a calibrated reference image, and the devices listed in the tools section.
Why Apple TV calibration matters
Calibrating your Apple TV isn't just for enthusiasts; it's about delivering accurate color, proper brightness, and believable contrast so movies, games, and photos look as intended. When you apple tv calibrate, you align your display's performance with the source material, helping your brain perceive more natural skin tones and correct saturation. In a typical living room, ambient light changes can shift what you see on screen, making calibration a moving target. The Calibrate Point team emphasizes a repeatable process that yields consistent results across viewing environments. This article provides a practical, step-by-step approach that respects both budget and equipment, so DIY enthusiasts and professionals alike can achieve reliable results without expensive gear. We will cover color science basics, how to use built-in tools, and how to maintain your calibration as lighting and content vary.
Color spaces, gamma, and tone mapping
Understanding color spaces and gamma is essential to calibrating Apple TV. Most consumer displays decode to Rec. 709 or sRGB, while HDR material uses different white points. The Apple TV offers options like Match Content, Dynamic Range, and color management that influence how the OS maps incoming signal to your display. For accuracy, you want a consistent white point (around D65) and a gamma curve around 2.2 for SDR, with appropriate tone-mapping when HDR content is active. In practice, set your Apple TV to Standard or Custom, enable Match Dynamic Range for HDR content, and use a test pattern to verify that grays appear neutral rather than tinted. If you use a colorimeter, you can profile your display and apply the resulting ICC profile within your video chain. The goal is a neutral, artifact-free image that preserves detail in shadows and highlights, while keeping skin tones natural. This aligns with the Calibrate Point guidance on practical calibration.
How to measure color accuracy without professional gear
Even if you don’t own a colorimeter, you can begin the process by using built-in test patterns and reference images. Start with a simple greyscale ramp to check for color casts across the spectrum. Use the color bars or a standard reference image to gauge hue shifts, ensuring skin tones look natural and neutral grays remain true. The advantage of starting without specialized equipment is that you learn to trust your eyes and establish a baseline. If you later add a colorimeter, you can validate or refine your results and create an ICC profile for consistent performance across content and lighting conditions. The goal is a repeatable routine you can perform in a typical living room, with reliable indicators you can rely on during setup.
Step-by-step: calibrating brightness, contrast, and sharpness
This section outlines the underlying concepts for brightness, contrast, and sharpness calibration. The next block provides concrete actions, but it helps to understand why you adjust these controls in a specific order. Start by setting a neutral white point so whites don’t look blue or yellow, then tune brightness so blacks stay deep without crushing detail, and finally adjust contrast to retain detail in bright scenes. Sharpness should be set to a minimum level to avoid edge halos while preserving crispness. Use test patterns and greyscale references to verify progress. The aim is a balanced image where shadows retain detail and highlights aren’t blown out, with colors faithful to real-world content. This approach aligns with best practices for home theater calibration.
Calibrating HDR vs SDR on Apple TV
HDR content presents a broader brightness range and more saturated colors than SDR, requiring separate checks. Ensure your display’s HDR mode is enabled when viewing HDR sources, and verify that the white point and peak brightness don’t clip in bright scenes. When calibrating, compare SDR and HDR results side-by-side using consistent test patterns and reference material. If your display supports Dolby Vision or HDR10, use the Apple TV’s matching options to reduce discrepancies. The goal is consistent tone mapping across formats, so HDR content looks natural without crushing blacks or blooming whites. This section emphasizes that HDR requires careful attention to both the source material and the display’s capabilities, a key factor highlighted by Calibrate Point.
Audio delay, lip-sync, and dialog clarity
Color calibration is only part of the viewing experience; audio timing matters just as much. Use the Apple TV audio settings to minimize delay and ensure lip-sync accuracy with your TV speakers or external audio system. When adjusting, test with fast-paced dialogue and action scenes to confirm that voice tracks align with on-screen motion. If you notice a mismatch, experiment with delayed audio or lip-sync compensation settings, and consider room acoustics that can introduce dwell time. Calibrating audio alongside video reduces the perception of mismatch and improves overall immersion. This holistic approach is central to practical calibration recommended by Calibrate Point.
Using test patterns and patterns with a colorimeter
Test patterns are essential for objective calibration. Start with grayscale ramps, color bars, and uniform color patches to verify neutrality and color balance. If you have a colorimeter, generate aReference ICC profile that maps the display’s native response to standard color spaces. Apply the profile through your display’s settings or a compatible video pipeline. Without hardware, rely on well-designed reference images and built-in patterns, validating results by eye and with cross-content checks. The combination of patterns and measurement tools yields a repeatable, verifiable process that you can perform regularly to maintain accuracy. This approach is a practical middle ground endorsed by the Calibrate Point team.
Room lighting, reflections, and screen placement
Ambient lighting has a significant impact on perceived contrast and color. Aim for steady, dim lighting that minimizes glare on the screen. Avoid direct sunlight or bright lamps facing the display, and consider using bias lighting behind the TV to improve perceived contrast without affecting color judgment. Screen placement height and viewing distance also influence calibration outcomes, so adjust seating and the screen to ensure a comfortable, centered viewing angle. Consistent environmental conditions help maintain calibration results, allowing you to reproduce the same setup across sessions. The Calibrate Point guidance emphasizes environmental control as a critical factor in achieving reliable outcomes.
Long-term calibration maintenance and verification
Calibration isn’t a one-off task; it’s an ongoing habit. Schedule periodic checks to revalidate color accuracy, especially after firmware updates, new content sources, or major lighting changes. Keep a simple log of settings, test patterns, and any notable observations. Recalibrate when you notice shifts in color or brightness or after making changes to your home theater system. Regular maintenance helps preserve fidelity and ensures your viewing experience remains consistent over time. This approach aligns with Calibrate Point’s philosophy of repeatable, durable calibration routines.
Quick post-calibration verification routine
After completing a calibration, run a quick verification round using a few benchmark scenes: a dark movie scene, a bright daytime scene, a skin-tone scene, and a fast-action sequence. Confirm that blacks stay detailed without crushed shadows, whites aren’t blown, and skin tones look natural. If anything stands out as off, revisit the relevant settings in brightness, contrast, gamma, and color balance. Document the final values and store them as a reference profile for future sessions. This quick check helps ensure you didn’t miss a subtle discrepancy and keeps your calibration trustworthy.
Tools & Materials
- Colorimeter or spectrophotometer(For objective color accuracy measurements; optional if using only built-in patterns)
- Calibrated reference display or test pattern images(Used to compare colors and grayscale without guesswork)
- HDMI cables and a stable power source(Ensure secure connections to avoid signal drops during calibration)
- Apple TV (latest software) and a compatible display(Keep firmware up to date to access the latest calibration features)
- Quiet room with controlled ambient lighting(Reduces measurement drift caused by changing light levels)
- Notepad or digital log(Record final settings and notes for future reference)
Steps
Estimated time: 60-90 minutes
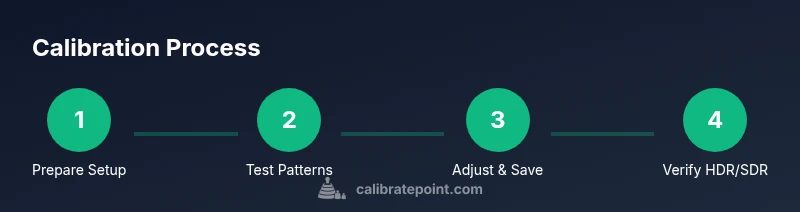
- 1
Prepare the setup
Clear the viewing area and dim ambient light to stabilize measurements. Verify your Apple TV is updated and the display input is clean and stable. Gather all tools listed in your Materials, and ensure you have a comfortable seating position.
Tip: Turn off any automatic brightness or energy-saving features on the display to avoid drifting during calibration. - 2
Enable color controls and match range on Apple TV
Open Settings > Video and Audio. Enable color controls and set Match Dynamic Range to On for HDR content. Confirm that the display’s format is aligned with the content you’ll test (SDR vs HDR).
Tip: If your TV offers a separate color management or game mode, start with the default settings and adjust gradually to observe results. - 3
Display reference test patterns
Show built-in test patterns or reference images that include grayscale ramps, color bars, and uniform colors. Ensure patterns fill the screen without overscan and that colors appear consistent across different regions.
Tip: Use a cross-content check to verify patterns look the same on movies, sports, and UI elements. - 4
Adjust brightness and contrast
Use a grayscale ramp to set brightness so blacks are deep but not crushed, and whites remain detail-rich. Then tune contrast so bright areas retain detail without clipping. Keep changes minimal at each step.
Tip: Avoid extreme values; small incremental changes yield more stable results. - 5
Calibrate color balance
If you have a color test pattern, adjust color gains to neutralize color casts. Use a color reference to ensure skin tones look natural and mid-tones don’t skew toward green, red, or blue.
Tip: If colors drift after changes, reset and retry with a fresh reference. - 6
Test HDR vs SDR and save profile
Switch between SDR and HDR sources to verify tone mapping and dynamic range. Save the calibrated profiles with clear labels so you can recall them later.
Tip: Label profiles by room and date to track changes over time.
Questions & Answers
Do I need expensive hardware to calibrate Apple TV?
Not necessarily. Built-in test patterns and reference images can start you off, while a colorimeter or spectrophotometer improves accuracy for more precise results.
You can start with built-in patterns, and a colorimeter makes the results more precise.
How often should I recalibrate?
Recalibrate when lighting changes, after firmware updates, or when you notice color drift. Regular quick checks help maintain accuracy.
Recalibrate when lighting changes or you notice color drift.
Can HDR calibration vary by content?
Yes. HDR expands the brightness range, so you should check HDR patterns separately and compare with SDR results to ensure consistent tone mapping.
HDR needs separate checks for consistency with SDR.
Is Calibrate Point’s method safe for my equipment?
Yes. Follow the recommended patterns and avoid extreme settings; monitor artifacts and stop if anything looks off.
Yes, as long as you follow safe patterns and avoid extreme changes.
What is the difference between color temperature and gamma?
Color temperature sets the white point; gamma controls tonal response. Both affect perceived brightness and the balance of shadows and highlights.
Color temperature sets white point; gamma shapes mid-tones.
Should I calibrate the TV panel or the content?
Calibrate the panel to display correctly. Content can vary; calibrating with reference material helps maintain consistency.
Calibrate the panel to ensure consistent output.
Watch Video
Key Takeaways
- Define a repeatable calibration routine
- Match white point and gamma for SDR first
- Separate SDR and HDR checks for accuracy
- Use test patterns and log results
- Calibrate audio timing alongside video when possible
- Maintain consistent ambient lighting during checks