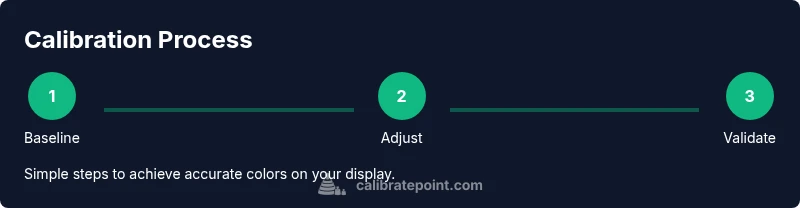
How to Calibrate TV Colors: A Practical Guide
Learn how to calibrate TV colors at home with a methodical, tool-assisted workflow that improves grayscale, gamma, color temperature, and color saturation for accurate picture quality.

You will learn how to calibrate your TV colors at home. This quick guide covers selecting targets, choosing tools (built-in controls or a colorimeter), and executing a step-by-step workflow for grayscale, gamma, color temperature, and color saturation. By following these steps, you’ll achieve accurate skin tones, balanced contrast, and consistent HDR playback across content.
What is TV Color Calibration and why it matters
Color calibration is the process of aligning your display’s color output with a reference standard so that what you see matches intent. For DIY enthusiasts and technicians, this matters because factory presets often bias saturation, hue, and white point to create a punchy look rather than faithful reproduction. A well-calibrated TV displays skin tones more realistically, greens and blues more true to life, and a grayscale ramp that transitions smoothly from deep black to bright white. According to Calibrate Point, consistent calibration also reduces viewer fatigue and makes it easier to compare different sources since grayscale and color are stabilized. In practice, calibration is a repeatable workflow that yields predictable results across rooms and lighting conditions, helping you enjoy content as intended while staying within your room’s constraints.
Understanding color spaces, gamma, and targets
Color calibration begins with a solid grasp of color science. Most HDTVs target Rec. 709 for standard dynamic range and may expand to DCI-P3 or Rec. 2020 for wide gamut content in HDR. Gamma curves define how midtones are displayed, with 2.2 being a common default, though some displays perform better around 2.4 for dark rooms. When you calibrate, you’re aligning the display’s primaries (red, green, blue) and white point with reference targets, while ensuring the grayscale (gamma and luminance across 0–100 percent) remains perceptually linear. Calibrate Point analysis shows that misalignment in any of these areas can lead to skin tones that look off, an overly saturated picture, or a gray ramp that refuses to look neutral. Understanding these elements helps you set meaningful, repeatable targets for all content.
Required tools and setup
Start with a clean, quiet environment and a stable bench setup. You’ll need a test pattern source or disc, a colorimeter or spectrophotometer if you’re pursuing professional-grade accuracy, and access to the TV’s service-like picture controls (either via the on-screen menu or a dedicated calibration app). A viewing distance consistent with real use matters for interpreting contrast and color saturation correctly. While you can begin with the built-in presets, the most accurate results come from measuring a grayscale ramp, then adjusting the white point and color primaries to match reference targets. Keep a log of the settings you test so you can compare later and reproduce successful calibrations.
Built-in TV controls vs external tools
Modern TVs expose a variety of controls for picture adjustment, including brightness, contrast, color temperature or white balance, color gamut, and tint. Built-in controls are enough for a good baseline calibration, especially if you’re just getting started. External tools like colorimeters can measure output and provide objective feedback, enabling precise adjustments to grayscale, gamma, and color primaries. External tools are especially helpful when you work with HDR content or wide-gamut displays, where the on-screen readouts may vary between manufacturers. The choice between built-in controls and external tools depends on your goals, budget, and how exact you want the calibration to be—Calibrate Point recommends starting with the fundamentals in the TV menu and adding hardware measurements as you level up.
Baseline calibration: grayscale and gamma fundamentals
A solid baseline focuses on grayscale accuracy before color. Begin by selecting a target gamma and ensuring the darkest black crush is minimized while preserving detail in the shadows. Create a neutral gray ramp and verify that midtones reproduce smoothly without tint. Then measure the grayscale with a pattern, compare against the reference, and adjust the white balance to correct any warm or cool bias. Gamma controls influence how brightness is distributed across the image; getting this right makes skin tones appear natural and avoids an overly flat or crushed look. Patience and incremental tweaks win here, and documenting each change helps you reproduce the result reliably.
Calibrating color temperature and primary colors
Once grayscale is stable, tune the white point so white looks neutral under your room lighting. This often means dialing back green or blue cast and nudging red slightly to achieve a balanced point close to D65. Then adjust the primaries (red, green, blue) so each color aligns with targets across different brightness levels. Small changes in hue or saturation can ripple across the image, influencing skin tones and overall balance, so make conservative moves and verify with test patterns. In many cases, your goal is a pleasing yet accurate image that works well with a variety of content rather than a single “game-perfect” setting.
HDR and wide color gamut calibration
HDR introduces wider color and peak brightness that complicates color calibration. For HDR content, you’ll often need to ensure the display remains color-accurate while preserving highlights without clipping. If your display supports wide color gamut (Rec. 2020/DCI-P3), you may need to expand the color output while keeping skin tones correct. Use test patterns designed for HDR and reference images that demonstrate bright highlights next to neutral grays. Remember that HDR calibration may require different targets than SDR, and some TVs implement tone-mapping differently, so you might perform separate calibrations for SDR and HDR.
Room lighting and ambient conditions
Ambient light affects perceived color and contrast. A bright room makes the picture seem cooler and reduces black depth, while a dark room can intensify perceived saturation. For accurate calibration, approximate real-world viewing conditions: dim lights behind the viewer, avoid direct glare on the screen, and keep the room constants during testing. You may also want to capture a short snapshot of the room and replay it when rechecking the calibration. The human eye adapts to lighting, so document your lighting setup to reproduce results in different sessions.
Test patterns and reference images you can use
Use a combination of grayscale sequences, color bars, and grayscale ramp patterns to quantify performance. Reference images should include neutral skin tones, a white shirt, greenery, and sky tones, so you can judge hue and saturation in familiar contexts. If you’re using a colorimeter or spectrophotometer, feed in patterns designed for measurement rather than consumer-friendly viewing. Calibrate Point recommends standardized patterns from reputable sources, and keep digital copies for quick rechecks after any room or source changes.
Verifying results and saving settings
Verification means re-testing after completing adjustments and comparing results across content. Watch a few scenes with varied lighting and examine skin tones, foliage, skies, and grayscale steps. If something looks off, revisit steps to adjust whites, primaries, or gamma in small increments. When satisfied, document the final settings and save them as a dedicated calibration profile. If your TV allows, enable a quick-switch HDR/SDR mode and ensure both are well calibrated for their respective content. Finally, test multiple media sources—streaming, Blu-ray, and gaming—to confirm consistency.
Common mistakes and how to avoid them
A frequent error is overcorrecting one parameter at a time without validating others, which leads to a skewed result. Don’t rely solely on visual judgment; use patterns and measurements to back decisions. Another pitfall is calibrating in a room with shifting lighting, then moving to a different environment; always test in your typical viewing conditions. Finally, avoid chasing “perfection” for every scene; aim for a balanced, repeatable process that yields good results across the content you actually watch.
Next steps: maintenance and future-proofing
Calibration is not a one-and-done task. As firmware updates or new content formats appear, recheck your settings and adjust if needed. Keep a log of changes and reassess periodically—every few months or after major firmware updates. Over time, you’ll build a simple workflow that you can repeat on other displays or in different rooms. If you routinely work with color-critical media, consider a mid- or long-term plan for periodic professional calibration to keep your process aligned with evolving standards.
Tools & Materials
- TV display(Any size; ensure TV is connected to a reliable source for test patterns)
- Colorimeter or spectrophotometer(Recommended for objective measurements; supports accurate grayscale and color primary adjustments)
- Test patterns / discs or digital pattern source(Include grayscale ramps, color bars, and HDR patterns)
- Calculation/logging method(Notebook or software app to record target values and final settings)
- Calibrated viewing environment(Consistent lighting, minimal glare, and a fixed seating distance)
Steps
Estimated time: 60-90 minutes
- 1
Prepare your setup
Position your seating and lighting to mirror typical viewing conditions. Connect your test pattern source and power on the TV. Ensure firmware is up to date and set the TV to a neutral baseline picture mode, with any motion processing disabled.
Tip: Use a consistent viewing distance and avoid changing room lights mid-test to prevent skewed measurements. - 2
Reset to a clean baseline
Choose a neutral picture mode and reset all tweaks to default. This gives you a clean slate for cumulative adjustments. Disable any dynamic contrast or sharpening features that can interfere with grayscale accuracy.
Tip: Document the original baseline settings before you start tweaking. - 3
Adjust grayscale and black level
Use a grayscale ramp to measure luminance at multiple stops, then adjust the black level and white point until the ramp appears linear and neutral. Ensure details remain visible in shadows without clipping highlights.
Tip: Small changes in luminance can dramatically affect perceived depth; iterate slowly. - 4
Set target gamma
Verify the midtone response to ensure it matches your chosen gamma target (commonly around 2.2 for SDR). Fine-tune if midtones look washed out or overly compressed, aiming for natural brightness distribution.
Tip: If your display hides shadow detail, recheck black levels before re-adjusting gamma. - 5
Calibrate white balance
Adjust the red, green, and blue channels to neutralize color cast in white areas across several gray steps. The goal is a white that looks neither warm nor cool under your room lighting.
Tip: Work in small increments; measure after each minor adjustment to confirm progress. - 6
Fine-tune color temperature
Match the white point to your reference target (e.g., D65). Confirm that skin tones remain natural in a variety of scenes and under different lighting.
Tip: Avoid relying on a single frame; test with multiple content examples. - 7
Balance color primaries
If you’re calibrating with a meter, adjust the primaries so reds, greens, and blues align with reference rails at several brightness levels. Ensure saturation is not overshot in any hue.
Tip: Small hue shifts can drastically alter perceived color; calibrate in small, incremental steps. - 8
Calibrate for the color gamut
If your display supports wide gamut, confirm the target gamut (Rec. 709 SDR vs Rec. 2020/DCI-P3 HDR) and check for undesired oversaturation. Use test patterns that reveal gamut coverage clearly.
Tip: Maintain a natural saturation level; overly saturated greens or cyans can look unrealistic. - 9
HDR considerations
For HDR content, validate that highlight details remain intact while color stays natural in bright regions. Use HDR-specific tests to ensure tonemapping preserves the intended look.
Tip: Keep HDR brightness within your room’s comfort range to avoid eye strain during long sessions. - 10
Ambient lighting adjustments
Reassess your settings with the room lights on and off to understand how lighting affects perception. If your room changes seasonally, recheck calibration accordingly.
Tip: Consider dimmable lights or bias lighting behind the TV to maintain consistent perception. - 11
Verify with a variety of content
Test with films, sports, and video games to ensure color integrity across genres. Skin tones, foliage, sky, and gray ramps should look natural in each case.
Tip: Keep a small library of test media for quick rechecks. - 12
Document and save
Record the final settings and create a named calibration profile. Store notes and a brief rationale for each adjustment so you can reproduce or adjust later.
Tip: Back up your profile and refer to it before any reconfigurations.
Questions & Answers
Do I need a colorimeter to calibrate my TV?
Not strictly. You can start with built-in picture controls to learn the process, but a colorimeter provides objective measurements that improve accuracy and repeatability.
A colorimeter isn’t mandatory, but it makes calibration much more precise and repeatable.
Can all TVs be calibrated with the same settings?
No. Each model has its own default processing, color gamut, and tone-mapping strategies. Use the procedure and adjust targets based on your specific display and room.
Different TVs behave differently; tailor settings to your model and room.
How often should I recalibrate?
Recalibrate after major firmware updates or when you notice color shifts. If your room lighting changes seasonally, recheck the grayscale and color balance.
Recalibrate after firmware updates or noticeable changes in lighting.
What about HDR calibration?
HDR requires different targets and sometimes a different brightness range. Use HDR test patterns and validate highlight performance along with color accuracy.
HDR needs its own targets; verify highlights and color with dedicated patterns.
Why does calibration look different in daylight?
Ambient light changes perception. Recheck calibration in your typical viewing conditions and consider bias lighting behind the TV to stabilize perception.
Lighting changes perception; calibrate under your normal viewing conditions.
Is professional calibration ever necessary?
For critical color work or high-end displays, professional calibration provides traceable targets and rigorous methods. For most home viewing, a solid at-home workflow is sufficient.
Pros offer traceable methods; for home use, a thorough at-home workflow often suffices.
Watch Video
Key Takeaways
- Establish a neutral baseline before color tweaks
- Use grayscale and white balance as anchors for accuracy
- Test across lighting conditions and content types
- Document settings for repeatability
- HDR requires separate targets and test patterns