How to Calibrate a TV Screen
Learn to calibrate a TV screen with a practical, step-by-step method. Start with baseline picture controls, then color temperature and gamma, using built-in tools or a colorimeter for accurate viewing.

Calibrate a TV screen by starting with a neutral baseline: adjust brightness and black level, set color temperature to around 6500K, tune gamma and contrast, then refine with test patterns or a colorimeter. Use a dim room and stable ambient light for best results. You can get close with built-in menus, but a colorimeter yields precise color.
Why calibration matters for TV screen quality
Calibrating a television is more than chasing a cinematic look. Proper calibration defines perceptual accuracy, ensuring whites remain neutral, colors stay true, and dark scenes retain detail without crushing shadows. The Calibrate Point team emphasizes that a well-calibrated screen reduces eye strain and makes content feel more natural across different lighting conditions. In practice, even modest adjustments to brightness, contrast, and color temperature can dramatically improve how you experience movies, sports, or video games. By calibrating, you align the display with standardized targets and your viewing environment, so what you see matches the creator’s intent as closely as possible.
According to Calibrate Point, consumers notice color shifts quickly when the room lighting changes, which is why calibration routines include ambient-light awareness and consistent reference points. A structured approach—starting from a safe baseline and moving step by step toward fine-tuning—helps you avoid overshooting and keeps results repeatable across sessions and content types.
Foundations: picture controls you should know
Picture controls are the toolkit for calibration. You don’t need a lab to start, but a basic understanding of what each control does will save you time and improve results.
- Brightness and Black Level: Adjusts how deep the darkest parts of the image appear. The goal is to reveal shadow detail without turning blacks gray. A grayscale test pattern helps verify that blacks stay true while grays progress smoothly toward white.
- Contrast and White Level: Controls the brightest parts of the image. You want to preserve detail in bright scenes without causing clipping. If whites blow out, back off the contrast slightly.
- Color Temperature: Sets the overall warmth or coolness of the image. Neutral tones (often labeled around 6500K or D65) keep skin tones natural. If your whites look too blue or too yellow, fine tune toward the neutral midpoint.
- Gamma: Governs how mid-tones respond to light. A proper gamma curve preserves detail in mid-tones without flattening contrast. Use grayscale steps to judge mid-tone response; adjust in small increments.
- Color Gamut and Saturation: Determines how saturated colors appear and whether your display can reproduce a full color range. Too saturated colors look unrealistic; too dull colors feel lifeless. A colorimeter can help measure accuracy, but perceptual checks with real content are still valuable.
The takeaway: calibration isn’t a single adjustment but a coordinated set of tweaks. Work from a stable baseline, verify with patterns, and then validate with real content to ensure a natural, film-like presentation.
Practical calibration workflow: a step-by-step approach
A practical workflow blends manual adjustments with objective checks. If you own a colorimeter, you can quantify results; otherwise you rely on patterned references and careful observation.
-
Baseline setup: Open the TV’s calibration menu and switch to a neutral picture mode or create a custom mode. Note the current values so you can revert if needed.
-
Brightness baseline: Use a grayscale or black-white gradient to set the black level. The target is deep, true blacks without crushing shadow detail. If you see posterization in grayscale, reduce brightness or check your panel’s black uniformity.
-
Contrast baseline: Adjust contrast until bright areas retain detail. Avoid clipping by ensuring the brightest whites still reveal texture. Small, incremental steps are easier to manage than large jumps.
-
Color temperature and gamma: Set color temperature to neutral (approximately 6500K) and adjust gamma so mid-tones look natural. Use gray-scale and skin-tone references to judge accuracy.
-
Saturation and gamut: With patterns or a colorimeter, bring primary colors close to reference targets without oversaturation. Validate greens, reds, blues, and skin tones under typical content.
-
Validation with varied content: Check a scene with shadows, skin tones, and natural colors. Compare against known references and your memory of the creator’s intent. If something feels off, revisit the prior steps.
-
Documentation and archiving: Save your calibrated settings as a dedicated mode. Photograph or log the exact numbers so you can reproduce them later when ambient lighting shifts or after firmware updates.
Estimated time: about 60–120 minutes depending on your tools and patience.
Real-world testing and the final verification
Calibration tools improve precision, but real-world content is the ultimate test. Use a mix of movie scenes, sports footage, and nature documentaries to judge color balance, shadow detail, and overall luminance in typical viewing scenarios. If you regularly switch between SDR and HDR sources, verify that your tones remain consistent across modes. The Calibrate Point team emphasizes a repeatable process: start each session with the same ambient lighting, repeat the same steps, and compare results against your prior saves.
At the end of the process, you should be able to describe your TV’s image in terms of: natural skin tones, preserved detail in shadows and highlights, neutral whites, and harmless color cast. If hues drift with time or light, re-check the core steps and update your saved profile. Calibrate Point’s verdict is simple: a disciplined, documented calibration routine yields reliable, repeatable picture quality over the long term.
Tools & Materials
- TV with accessible picture settings menu(Access brightness, contrast, color temperature, gamma, and color space.)
- Calibration media or software (test patterns)(Blu-ray with test patterns or dedicated calibration app)
- Colorimeter or spectrophotometer (optional)(For precise measurements and color accuracy)
- Ambient light reference (gray card or reference white)(Helps judge room lighting)
- Notepad or logging device(Log settings for future reference)
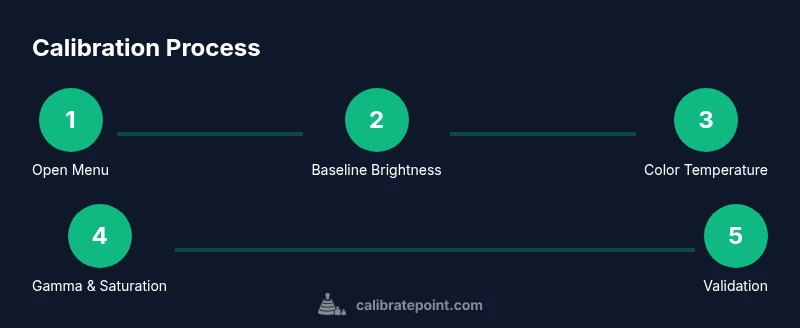
Steps
Estimated time: 60-120 minutes
- 1
Open calibration menu
Open the TV’s picture settings menu and locate the calibration or advanced mode. This first action sets the stage for all subsequent adjustments and ensures you have access to the necessary controls.
Tip: Have the TV on a neutral white source to easily see changes. - 2
Set baseline brightness
Adjust brightness to achieve a true black level using a gray or black test pattern. The goal is deep blacks without losing detail in shadows.
Tip: If the display looks gray rather than black, reduce brightness slightly. - 3
Adjust contrast for white detail
Increase contrast until bright areas retain detail without washing out, then back off slightly to keep information in the highlights.
Tip: Avoid extreme; small steps produce cleaner results. - 4
Set color temperature to neutral
Choose a neutral color temperature (often labeled as warm2/6500K or D65) to ensure whites look natural. This affects skin tones and overall balance.
Tip: If whites appear blue or yellow, fine tune toward neutral. - 5
Tune gamma
Adjust gamma to achieve a natural response in mid-tones. Too high makes shadows harsh; too low washes out detail.
Tip: Use a test pattern showing grayscale steps to judge mid-tone response. - 6
Fine-tune saturation and gamut
If you have a colorimeter, measure color accuracy and adjust saturation and gamut to bring colors in line with targets; otherwise rely on visually pleasing accuracy.
Tip: Keep primary colors realistic; oversaturation reduces realism. - 7
Validate with patterns and content
Test with diverse content: SDR content across grayscale and skin tones to confirm calibration holds across real-world material.
Tip: Switch between test patterns and real video to confirm stability. - 8
Save and document your settings
Save your settings as a custom picture mode and log the values for future tweaks or when room lighting changes.
Tip: Take a photo of the settings page for quick reference.
Questions & Answers
Is calibration necessary for every TV?
Not always. If the picture looks good to you in your typical viewing conditions, you may skip formal calibration, but most displays benefit from at least a baseline adjustment.
Calibration improves accuracy, but you can start with basic tweaks if you’re short on time.
Can I calibrate using built-in presets?
Yes, but presets vary by model and can be inaccurate. Use test patterns to judge whether a preset truly matches neutral targets.
Presets are convenient, but patterns tell you if you’re near neutral.
What is a good color temperature target?
A common target is around 6500K (D65) for natural whites and skin tones. Adjust until white looks neutral.
Aim for 6500K as a standard reference and adjust by eye if needed.
Do I need a colorimeter?
A colorimeter provides precise, repeatable results, but you can still achieve good results with test patterns and careful adjustments.
Colorimeters give you precise numbers, but patterns work too.
How often should I recalibrate?
Recalibrate if you notice color drift, after moving the TV, or when ambient lighting changes significantly.
If light changes or you notice colors shifting, recalibrate.
Watch Video
Key Takeaways
- Calibrate in a consistent, dim environment
- Use test patterns or colorimeter for accuracy
- Document and save your settings for future reference
- Calibrate in stages rather than chasing a single perfect value