How to Calibrate Your TV for Best Picture
Learn step-by-step how to calibrate your TV for the best picture quality, covering brightness, contrast, gamma, color temperature, and HDR optimization with practical, DIY-friendly methods.

Calibrate your TV to unlock its true picture quality by fine-tuning brightness, contrast, gamma, color temperature, and backlight using test patterns. Start in a neutral mode, use a colorimeter or grayscale targets for guided adjustments, and validate with real content. Expect noticeably improved shadows, midtones, and color fidelity for SDR and HDR viewing.
Why calibrating your TV matters
Calibration isn’t about chasing perfect numbers; it’s about aligning what you see with industry standards and your room. A properly calibrated TV shows deeper blacks, more accurate grayscale, and truer color, which improves everything from movies to sports to video games. According to Calibrate Point, calibration is one of the quickest ways to unlock a display’s potential without hardware upgrades. In a typical living room, minor tweaks can yield a noticeable difference in shadow detail and color purity, especially when comparing SDR to HDR content. Keep expectations realistic—calibration won’t fix a defective panel, but it will bring out its best performance.
How human vision affects picture judgment
Our eyes perceive brightness and color relative to surrounding light and context. Small shifts in gamma or white balance can change perceived skin tone or gray scale without obvious shifts in numbers. This makes consistent lighting and standard test patterns essential. Calibrate Point's approach emphasizes using grayscale ramps and color targets to anchor adjustments in measurable references, then validating with real-world content. By designing your workflow around human perception and objective validation, you reduce guesswork and increase the likelihood of repeatable results across rooms and viewing devices.
Understanding common color spaces and standards
Most TVs base color in Rec. 709 for SDR and DCI-P3 or Rec. 2020 for HDR content. When calibrating, you want a color temperature close to D65 and a neutral grayscale, with correct gamma (typically around 2.2 for SDR, 2.4 for dark rooms). Some sets offer a CMS (color management system) that lets you adjust hue, saturation, and luminance for primaries and secondaries; use it sparingly, focusing on accuracy over saturation. If your TV lacks advanced controls, rely on white-balance presets and grayscale targets, then use an external meter to verify results. Remember, HDR brightness targets are higher, but your room and panel limitations will influence final results.
Room lighting and its impact on calibration
Ambient light shifts perception; a bright room can wash out blacks and reduce contrast, while a dark room can make colors appear oversaturated. For calibration, aim for moderate lighting—dim enough to view detail, but not pitch black. Consistency matters: calibrate in the same lighting you primarily watch in. Use blackout curtains or a controllable lamp to maintain the same environment during follow-up checks. Calibrate Point suggests establishing a night-time baseline in a dim room, then rechecking in brighter daylight to note perceptual changes rather than chasing brute reference values alone.
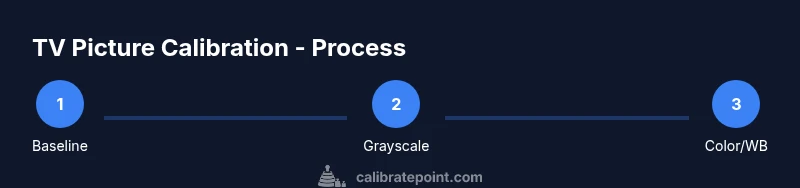
Baseline settings: picture mode, brightness, contrast
Start with the TV in a neutral baseline, usually a Custom or Movie mode. Turn off any energy saving features and motion smoothing to prevent artificial edge enhancement. Set brightness so that the 0% gray ramp is visible without clipping, and adjust contrast to keep the 100% white ramp distinct without crushing detail. Document these initial values as your baseline before moving into grayscale and color work. This stage creates a trustworthy reference for subsequent steps.
Gamma, color temperature, and grayscale
Gamma controls midtone mapping; most living-room TVs default near 2.2, which works well with typical room lighting but may need tuning in darker rooms. Color temperature settings influence skin tones and overall warmth; aim for a neutral white balance around 6500K (D65). Use grayscale targets to verify that 10% to 90% ramps transition smoothly without visible steps. If your meter shows a consistent drift, adjust white balance and gamma in small increments, then re-check with the grayscale chart. Small, iterative tweaks produce stable results that persist across content.
Color calibration workflow overview
A practical workflow starts with a stable baseline, then proceeds through grayscale verification, color accuracy using primary and secondary colors, and final HDR considerations if you have HDR support. An external colorimeter or spectrophotometer makes this process reliable by providing objective data. Throughout, rely on test patterns or calibration software that exports measurable targets. This structured approach minimizes the risk of over-saturating colors or mis-setting blacks and shadows.
Detailed steps you can perform at home
The following steps outline a home-friendly calibration path. You can perform them with basic tools and freely available test patterns or software. Accuracy improves with a calm environment and patience. Treat each step as a small experiment: adjust, measure, compare content you trust, and then lock in the change. When possible, save a separate calibration profile that you can switch to for different content types or lighting conditions.
Quality assurance: testing with content and patterns
After completing the settings, verify with a range of content: dark scenes, skin tones, and bright outdoor footage. Use grayscale tests, color bars, and real-world videos to confirm that shadows retain detail and whites remain clean. If you notice posterization, banding, or color clipping, revisit the corresponding controls. Keep a log of your checks and results to track changes over time and avoid drift due to aging components.
Next steps and maintaining calibration over time
Calibration isn't a one-and-done task. Revisit your setup whenever you change viewing content, upgrade firmware, or adjust lighting. A quarterly check-in is often enough for many users. If you rely on HDR content, re-verify color and brightness targets after major firmware updates or panel changes. Finally, consider saving different profiles for cinema, gaming, and general viewing to optimize each scenario without starting from scratch each time.
Tools & Materials
- Colorimeter or spectrophotometer(Essential for objective color and grayscale calibration.)
- Display test patterns or calibration software(Grayscale ramps, gamma charts, and color targets needed for accurate adjustments.)
- Source device with test patterns (HDMI or physical discs)(Used to feed stable test signals and pattern sequences.)
- Light meter (optional)(Helps approximate room brightness for consistent checks.)
Steps
Estimated time: 60-75 minutes
- 1
Gather and organize tools
Collect your colorimeter, test patterns or software, and a stable source. Verify batteries, cables, and that patterns load correctly. Having everything ready reduces mid-test interruptions.
Tip: Lay out items on a quiet surface and label profiles for quick switching later. - 2
Reset to a neutral baseline
Set the TV to a neutral picture mode (Custom or Movie). Disable motion smoothing and energy-saving features to avoid artificial enhancements during tests.
Tip: Document the default settings before changing anything for easy reverting. - 3
Adjust brightness and contrast using ramps
Use a grayscale ramp to set brightness so 0% gray is visible without crushing details, and adjust contrast so 100% white shows detail without clipping.
Tip: Make minor adjustments (1-2 units) and re-check multiple gray steps to ensure smooth transitions. - 4
Tune black level and gamma
With test patterns, fine-tune the black level until blacks are deep but not crushed, then set the gamma to roughly 2.2 (adjust for room) by comparing midtones.
Tip: If shadows look flat, small gamma changes can restore depth without affecting whites. - 5
Calibrate color and white balance
Utilize the colorimeter to balance white points and adjust primary/secondary colors within the CMS if available. Aim for neutral skin tones and accurate primary colors.
Tip: Proceed in small increments; verify with a trusted test image after each adjustment. - 6
Validate with content and lock settings
Run a variety of content that you watch regularly. If satisfied, save the profile with a descriptive label (e.g., DolbyCinema_HD).
Tip: Keep a calibration log to compare future changes and detect drift over time.
Questions & Answers
What is the best TV screen mode for calibration?
Most calibrations start from a Custom or Movie mode with enhancements disabled. This provides a stable baseline for grayscale and color work.
Start from a custom mode and switch off enhancements to get a stable baseline for calibration.
Do I need a colorimeter to calibrate my TV?
A colorimeter or spectrophotometer provides objective data and makes grayscale and color adjustments repeatable. It’s highly recommended for reliable results.
A colorimeter is highly recommended for repeatable, objective color and grayscale calibration.
Can I calibrate using free software or patterns?
Yes, there are free test patterns and software options that can guide basic calibration. However, a colorimeter improves accuracy and consistency.
Free tools can guide you, but a colorimeter offers stronger, repeatable accuracy.
How often should I recalibrate my TV?
Recalibrate when you notice color shifts, after firmware updates, or when lighting conditions change significantly. A quarterly check-in suits many setups.
Recalibrate if you notice changes or after firmware updates; a quarterly check is common.
Will calibration affect HDR content differently?
HDR targets higher peak brightness and broader color ranges. Calibrating for HDR requires careful adjustments to preserve highlight detail while maintaining color accuracy.
HDR calibration emphasizes preserving highlight detail while maintaining color accuracy.
Watch Video
Key Takeaways
- Establish a neutral baseline first
- Use a colorimeter for objective accuracy
- Validate with grayscale and color targets
- Save distinct profiles for different content