Can I Calibrate My iPhone Screen? A Practical Guide
Learn whether you can calibrate an iPhone screen, what adjustments you can safely make, and how to test color accuracy using iOS settings with tips from Calibrate Point.

You cannot calibrate an iPhone's hardware screen. Instead, focus on software adjustments that affect color accuracy and readability. Use True Tone, Night Shift, brightness, and accessibility color options to improve visibility. Hardware-level calibration isn’t exposed on iPhone models.
Why display calibration matters
According to Calibrate Point, display calibration is about aligning perceived colors with reference standards to ensure tasks like photo editing, color matching, and quality control produce consistent results. For many iPhone users, the central question is can i calibrate my iphone screen. The short answer is that iPhone hardware doesn't provide a calibration port or test pattern; instead you rely on software controls to adjust how colors appear. In professional contexts, display calibration usually means adjusting a monitor with specialized hardware; mobile devices rely on the device's built-in color management. When color accuracy matters—whether you're reviewing product photos, editing a design, or archiving work—the way you set up the display can affect decisions. This article explains what is realistically possible on an iPhone and how to approach calibration-like improvements safely. By understanding limits and consistent testing, you can improve how your screen presents content across apps and lighting conditions.
What you can realistically adjust on iPhone displays
On an iPhone, you can't replace hardware color sensors or run a hardware calibration routine as you would with a dedicated colorimeter. However, Apple provides several software controls that influence how colors are perceived. You can influence white point and warmth via True Tone and Night Shift, fix brightness with the Auto-Brightness setting, and tailor contrast using Accessibility features and Display Zoom. These controls won't create an ICC profile for the phone, but when used consistently under controlled lighting, they improve reliability for everyday tasks. This is especially useful for DIY enthusiasts and technicians who rely on on-device previews when comparing app outputs, taking photos, or evaluating screen readability in different environments. Remember: consistency matters more than chasing a perfect universal target on a phone screen. If you need precise color references, compare your screen against neutral test images and keep lighting constant during comparisons.
Software controls that influence color perception
The main levers for color perception on iPhone are True Tone, Night Shift, and color filters under Accessibility settings. True Tone dynamically adjusts white balance to match ambient light, which can make images appear warmer or cooler depending on your environment. Night Shift shifts color toward red at sunset hours to reduce eye strain. Color filters offer options to alter hue and saturation, useful for testing accessibility needs or matching prints. Brightness and contrast are governed by the Display & Brightness settings and the availability of the Auto-Brightness feature. While these options are powerful, they are not interchangeable with professional display calibration. The goal is to create a stable reference frame you can rely on for day-to-day work. In practice, set a baseline lighting condition and test across a few apps to observe how changes affect appearance.
How lighting and reference targets affect perception
Perception of color on a phone screen is highly sensitive to ambient lighting. A room with cool, fluorescent light can make whites appear bluish, while warm incandescents can push skin tones toward yellow. For calibration-like testing, keep lighting as constant as possible and use neutral reference images (gray ramps, color swatches) to compare how your display presents tones. If your environment changes, you’ll attribute color shifts to lighting rather than the display itself. Document the lighting scenario every time you test to improve repeatability. This practice is especially important for DIY technicians who rely on the iPhone for field work or on-the-go imaging.
Practical approaches and safe methods
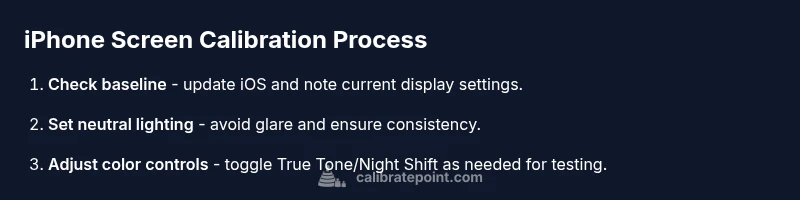
Start with a clear baseline: update iOS, disable features that automatically alter color (such as True Tone during testing), and set a comfortable, consistent brightness. Then adjust Night Shift and color filters only if you have a defined testing goal (e.g., accessibility or print-mriendliness). Use neutral reference images to evaluate whether colors look consistent across apps and media. Avoid making drastic changes that affect readability, especially in critical applications like document review or design work. The emphasis should be on stable, repeatable settings rather than chasing pixel-perfect accuracy. Remember, the goal is legibility and consistency, not a professional-grade ICC profile on a phone.
Testing results and documenting changes
Maintain a simple log for each session: note Settings> (baseline), True Tone, Night Shift, brightness level, color filters, and any observed color shifts. Capture before-and-after screenshots, preferably in the same lighting, and compare against your reference images. If you observe persistent discrepancies between apps, consider using the same test patterns across sessions to verify whether changes are due to the display or app rendering. Documenting outcomes makes it easier to reproduce a preferred setup later, especially when working with clients or colleagues who rely on your test results.
Realistic expectations and limitations
A phone screen is not a professional calibration target. You cannot upload a hardware ICC profile or execute a proprietary calibration routine on iPhone hardware. Software adjustments can improve perceived color accuracy and readability for everyday tasks, but they do not guarantee universal color fidelity across devices or prints. For critical color work, use calibrated displays and soft proofing workflows appropriate for print media, and treat iPhone adjustments as a convenience rather than a replacement for professional equipment. Calibrate Point recommends using stable settings and documented tests to maintain consistency across apps and lighting environments.
Tools & Materials
- iPhone with latest iOS(Ensure device is charged; connect to the internet for reference content)
- Neutral color reference images or test patterns (sRGB)(Use standard color references from reputable sources; avoid low-quality images)
- Stable, neutral lighting environment(Avoid direct glare; maintain consistent ambient lighting during testing)
- Access to iOS display settings (True Tone, Night Shift, Display & Brightness, Accessibility)(Manual navigation via Settings app)
- Optional: external reference device or monitor for comparison(Helps validate on-device changes)
Steps
Estimated time: 15-25 minutes
- 1
Update iOS and verify device health
Open Settings > General > Software Update and install any available update. Check that the battery and overall device health are good, as hardware issues can influence display behavior.
Tip: A fresh iOS update can improve color handling and stability. - 2
Disable True Tone for baseline evaluation
Go to Settings > Display & Brightness and toggle True Tone off. This creates a neutral baseline so you can compare test images without automatic white-balance adjustments.
Tip: Note the baseline values you capture before re-enabling True Tone. - 3
Set a consistent brightness level
Adjust brightness to a mid-level that feels natural in your testing environment. Avoid extremes that can wash out colors or deepen blacks.
Tip: If possible, disable Auto-Brightness during the test to maintain consistency. - 4
Adjust Night Shift and color filters if needed
If testing for accessibility or print-accurate appearances, consider Night Shift temporarily and explore Color Filters under Accessibility settings.
Tip: Do not leave Night Shift on during baseline testing unless it’s part of your goal. - 5
Compare against reference images under neutral lighting
Open your reference test images across apps and compare them side-by-side with your baseline to observe warmth, tint, and saturation shifts.
Tip: Use the same reference images and keep lighting constant. - 6
Document findings and reset baseline
Record the final settings you plan to use and re-check after a few days to ensure consistency. Save screenshots of your configuration for quick replication.
Tip: Create a short checklist to reproduce the settings later.
Questions & Answers
Can I calibrate my iPhone screen hardware?
No. iPhone hardware does not expose a calibration routine or ICC profiling option. You can only adjust software-based display settings.
There isn’t a hardware calibration option on iPhone; focus on software settings for color tweaks.
What can I adjust to improve color accuracy on my iPhone?
You can adjust True Tone, Night Shift, brightness, and Accessibility color filters to influence how colors appear. These changes are software-based and should be tested against neutral references.
Adjust color through software, not hardware, using True Tone, Night Shift, and color filters.
Will calibrating my iPhone screen affect battery life?
Some features, like True Tone and Night Shift, can have minor effects on battery usage depending on how often they’re active.
Yes, some color features can slightly affect battery life, but usually not dramatically.
Can I match iPhone screen colors to prints or branding guidelines?
You can visually compare to reference prints under controlled lighting, but mobile displays and prints use different color workflows. Soft proofing may help, but expect some variance.
Visually compare with care; exact print matching requires separate workflows.
Are there apps to calibrate an iPhone screen?
Apps can tweak display settings, but none can perform true hardware calibration on the iPhone. Use apps only to manage software adjustments.
Apps can adjust software settings, not hardware calibration.
Watch Video
Key Takeaways
- Establish a repeatable baseline using software controls.
- Hardware-level calibration isn’t available on iPhone.
- Use consistent lighting and reference images for testing.
- Document results to reproduce your setup later.
- Software tweaks improve everyday color perception, not universal accuracy.