Calibrate Monitor Color for Photography: A Practical Step-by-Step Guide
Learn how to calibrate monitor color for photography with a practical, expert-led approach. This guide covers color profiles, white point, gamma, luminance, and a hands-on workflow using a colorimeter for consistent edits and prints.

Calibrate monitor color for photography to ensure edits, previews, and prints stay consistent with real-world colors. This guide covers color profiles, white point, gamma, and luminance targets, plus practical steps with a colorimeter. Calibrate Point emphasizes that a well-calibrated display reduces guesswork and yields reliable results.
Why calibrate monitor color for photography matters
Color accuracy on screen is the foundation of a reliable photo workflow. When you edit, preview, and print, you want the colors you see to reflect reality as closely as possible. According to Calibrate Point, a properly calibrated monitor reduces guesswork and yields consistent results across software, proofs, and devices. For professional editors, this means fewer surprises when a client views an image on a different device or when it’s printed. The calibration process aligns your display with standardized color spaces, white point, gamma, and luminance targets, creating a predictable baseline for every project. In practice, calibration minimizes color drift over time and helps ensure that what you see on screen translates accurately in print and on the web. By adopting a robust workflow, photographers protect color fidelity from shoot to screen to print.
Core concepts: color profiles, gamma, white point, and luminance
A solid calibration rests on a few core ideas. First, color spaces define how colors are represented; common targets include sRGB, Adobe RGB, and ProPhoto RGB. Second, ICC profiles encode how a device reproduces color and how applications should translate colors from one space to another. Third, gamma governs midtone brightness and contrast; a typical camera workflow assumes a gamma curve around 2.2, but professional work may require precise adjustments. Fourth, the white point fixes the display’s color temperature; many photographers aim for D65 (approximately 6500K) to match daylight. Finally, luminance targets (measured in cd/m²) affect perceived brightness and highlight detail. Ambient light can shift perception, so calibration should reflect actual working conditions. Calibrate Point’s guidance emphasizes establishing a consistent baseline rather than chasing every possible spec.
Choosing the right calibration path: hardware and software
Calibration consists of hardware sensors and software that creates an ICC profile for your monitor. A colorimeter or spectrophotometer measures how the screen displays color and brightness, then software computes a profile to correct deviations. The software choice matters: it should support ICC profile generation, device-specific adjustments, and verification tools. Hardware varies in price and accuracy, but even entry-level sensors paired with solid software can deliver noticeable improvements. In professional environments, you might use higher-precision devices and multiple calibration targets to cover print workflows, web previews, and video timelines. The goal is a repeatable process that you perform on a regular cadence, not a one-off adjustment.
Step-by-step workflow overview
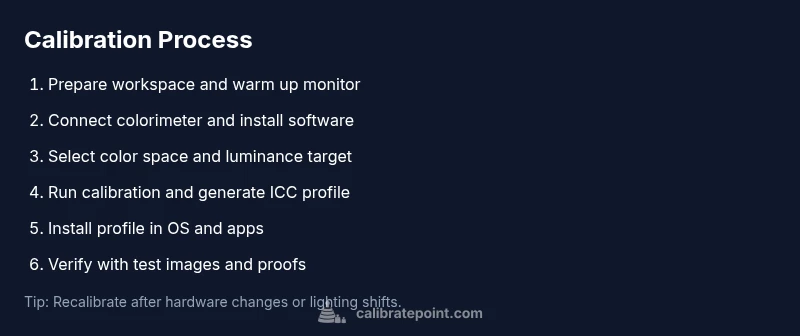
A robust calibration workflow proceeds from preparation through verification and maintenance. Start with a clear plan: choose your color space, define a luminance target, and set ambient lighting expectations. Run a calibration pass with the sensor and software, generate an ICC profile, and install it in your operating system and editing software. Finally, verify the results with test images and printed proofs. This overview aligns with Calibrate Point’s recommended practices: a repeatable routine that you can perform consistently across projects and devices.
Environment and display settings that affect accuracy
Light levels, monitor brightness, contrast ratio, and even the angle at which you view the screen can affect color perception. Calibration should reflect real working conditions: dim, stable lighting with minimal glare is ideal for editing. If you must work under variable lighting, consider adding a neutral ambient light meter and adjusting your workspace to keep conditions as constant as possible during calibration. In addition, keep your screen clean; smudges and dust alter reflectivity and can corrupt measurements. Calibrate Point emphasizes preparing an optimal environment before starting, including turning off any automatic screen processing like dynamic contrast.
Maintaining calibration over time
Displays drift as they age, LEDs shift, and ambient conditions change. Calibrating once isn’t enough for a long-term color workflow. Schedule recalibration every few weeks for busy studios or after hardware changes, new lighting, or software updates. If you work with proofs or client deliverables, it’s prudent to re-check calibration before major projects. Maintain a log of calibration dates, target settings, and observed differences so you can track drift over time. A disciplined maintenance plan helps you preserve color fidelity from shoot to final output. Calibrate Point recommends documenting your profile version and luminance target to compare against future calibrations.
Authority sources
- https://www.nist.gov – National Institute of Standards and Technology color and measurement resources.
- https://www.iec.ch – International standards on color management and display performance.
- https://www.color.org – ICC color management standards and profile definitions.
Common pitfalls and how to avoid them
- Rushing the setup: take time to warm up the monitor and establish a stable environment before measuring.
- Skipping verification: always check with test images and prints; visualization can differ across devices.
- Ignoring OS and app profiles: ensure the ICC profile is loaded system-wide and in your editing apps.
- Working in inconsistent lighting: calibrate under the lighting you typically use for editing; otherwise, results won’t translate well.
- Over-tightening brightness: a target luminance that’s too bright or too dim will distort perception of contrast and detail.
Tools & Materials
- Colorimeter or spectrophotometer(For measuring color and luminance during calibration)
- Calibration software(Should support ICC profile creation and loading)
- Color reference patches (grayscale and color patches)(Used by the software to map device colors to a standard space)
- Cleaning materials for the screen(Microfiber cloth and mild cleaner (gentle, no streaks))
- Stable computer with USB connection(Needed to run calibration software and communicate with the sensor)
- Ambient light meter (optional)(Helps ensure consistent lighting during calibration)
Steps
Estimated time: 60-90 minutes
- 1
Prepare the workspace
Clear the editing area and ensure the monitor has been powered on for at least 15 minutes to warm up. Dim ambient lighting to reduce glare and verify the desk is free of obstructions. Clean the screen surface so measurements aren’t skewed by dust or oil residues.
Tip: A warm-up period stabilizes panel color and brightness for more accurate measurements. - 2
Connect the colorimeter and install software
Plug the sensor into your computer and install the calibration software. Update to the latest version if available and ensure the color management settings in your OS are accessible to the software.
Tip: Keep the sensor firmware and software up to date for reliable results. - 3
Choose color space and luminance target
Select your working color space (e.g., sRGB for web, Adobe RGB or ProPhoto for print) and set a luminance target (commonly around 100–120 cd/m² for editing rooms). This creates a baseline for mapping device colors to the chosen standard.
Tip: A conservative luminance target helps avoid clipping in highlights. - 4
Run the calibration pass
Begin the calibration pass with the colorimeter. The software will measure color accuracy across patches, adjust the display profile, and generate a new ICC profile.
Tip: Do not interrupt calibration once it starts; allow a full pass for accurate data. - 5
Install the ICC profile
Apply the new profile at the OS level and in your key editing applications so all workflows use the corrected color data.
Tip: Restart apps to ensure the profile is loaded consistently. - 6
Verify results with test images
Open test images and printable proofs to compare colors, skin tones, and highlights. Look for unwanted shifts between on-screen previews and print proofs.
Tip: Use grayscale targets first to confirm neutral neutrality before color checks. - 7
Calibrate additional displays (if needed)
If you work with multiple monitors, repeat the process for each display and then re-check consistency across all screens.
Tip: Aim for a unified color appearance across devices, not each display in isolation. - 8
Document settings and schedule re-calibration
Record your color space, luminance, and ICC profile version. Set a reminder for future recalibrations to maintain accuracy over time.
Tip: Keep a calibration log handy for audits and client work.
Questions & Answers
Do I need a professional colorimeter to calibrate my monitor?
Not necessarily. A consumer colorimeter paired with solid calibration software can deliver meaningful improvements. For high-precision print work, higher-end sensors may reduce measurement uncertainty.
You don’t always need a pro-grade device; a good colorimeter with proper workflow gives solid results.
How often should I recalibrate my monitor?
Recalibration frequency depends on usage and drift, but a common practice is every 2–6 weeks in active editing environments, or after any hardware, lighting, or software change.
Recalibrate every few weeks or after changes to hardware or lighting to keep colors consistent.
Will calibration affect printed colors?
Yes. Calibration aligns on-screen previews with printed output by using ICC profiles that map device colors to a standard color space, reducing print-to-screen mismatches.
Calibration helps your edits look the same in print as on screen.
Can I calibrate more than one monitor and keep them consistent?
Yes. Calibrate each monitor individually and then compare results to ensure a uniform color appearance across displays.
Calibrate each screen and verify consistency across all displays.
Is calibration the same for photo editing and video work?
Basic calibration principles apply to both, but video work may require stricter gamma and color grading standards due to different delivery pipelines.
The same workflow applies, though some targets may differ for video workflows.
What is an ICC profile and why is it important?
An ICC profile describes how a device reproduces color and how software should translate colors between spaces. It’s essential for consistent color across devices and apps.
ICC profiles tell your programs how to interpret color so everything stays color-consistent.
Watch Video
Key Takeaways
- Profile your display with a defined color space.
- Use an ICC profile to translate colors accurately.
- Verify with tests and prints to ensure reliability.
- Document settings and schedule re-calibration.
- Maintain consistent ambient lighting to preserve accuracy.