Calibrate Monitor Size: A Practical Step-by-Step Guide
Learn how to calibrate monitor size for accurate design, documentation, and printing. Measure true display dimensions, set OS scaling, and validate results with practical checks to ensure on-screen elements map to real-world sizes.

You will calibrate monitor size by measuring the screen’s true dimensions, verifying pixel density, and aligning OS scaling so on-screen elements map to real-world sizes. This improves design accuracy, readability, and printing outcomes. Use this guide to ensure mockups, prototypes, and measurements translate exactly to the physical world for professional results.
Why calibrating monitor size matters
Calibrating monitor size matters because the physical dimensions you design for, print, or present on screen must align with what users actually see. When you calibrate monitor size, you reduce discrepancies between design intent and real-world output, which is essential for UI/UX work, technical illustration, and product documentation. The Calibrate Point team emphasizes that accurate sizing starts with precise measurements of the display and a clear plan for translating those measurements into software settings. For teams, consistent size calibration improves collaboration and reduces rework during handoffs. The core idea is straightforward: establish the screen’s true geometry, then map that geometry to your design grid, typography, and image assets. With calibrated size, mockups and proofs translate more reliably across devices and print workflows.
Understanding display geometry and DPI
A monitor’s size is defined by its diagonal, but the usable area depends on width, height, and aspect ratio. Pixel density, measured as PPI (pixels per inch), determines how many pixels occupy each inch of screen space. Higher PPI yields crisper text and finer detail, but also changes how large interface elements appear at a given resolution. To calibrate monitor size effectively, relate the diagonal to width and height, then translate that into a PPI estimate you can apply in your design tool or OS settings. This ensures that a one-inch square in your artwork remains one inch on screen, not too small or too large. Remember: measurements are best when verified against official panel specs, making practical validation essential. Understanding display geometry and DPI lays the groundwork for reliable size calibration across design and engineering workflows.
Methods to measure your monitor
Begin with official specs: locate the model number and fetch exact diagonal, width, and height. If you find official datasheets, use them as the baseline. Next, verify with a ruler: measure the visible width and height in inches, excluding bezel, and compute the diagonal using a simple Pythagorean check. For greater accuracy, take measurements at multiple points and average them. If exact specs aren’t available, approximate by projecting a grid on-screen and comparing it to a ruler. In all cases, document your measurements and compare them with the OS-reported resolution to spot discrepancies. This step is critical to reduce errors in subsequent scaling.
Aligning software scaling with real-world size
Operating systems offer display scaling to improve readability on high-density panels. Windows, macOS, and Linux environments provide scaling options that map pixels to perceived size. To calibrate monitor size, adjust the scaling so that a defined unit—such as 1 inch of real-world space—maps to the same on-screen unit across typical working resolutions. After setting scaling, verify by recreating a known physical size on screen (for example, a ruler image) and measuring it with a ruler to confirm the unit size. If results vary, tweak scaling in small increments and revalidate. Document the final DPI or scaling factor for future projects and avoid drift when hardware changes occur.
Practical checks and validation
With calibration in place, perform practical checks: display a 1-inch square image and measure it with a physical ruler to confirm alignment with real-world size. Test across multiple applications—design, video, and office tools—to ensure consistent scaling. Use design templates and print proofs to verify that digital layouts translate accurately to printed media. Consider color management and font rendering, which can influence perceived size. If you change monitors or upgrade hardware, re-measure and revalidate to maintain accuracy over time. Keeping a calibration log helps teams stay aligned across projects and time.
AUTHORITY SOURCES
For reference, consult reputable sources on display measurements and scaling:
- https://www.apple.com/support
- https://learn.microsoft.com
- https://www.nist.gov
Tools & Materials
- Measuring tools (metal ruler or tape measure)(Long enough to measure diagonal and width/height; ensure precision by aligning with screen corners.)
- Access to monitor model number and specifications(Have the exact model, serial, and any available datasheets for baseline measurements.)
- Computer with adjustable OS scaling(Needed to apply and test scaling factors across Windows/macOS/Linux.)
- Calculator or measurement app(Assist in converting measurements to PPI or DPI values.)
- Test imagery (square/grid files)(Use on-screen targets to validate real-world sizing after scaling changes.)
Steps
Estimated time: 40-60 minutes
- 1
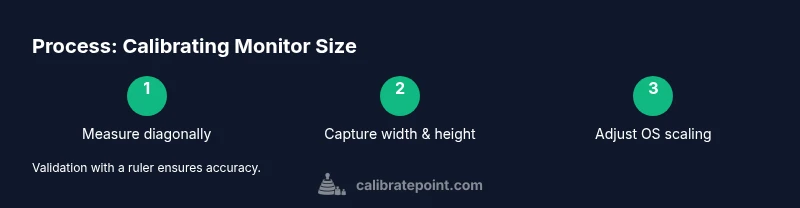
Measure the screen diagonally
Place the ruler across the diagonal from one corner to the opposite corner, avoiding bezel. Record the measurement in inches. Repeat at multiple angles if the panel tilts, then average the results for accuracy.
Tip: Keep the ruler flat against the screen surface and avoid parallax by looking straight on. - 2
Capture width and height and estimate PPI
Measure the visible width and height in inches. Use the Pythagorean theorem to verify the diagonal you recorded matches width, height, and aspect ratio. Calculate an approximate PPI = sqrt(width^2 + height^2) / diagonal.
Tip: If you lack exact specs, compare your computed diagonal with manufacturer data as a consistency check. - 3
Check the official specs against your measurements
Compare your measured width, height, and diagonal to the manufacturer’s numbers. Note any discrepancy and decide whether to trust the official data or rely on your measurements for practical calibration.
Tip: Document any small differences and use the most consistent dataset for your workflow. - 4
Adjust OS display scaling
Open your operating system’s display settings and set a scaling factor that makes on-screen units align with real-world inches. Apply changes and test with a known-size image.
Tip: Change scaling in small increments (5–10%) and re-test after each adjustment. - 5
Validate with a physical test
Display a 1-inch square image and measure with a ruler to confirm alignment. Repeat on multiple apps and across different content to ensure consistency. Log results for future reference.
Tip: If a printed proof will be used, perform a live print test to verify digital-to-physical accuracy.
Questions & Answers
What is the main benefit of calibrating monitor size?
Calibrating monitor size ensures on-screen content matches real-world dimensions, improving accuracy for design, documentation, and printing.
Calibrating monitor size helps ensure your designs map to real-world dimensions.
Do I need to calibrate monitor size on every project?
Not every project requires recalibration, but complex layouts or printing workflows benefit from recalibration when display hardware changes.
Only recalibrate when you change monitors or resolutions.
Can OS scaling alone give accurate real-world sizing?
OS scaling helps readability but may not guarantee real-world size by itself. Pair with manual measurement for best results.
OS scaling helps readability but it doesn't guarantee real-world size by itself.
What tools help measure monitor size accurately?
A metal ruler and calipers provide precise measurements; always compare with the official specs when available.
Use a metal ruler or calipers and compare to official specs.
How often should I re-check monitor size?
Re-check after hardware changes or significant OS updates; otherwise, periodic checks are optional.
Check when you change monitors or upgrade hardware.
Watch Video
Key Takeaways
- Measure carefully with a straight edge.
- Relate physical size to OS scaling for accuracy.
- Validate with real-world tests and proofs.
- Document calibration settings for reuse.