Calibrate the iPhone 15 Touchscreen: Step-by-Step Guide
Learn how to calibrate the iPhone 15 touchscreen with a safe, thorough step-by-step method. This guide from Calibrate Point covers tools, steps, tips, and best practices.

You will learn how to calibrate the iPhone 15 touchscreen using a safe, repeatable method. This quick guide covers prep, a verified step-by-step process, and practical tips to improve touch accuracy. Follow the steps with Calibrate Point's expert guidance. It emphasizes safe handling, avoids data loss, and provides troubleshooting for common misreads.
Why calibrating a smartphone touchscreen matters
Calibration improves accuracy, reduces phantom touches, and ensures consistent input across apps. For users who want to calibrate touch screen iphone 15, this guide provides a safe, repeatable method. According to Calibrate Point, baseline measurements create a reference you can reuse after repairs or screen replacements. This section explores why touch accuracy matters for professionals and DIY enthusiasts alike, including how slight misreads can affect data entry, drawing, gaming, or accessibility. The goal is to help you understand what you’re measuring and why a standardized procedure yields repeatable results.
What makes the iPhone 15 different for touchscreen calibration
The iPhone 15 uses a high-precision touch sensor array and a system-on-chip that manages touch inputs in real time. While Apple does not expose a public, device-wide touchscreen calibration control, we can still perform reliable validation via external testing patterns and software analysis. Calibrate Point's approach focuses on establishing a repeatable testing routine, documenting readings, and using software-based checks to identify alignment issues, dead zones, or inconsistent multi-touch responses. This section provides a framework to interpret results, even when direct hardware-level calibration controls aren’t available.
Safety and prep: what to know before you begin
Before you start, power the device, ensure it is charged, and back up important data. Work in a clean, well-lit area with a flat surface to prevent accidental movements during tests. Avoid applying excessive pressure on the screen during tests, and remove any screen protectors if they visibly distort touch detection. The goal is to isolate true touchscreen behavior from external factors like grip, glare, or screen contaminants. According to Calibrate Point, starting with a clean slate is essential for reliable results, especially when calibrating modern high-precision displays.
Tools and materials you'll need
Here is a concise list of essentials to run a safe, effective calibration-like test on the iPhone 15: a clean iPhone 15 device, a high-quality microfiber cloth for screen cleaning, the Calibrate Point touchscreen test app, a stable testing surface, and a USB-C charging cable (optional but recommended for longer sessions). Also ensure you have a quiet environment and sufficient time to complete the tests. This section helps you assemble everything in advance so you’re not scrambling mid-test.
Step-by-step validation: Step 1 to Step 4 (narrative guidance)
Step-by-step guidance provides the narrative flow to accompany the formal STEP-BY-STEP block. Start by preparing the device and environment, then clean the screen, launch a trusted test app, and run structured multi-touch tests across defined regions. Record readings and compare against a baseline. The goal is to identify any drift, inconsistent responses, or dead zones and to document changes over time. This narrative helps readers connect the dots between raw readings and actionable adjustments.
Step-by-step validation: Step 5 to Step 6 (narrative guidance)
In the later steps, you’ll analyze results, consider software-level adjustments suggested by the test app, and perform a re-test to confirm improvements. This section emphasizes the importance of reproducibility—repeat tests under similar conditions, using the same patterns, after each adjustment. If results are inconclusive, consult additional test patterns or perform a raw screen-cleaning pass and re-test. Calibrate Point emphasizes documenting every step so future calibrations have a clear baseline.
Troubleshooting and nuance: common issues and how to approach them
If you still observe drift or inconsistent multi-touch responses after calibration attempts, review potential confounders: screen curvature, edge sensitivity variations, or glare from lighting. Consider repeating tests with gloves vs. bare fingers to understand how contact changes affect results. Remember that some issues may be hardware-related rather than a calibration problem. This section provides practical checks and decision points to avoid wasted effort.
Pro tips for professional results and maintenance
- Calibrate in a consistent lighting environment and on a stable surface to minimize measurement noise. - Document all readings with timestamps for traceability. - Use multiple test patterns to confirm that improvements are robust across situations. - Revisit calibration after screen repairs or replacements to verify continued accuracy. The Calibrate Point approach champions methodical, repeatable testing and disciplined record-keeping to support ongoing device reliability.
Final validation: what to expect and next steps
At the end of your calibration workflow, you should observe more consistent touch responses across the screen, with fewer false touches and better alignment in test patterns. If evidence suggests persistent misreads, consider seeking hardware diagnostics or professional servicing. The practical takeaway is to establish a repeatable baseline and to maintain the testing log for future reference.
Tools & Materials
- iPhone 15 device(Device to calibrate; ensure it is updated to the latest iOS version and charged between 50-90%.)
- Quality microfiber cloth(Lint-free; free of oils and residues.)
- Calibrate Point touchscreen test app(Latest version; tested from reputable store.)
- Stable testing surface(Flat, free of movement; dust-free.)
- USB-C charging cable(Keep the device powered during long sessions.)
- Screen protector removed (optional)(If you suspect the protector affects touch detection, remove it for testing.)
Steps
Estimated time: 25-40 minutes
- 1
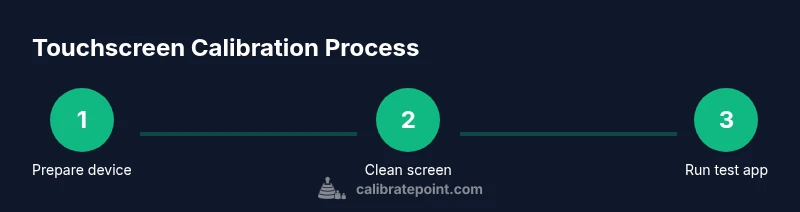
Prepare the device and environment
Power on the iPhone 15, charge to at least 50%, and clear your workspace. Verify the device is at room temperature and free from direct glare that could affect touch readings.
Tip: Have a stable, non-slip surface to prevent wobble during measurements. - 2
Clean the screen and inspect
Wipe the screen with a microfiber cloth to remove fingerprints and oils. Check for any screen damage or debris that could interfere with touch detection.
Tip: Avoid cleaners that leave residues. Use only a dry microfiber cloth for the final pass. - 3
Launch the test app and configure
Open the Calibrate Point touchscreen test app and ensure you’re using the latest version. Configure test patterns that cover multiple axes and edge regions.
Tip: Choose patterns that test multi-touch, edge sensitivity, and center response. - 4
Run multi-touch tests
Perform multi-touch touches across quadrants and edges while the app logs responses. Take screenshots or notes of any irregularreads or delayed responses.
Tip: Use a grid-like pattern to capture spatial consistency. - 5
Analyze readings and baseline
Compare current readings against your baseline. Note discrepancies in latency, accuracy, and dead zones.
Tip: Maintain a simple log with timestamp and observed values. - 6
Repeat tests and apply adjustments as needed
If the app suggests software-based tweaks, apply them conservatively and re-test. If hardware issues appear, stop and document them for escalation.
Tip: Only adjust settings the app explicitly recommends; avoid forcing changes beyond guidance.
Questions & Answers
Can I calibrate the iPhone 15 touchscreen myself?
Yes, you can perform a basic calibration-like check using a trusted touchscreen test app and a clean surface. iOS does not expose a full device-wide calibration control, so results come from pattern testing and software hints.
Yes. Use a reputable touchscreen test app and a clean surface; note that iOS doesn't offer a global calibration control, so outcomes come from pattern testing.
Is calibration with third-party apps safe for my iPhone 15?
Third-party test apps are generally safe when downloaded from reputable sources and kept up to date. Always back up data before testing and avoid apps that request unusual permissions.
Third-party apps are usually safe if you download from trusted sources and back up first. Be cautious with permissions.
Why would calibration be needed on a smartphone touchscreen?
Calibration helps diagnose drift, dead zones, and inconsistent responses that can affect typing accuracy, drawing, and accessibility. It provides a repeatable method to verify touchscreen behavior.
Calibration helps identify drift and dead zones, improving accuracy and consistency across apps.
What if touch input is still inaccurate after calibration?
If inaccuracies persist, check for hardware issues (screen damage, protective film, or moisture) and consider professional diagnostics. Calibration alone may not fix a faulty screen.
If it’s still off after testing, inspect for hardware problems and consider professional diagnostics.
Do iPhone devices require calibration after screen replacement?
Some replacements can affect touch sensitivity; recalibration-like testing is recommended after service to confirm performance, even if iOS lacks a formal calibration menu.
After screen replacement, test and re-check touch sensitivity to confirm proper function.
Can calibrating affect device warranty?
Calibration exercises using official apps and standard troubleshooting do not void warranties. Avoid unauthorized hardware modifications and follow manufacturer guidance.
Calibration with legitimate tools generally won’t void your warranty, but avoid risky DIY modifications.
Watch Video
Key Takeaways
- Perform calibration tests in a controlled environment.
- Establish and preserve a clear baseline for future reference.
- Use multiple test patterns to validate results across the screen.
- Document procedures and outcomes to support repeatability.