Calibrate Touch Screen Repair: A Practical Guide
Learn how to calibrate touch screen repair with a step-by-step approach, safety checks, and proven methods to ensure accurate touch input and reliable performance.

By the end of this guide, you will be able to calibrate a touch screen after repair, align touch input with accuracy, and validate results across common devices. You’ll learn when to use OS calibration tools vs. vendor software, plus essential safety and verification steps to avoid common misalignment issues. Prepare your workspace, gather the right tools, and follow the steps to achieve reliable results.
Why calibrate touch screen repair matters
After repairing a touchscreen, misalignment and inaccurate touch input are common. Calibration corrects the coordinate mapping between your finger and on-screen response, ensuring that taps register where you intend. For professionals, getting calibration right reduces rework time, improves user experience, and minimizes returns. This guide from Calibrate Point explains how to calibrate touch screen repair safely and effectively, with practical steps you can follow in a workshop or on-site.
Calibrating readouts also helps when screens have been replaced, when protective glass has been added, or when firmware has been updated. Accurate calibration reduces the need to guess where to press, which is critical for devices used in field service, diagnostics, and customer-facing interfaces.
Brand-wise, Calibrate Point emphasizes repeatable calibration routines to minimize drift over time. According to Calibrate Point, a consistent calibration workflow yields more reliable performance and lowers service calls for misalignment.
Understanding calibration basics for touch screens
Touch screen calibration establishes a precise mapping between touch coordinates and display coordinates. Modern devices often rely on capacitive sensors that detect multiple points of contact, while older or specialized screens may use resistive technologies. Regardless of the subtype, calibration compensates for any geometric distortion, offset, or scaling that occurs during assembly, replacement, or aging.
In practice, calibration tools present a target grid or crosshair pattern. You touch each target to register the exact point, and the software builds a new calibration profile. If the profile aligns closely with real-world taps, your device will respond where you expect it to. This process is also essential after repairing a display, replacing a digitizer, or updating firmware that affects the touch controller.
Safety and prerequisite checks before you start
Power down the device completely before you begin. Disconnect any accessories and unplug from power when possible to minimize risk. Work on a nonstatic surface and wear an anti-static wrist strap to prevent electrostatic discharge from damaging sensitive components.
Verify that you are using the correct calibration method for your device. If you are uncertain whether your device supports software calibration, consult the manufacturer’s guidelines or vendor utilities. Keep a log of the device model, serial number, and firmware version to reference if recalibration is needed later.
Choosing the right calibration method for your device
Most consumer devices support software-based calibration via the operating system or the manufacturer’s utilities. For some devices, a dedicated calibration tool provided by the digitizer or display vendor is required. In high-precision scenarios, you may use a hardware calibrator or a calibration profile exported from a controlled lab setup. The key is to choose a method that targets the exact touch controller in your device and to follow the official instructions to avoid introducing distortions.
If you recently replaced the digitizer or display, re-check that the connectors are seated properly and that the calibration method aligns with the new components. Firmware updates can also alter calibration behavior, so verify you’re on the recommended version before starting.
Preparing the workspace and environment
Set up a clean, well-lit workspace with a stable, non-slip surface. Gather the tools you'll need and ensure your device is accessible (screens, digitizer, connectors) without forcing cables. A static-safe environment reduces the risk of unintended electrical discharge that could affect the calibration process. Have a soft cloth ready to wipe the screen before calibration to ensure measurement accuracy and to avoid smudges influencing touch input.
How calibration tests verify accuracy
After applying a calibration profile, run a quick validation test. Many OS tools provide a touch accuracy check or a visual alignment test. You should be able to touch near the center of the screen and have the cursor or highlight align precisely with your finger. If discrepancies persist, re-run the calibration with adjusted sampling points or try an alternative method if available. Documentation of test results helps track stability over time.
Common issues and how calibration helps fix them
Common issues include slight offset between touch input and display, small dead zones where taps are not registered, and jitter when swiping. Calibration works by re-mapping touch coordinates to the display grid, reducing these errors. In some cases, temperature variance or screen flex can cause temporary misalignment; re-calibrating after such changes often restores accuracy.
Best practices for calibration across device types
Tablets, laptops with touchpads, and monitors each have unique calibration considerations. For mobile devices, use the built-in OS calibration feature or vendor utilities designed for touch input. For external monitors with touch input, calibrate at the recommended resolution and verify that the device’s color settings do not affect touch responsiveness. Document environment specifics (screen size, resolution, hand position) to improve repeatability across devices.
Post-calibration validation steps
Once calibration is complete, perform a multi-region test: tap controls at the center and edges, perform a grid-based touch test, and perform typical tasks you expect to run on the device. Confirm no fingernail or stylus input lag is observed and that pinch-to-zoom remains accurate. If measuring tools are available, compare measured coordinates against expected values and adjust as needed.
Next steps after calibration
Save the calibration profile in the device’s memory or a centralized management system for easy reapplication after firmware updates or hardware changes. Maintain a calibration log including date, device model, calibration method, and test results. Periodic checks—especially after reassembly or impact events—help preserve touch accuracy over the device’s lifespan.
Quick reference checks and notes
Always back up important data before performing calibration, in case you need to revert to a previous profile. Use official tools or trusted vendor utilities to avoid corrupting the touch controller. If calibration consistently fails, consider re-seating connectors, inspecting for damaged cables, or seeking professional calibration services.
Tools & Materials
- Precision screwdriver set(To remove/ reinstall screws around the bezel)
- Anti-static wrist strap(Prevent ESD damage to internal components)
- Calibration software/tool (official or OS built-in)(Use vendor-provided utility or OS calibration tool)
- USB-C or USB-A cable(For calibration or firmware updates)
- Microfiber cloth(Clean screen before calibration)
- Static-free workspace mat(Improve safety during repair)
Steps
Estimated time: 60-90 minutes
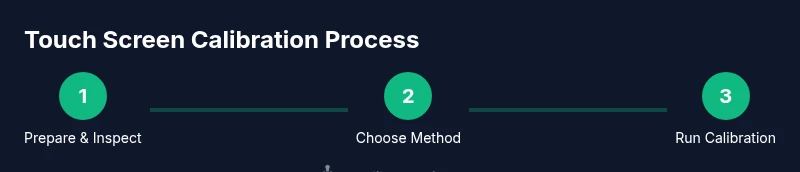
- 1
Power down and prepare device
Shut down the device completely and unplug any power sources. Remove peripherals to prevent interference during calibration. Ground yourself using the anti-static strap before handling internal components.
Tip: Work on a non-static surface and keep the device on a stable, flat desk. - 2
Inspect hardware connections
Open the enclosure according to the manufacturer’s guidelines and visually inspect digitizer and display connectors. Reseat any loose cables carefully to ensure a clean connection before calibrating.
Tip: Use a touch-friendly lighted magnifier if connectors are small. - 3
Choose calibration method
Select the calibration method appropriate for your device: OS-level calibration for mainstream devices, vendor utilities for specialized hardware, or a hardware calibrator if required. Confirm firmware version compatibility before proceeding.
Tip: If in doubt, start with the OS calibration tool first. - 4
Launch calibration tool
Open the chosen calibration software and start the process. Follow on-screen prompts precisely, touching the targets as they appear to map input coordinates.
Tip: Keep your finger steady and touch with the center of your finger for accuracy. - 5
Capture multiple reference points
Calibrate using multiple reference points across the screen to improve overall accuracy. Avoid focusing only on the center; include edge regions to reduce offset.
Tip: If the tool allows, enable edge sampling for better coverage. - 6
Save and apply profile
Save the new calibration profile to the device and apply it. Some systems require a restart to fully activate the profile.
Tip: Label the profile with device model and date for future reference. - 7
Run a validation test
Perform a quick on-device validation by tapping targets and performing basic gestures. Confirm alignment across center, corners, and edges.
Tip: If misalignment persists, retrace steps or choose an alternate calibration method. - 8
Document results
Record test outcomes, timestamp, and any observed drift over time. This helps with future maintenance and troubleshooting.
Tip: Keep a simple log or checklist for quick audits. - 9
Re-test after changes
If you replace components again or update firmware, re-run calibration and validation to ensure continued accuracy.
Tip: Schedule routine checks after major maintenance. - 10
Close up and monitor performance
Reassemble the device securely and monitor performance under real-world usage for the first 24–48 hours. Look for any recurring misalignment and plan a re-calibration if needed.
Tip: Make calibration a standard post-repair step.
Questions & Answers
What does calibration fix after touch screen repair?
Calibration fixes the mapping between touch input and display coordinates, correcting misalignment that often appears after repair or component replacement.
Calibration fixes touch input alignment after repair by re-mapping coordinates.
Do I need to calibrate after every screen replacement?
Not every replacement requires calibration, but many devices benefit from a calibration pass to ensure accurate input and prevent drift.
You should calibrate after replacement if you notice misalignment.
Can software calibration harm your device?
Calibrating with built-in OS tools or official vendor utilities is safe when followed correctly. Avoid third-party tools from untrusted sources.
Calibration using official tools is safe when you follow instructions.
What if calibration keeps failing?
Check internal connections, verify firmware compatibility, and try an alternative calibration method if available. Persistent failures may indicate hardware issues.
If calibration fails, check connections and firmware, and try another method.
Is hardware calibration possible without official tools?
In most consumer devices, calibration is software-based. Hardware calibration is uncommon outside specialized labs.
Most devices rely on software calibration, not hardware tools.
How often should calibration be performed?
Calibrate after major repairs or component changes, then test for drift during normal use and recalibrate as needed.
Calibrate after repairs and when you notice drift.
Watch Video
Key Takeaways
- Calibrate after repair to ensure accurate touch input
- Choose the calibration method that matches your device
- Validate results with multi-region tests
- Document calibration steps for future maintenance