Calibrate Phone Touch Screen: A Practical Step-by-Step Guide
Learn how to calibrate your phone touch screen with a safe, practical, step-by-step method. Diagnose responsiveness issues, pick software-based or built-in tools, and validate results. Calibrate Point walks you through best practices for Android and iOS devices.

This guide helps you diagnose touch responsiveness on a smartphone and perform a safe calibration. You’ll learn when calibration is needed, how to choose software-based or built-in tools, and a clear workflow. Start with a clean screen, a trusted calibration method, and test across multi-touch gestures.
Why touch screen calibration matters
Over time, a phone’s touch screen can appear less accurate due to hardware wear, software updates, or buildup of oils and dust. Calibration helps align the screen’s input map with your finger movements, reducing phantom touches, missed taps, and edge inaccuracies. For professional technicians and DIY enthusiasts, understanding when calibration is appropriate ensures you don’t replace hardware unnecessarily. At Calibrate Point, we often see devices that respond inconsistently after a long period of use, and software-based re-mapping can restore reliable input without hardware interventions. In this section we explore the factors that influence calibration outcomes and how to distinguish real drift from transient glitches.
When calibration helps vs normal wear
Calibration is most helpful when you notice consistent issues such as lag, misregistration, areas of the screen that don’t respond, or occasional touch dropouts. It is not a cure for a physically damaged panel, a cracked glass, or moisture intrusion. Before calibrating, inspect the screen for visible damage and ensure the device isn’t running beta software. The Calibrate Point team recommends a quick pre-check: swipe across the screen, perform multi-finger gestures, and note any zones that feel abnormal. If issues persist after calibration, consider repair rather than iterative software tweaks.
Software-based vs hardware-based calibration
Software-based calibration maps touch input more precisely within the device’s OS and can be reversed easily; hardware-based calibration adjusts underlying sensors and may require factory service. In most consumer devices, software adjustments are sufficient to restore typical responsiveness. Hardware interventions are significantly more involved and may require professional service or replacement parts. This distinction helps you decide whether a quick software refresh is worth attempting before seeking repair.
Safety and prerequisites
Before you begin, back up important data and ensure the device is charged to avoid mid-calibration power loss. Calibrate Point recommends performing the process in a well-lit, clean environment with the screen free of oils and moisture. Remove screen protectors if they interfere with touch accuracy and use only trusted calibration tools—prefer built-in options or reputable apps from official stores. If your device shows signs of damage, cracks, or moisture, do not proceed until resolved.
Tools and materials you’ll need
Gather a clean microfiber cloth, a charged device, and a trusted calibration app or the device’s built-in calibration feature. If you have access to a test stylus, keep it handy for precision taps, but it’s optional. Ensure you have a stable Wi‑Fi connection for app updates and review any permissions requested by calibration software. Keeping a backup of your data is optional but prudent before major OS changes.
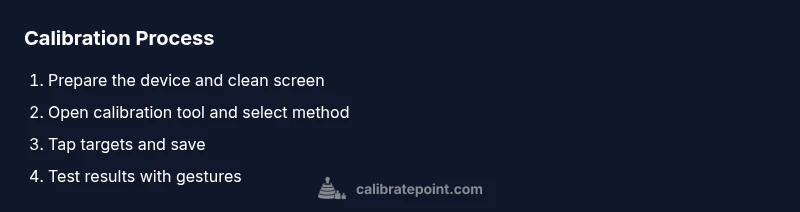
Step-by-step overview of the calibration workflow
This section provides a high-level roadmap: prepare the device, access calibration tools, select a calibration method, perform guided taps, save changes, and verify results. Whether you’re using built-in features on Android or iOS, or a third-party app, the core flow remains the same: ensure a clean screen, follow on-screen prompts, and retest after saving. Always be prepared to revert if symptoms recur.
Android-specific calibration options
Android devices vary widely in their calibration paths. Common routes include Settings > Display > Touch calibration (if available) or Settings > Accessibility > Calibration options. If your device lacks a built-in calibrator, a reputable calibration app from the official store is a safe alternative. Keep in mind that some OEM skins apply dynamic gesture mappings that can re-adjust after major updates, so re-test after each OS change.
iOS-specific calibration approaches
iPhones typically rely on automatic smoothing and calibration within iOS itself, with limited user-facing hardware calibration controls. If you experience persistent misalignment, perform a general maintenance routine: restart, update to the latest iOS version, and reset settings if needed (without erasing data). If problems persist after software maintenance, hardware issues should be considered.
Third-party apps and best practices
If you opt for a third-party calibration tool, choose apps with positive reviews and clear safety permissions. Avoid apps that request invasive access or dubious device-level changes. Always perform calibration in a single-user session to prevent background processes from interfering, and re-test with a diverse set of gestures and screen zones.
Validating calibration results with tests
After saving the calibration, run practical tests: light taps, long presses, two-finger gestures, and edge taps across all corners. Compare results against prior behavior and note any improvements. If issues remain or reappear after reboot, revert to the previous calibration profile or consult device support.
Maintenance and long-term care for touchscreen accuracy
Regular cleaning, firmware updates, and periodic re-testing help maintain accuracy. Avoid aggressive screen cleaners or abrasive materials, and protect the display with a high-quality screen protector that doesn’t impede touch input. Document calibration settings so you can rollback if needed and schedule a routine check every few months or after major software updates.
Tools & Materials
- Clean microfiber cloth(Use to remove oils and fingerprints before starting.)
- Calibration tool (built-in or reputable third-party app)(Choose from trusted sources; ensure permissions are granted.)
- Phone charged(Keep battery above 50% to prevent mid-process shutdown.)
- Screen protector (optional)(If present and interfering, remove for accuracy.)
- Device backup(Backup data before major changes.)
Steps
Estimated time: Total time: 15-25 minutes
- 1
Prepare and clean the screen
Power on the device, remove any screen protector if it hinders accuracy, and wipe the display with a microfiber cloth until completely dry. This minimizes oils that can affect touch readings.
Tip: Use a light, circular motion and avoid excess liquid cleaners. - 2
Open the calibration tool
Launch the built-in calibration feature if available, or install a reputable calibration app from the official store. Review requested permissions and proceed when ready.
Tip: Prefer built-in options first for compatibility and reversibility. - 3
Choose calibration method
Select software-based calibration. Hardware calibration options, if offered, may require professional service and are not usually user-accessible.
Tip: If uncertain, start with software-based alignment. - 4
Tap targets as directed
Follow on-screen prompts to tap center points across the screen. Maintain a steady touch and avoid multiple fingers at once to get accurate mappings.
Tip: Keep your finger perpendicular to the screen for consistency. - 5
Save changes and reboot
Confirm the new calibration profile and reboot the device if prompted. Reboot ensures mappings are fully applied.
Tip: If a reboot is inconvenient, perform a soft restart first. - 6
Test with real gestures
After the reboot, test common actions: taps, swipes, pinch-zooms, and edges. Validate that inputs feel natural and responsive.
Tip: Document any zones that still feel off for potential follow-up.
Questions & Answers
Is calibration necessary for every phone?
Not for all devices. Calibrating can help when you notice lag, missed taps, or misalignment, but hardware damage will not be fixed by software tweaks.
You usually don’t need to calibrate unless you notice touch issues. If you do, use trusted tools and test afterward.
What do I need before starting?
A clean screen, a charged device, and a trusted calibration tool or built-in option. Back up data if you’re making major changes.
Make sure the screen is clean, the device is charged, and you have a trusted calibration tool ready.
Can calibration fix all touch issues?
Calibration can improve responsiveness but won’t fix hardware faults such as a damaged digitizer or cracked glass. Seek repair if problems persist.
Calibration helps most software-based misreads but hardware problems need service.
How long does calibration take?
Most calibration runs take 10-25 minutes, depending on device and method. Plan for a short window without interruptions.
Usually under half an hour; have a quiet moment to complete it.
Should I calibrate after replacing the screen?
Yes. Recalibration is advisable after hardware changes to ensure input maps align with the new panel.
If the screen was replaced, recalibrate to ensure accuracy.
What if calibration makes it worse?
Revert to the previous calibration profile or reset to defaults, then test again. If issues continue, consult support.
If things get worse, go back to the old settings and seek help.
Watch Video
Key Takeaways
- Calibrate when responsiveness drifts; hardware faults require repair.
- Always start with a clean screen and trusted tools.
- Test after saving calibration with diverse gestures.
- Hardware issues may limit calibration effectiveness.
- Maintain calibration by periodic checks after updates.