How to Fix Calibration on Android: A Practical Guide
Learn how to fix calibration on Android with a structured, safe, step-by-step approach. Improve display accuracy, touch response, and sensor precision using trusted methods and practical tips.

This guide shows you how to fix calibration on Android by addressing display, touch, and sensor calibration through a safe, step-by-step workflow. Start with basic checks, use built-in tools or trusted apps, and verify results with simple tests. Following these steps helps restore accurate color, touch responsiveness, and reliable sensor readings.
Why calibration on Android matters
Calibration on Android matters because it directly affects daily usability, from color accuracy on photos and videos to touch precision in games and typing, and sensor reliability for navigation apps. If you’re asking how to fix calibration on android, you’re seeking a reliable workflow to restore consistency across display, touch, and motion sensors. According to Calibrate Point, a structured calibration approach reduces drift and increases confidence in device performance. The goal isn’t to achieve perfection in every metric, but to restore practical accuracy that you notice in everyday tasks. In this guide, you’ll learn practical checks, safe methods, and OEM-agnostic approaches you can adapt to most Android devices, with actionable steps you can follow today. By the end, you’ll know how to recalibrate display color, touch sensitivity, and key sensors, and you’ll have strategies to verify results without risking data or device safety.
The different calibration needs on Android
Android devices integrate several calibration pathways: display color and brightness calibration, touch input calibration, and sensor calibration (accelerometer, gyroscope, compass). Display calibration ensures color fidelity and gamma accuracy for screens and cameras; touch calibration improves input precision across apps; sensor calibration helps navigation, AR apps, and motion-based tools stay aligned with real-world movement. Calibrating these components requires a mix of built-in tools, calibration apps from trusted sources, and careful data handling. This section clarifies what you should expect from each type and how they interact, so you can plan a complete calibration workflow that matches your device and usage. Remember, Calibrate Point emphasizes starting with the least invasive methods and only moving to third-party apps when necessary.
Safety-first: prep steps before touching settings
Before you begin any calibration activity, ensure you back up essential data and charge the device to at least 50%. If your device offers developer options, enabling them can help you access advanced tools, but avoid enabling risky developer features unless you know their impact. Work in a calm environment to minimize accidental taps, and keep the device away from extreme temperatures that can affect screen color and sensor readings. These preparatory steps reduce the risk of unintended changes and make it easier to revert if something goes wrong. Calibrate Point recommends documenting the baseline state so you can compare post-calibration results.
Calibrating display color and brightness
Display calibration centers on color balance, gamma, and brightness consistency across viewing conditions. Start with a built-in tool if your OEM provides one (for example, color temperature or night mode adjustments) or use a trusted third-party calibration app. When testing, compare neutral gray swatches under different lighting and verify that whites remain white rather than yellow or blue. Adjust color temperature toward a natural balance and maintain a comfortable brightness level that doesn’t wash out details in shadows or highlights. Validate results by opening photos, videos, and UI elements to ensure colors look natural and consistent.
Calibrating touch input and screen responsiveness
Touch calibration ensures that taps, swipes, and gestures map accurately to the screen. If your device has a built-in touch calibration flow, run it and follow the on-screen prompts. If not, use a reputable calibration app that offers multi-point alignment tests. During testing, perform common gestures—tap center, edges, double-tap, and long-press—and verify that the response matches your intent. If you notice drift or lag, re-run the test and adjust sensitivity or calibration curves as needed. Remember that case, screen protectors, or gloves can affect touch accuracy, so remove obstructions during testing and re-test after adjustments.
Sensor calibration basics: accelerometer, gyroscope, and compass
Device sensors are essential for navigation, AR apps, and fitness tracking. Many Android devices include sensor test utilities that guide you through basic alignments for accelerometer and gyroscope. For compass calibration, rotate the device in a figure-eight motion as instructed by the app or OS tool. If the device lacks built-in sensor calibration, rely on reputable calibration apps that perform sensor self-tests and report drift levels. After performing sensor calibrations, validate by opening a map app or a motion-based game that relies on orientation and movement accuracy.
Using calibration apps safely and effectively
Third-party calibration apps can help when OEM tools are limited, but choose apps from reputable developers with good reviews and clear permission models. Read privacy policies to understand what data the app accesses, and avoid apps that request unnecessary permissions. Start with an app that offers guided color and sensor tests, then compare results against baseline measurements you recorded before calibration. If an app’s recommendations suggest drastic changes, consider alternative methods or revert to defaults and test again. Always back up settings before making sweeping changes.
How to interpret results and avoid over-calibration
Calibration should reduce drift and improve consistency, not create new anomalies. After you complete the steps, run a quick, repeatable test across lighting, touch accuracy, and sensor-driven apps. Look for stability across sessions, not just a single measurement. If results vary significantly between tests or lighting conditions, re-check each parameter, and consider repeating the calibration in a controlled environment. Calibrate Point reminds users to favor gradual, reversible adjustments over sweeping changes, which minimizes the risk of over-calibration.
Common issues and troubleshooting tips
If you see color shifts after calibration, revisit color balance settings and re-test under multiple lighting conditions. If touch response becomes unreliable, ensure the screen is clean and free of dust or screen protectors that hinder accuracy, then re-run the test. For sensor drift, restart the device and re-run sensor tests; if issues persist, reset specific calibration settings or consult device support. Comprehensive documentation of baseline values helps you distinguish between device drift and calibration error, enabling targeted fixes without unnecessary resets.
Privacy, data protection, and ongoing maintenance
Calibration changes can affect app behavior and privacy settings depending on the tools used. Regularly review app permissions and avoid sharing sensitive data with calibration tools. Schedule periodic rechecks—every few months or after major updates—to maintain reliability. Use safe, trusted methods and avoid rooting or irreversible changes that could affect warranty. The Calibrate Point approach emphasizes a reproducible workflow that protects your data while keeping calibration results dependable over time.
Tools & Materials
- Android device with latest OS support(Ensure device is charged and not in developer-safe lockdown mode)
- Soothing environment (neutral lighting)(Reduces false color perception during display tests)
- Calibration app (trusted vendor or OEM tool)(Download only from official store or OEM site)
- Backup method (cloud or local)(Back up important data before testing)
- Screen cleaning cloth(Keeps screen free from smudges during tests)
- USB cable and computer (optional)(Used for advanced sensor tests on some devices)
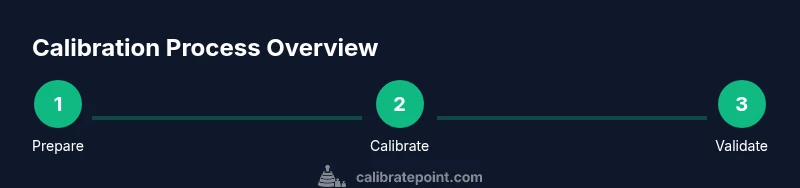
Steps
Estimated time: 25-40 minutes
- 1
Prepare the device
Charge the device to at least 50%, back up essential data, and close background apps to prevent interference during calibration. This ensures stable test conditions and protects your information if you need to reset settings.
Tip: Take a before-shot of your display and a quick touch-test screenshot for later comparison. - 2
Access calibration options
Open Settings and locate display, accessibility, or developer options. If your device offers a dedicated calibration section, use it; otherwise, move to a trusted calibration app to access tests for color, touch, and sensors.
Tip: If you can’t find a calibration menu, bookmark OEM support or search for your device model + calibration. - 3
Calibrate display color
Use the built-in color adjustment or a reputable app to align color balance, gamma, and brightness. Test with neutral grays and real-world images to ensure natural tones.
Tip: Avoid extreme color shifts; aim for consistency across different apps and lighting conditions. - 4
Test touch input
Run a multi-point touch test, then perform common gestures (tap, swipe, pinch). If you notice latency or missed taps, recalibrate or consider removing a screen protector for precise testing.
Tip: Keep your finger dry and use clean fingertips during tests. - 5
Calibrate sensors
Activate accelerometer and gyroscope tests; rotate the device, perform figure-eight motions for compass calibration if prompted. Validate with a navigation app or AR tool to check orientation.
Tip: Ensure you follow on-screen prompts exactly; small misalignments can throw off results. - 6
Confirm test results
Run quick, repeatable tests for color, touch, and sensors. Compare measurements to baseline and ensure performance is stable across sessions.
Tip: Document outcomes and note any anomalies for future reference. - 7
Adjust or revert if needed
If results are inconsistent, adjust calibration increments gradually. If issues persist, revert to default settings and re-test to avoid permanent miscalibration.
Tip: Always keep a rollback option ready in case you need to undo changes. - 8
Finalize and maintain
Save calibration presets, share a quick note with what you changed, and schedule a semi-annual check to maintain accuracy.
Tip: Set a reminder to re-check calibration after OS updates or device changes.
Questions & Answers
Is calibration safe for Android devices?
Yes, calibration is generally safe when you use trusted tools and avoid root or risky system changes. Follow official guidance and back up data beforehand.
Calibration is safe when you use trusted tools and back up your data. Follow official steps and avoid risky tweaks.
Do I need to root my device to calibrate?
Most calibrations do not require rooting. Rooting can void warranties and introduce instability. Stick to OEM tools or reputable apps.
You usually don’t need root access to calibrate. If you do, know the risks and follow trusted sources.
What if calibration makes things worse?
If results worsen, revert the settings to the previous baseline or reset the calibration changes. Rechecking the previous baseline helps identify which step caused the issue.
If things get worse, undo changes or reset to the original baseline and try again step by step.
Which apps are trustworthy for calibration?
Use OEM-provided tools or apps from well-known developers with good reviews. Avoid apps that request broad system permissions or claim to fully replace hardware calibration.
Prefer OEM tools or reputable developers with solid reviews; avoid apps asking for excessive permissions.
How long does calibration last?
Calibration doesn’t have a fixed duration. Recheck when you notice drift, after OS updates, or after changing accessories like a screen protector. Schedule periodic rechecks if you rely on precise results.
There’s no fixed duration; recheck calibration after updates or changes and when you notice drift.
Can calibration affect color accuracy?
Yes. Improper calibration can worsen color accuracy. Use neutral tests and compare against known references to verify improvements.
Improper calibration can hurt color accuracy; test against neutral references to verify improvements.
Watch Video
Key Takeaways
- Identify calibration needs (display, touch, sensors) before starting.
- Use OEM tools first; switch to trusted apps if necessary.
- Test across real tasks, not just isolated tests.
- Back up data and document changes for future reference.