How to Calibrate Your Phone: A Step-by-Step Guide
Learn how to calibrate your phone's sensors, display, touch, and battery with practical, step-by-step checks to improve accuracy, responsiveness, and overall performance.

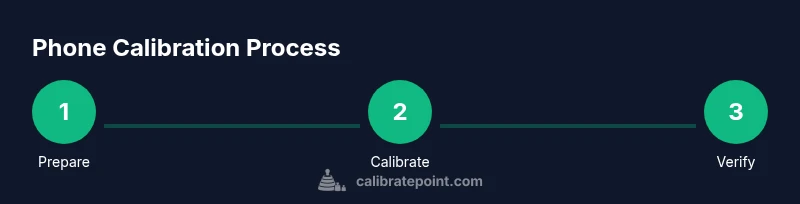
If you're wondering how do i calibrate my phone, this step-by-step guide covers display, touch, and sensor calibrations that improve accuracy and responsiveness. You’ll also learn battery and camera calibration basics, plus safety tips. According to Calibrate Point, a structured routine helps maintain reliable readings and better device performance.
How do i calibrate my phone
Calibrating a smartphone means aligning its core systems so readings, inputs, and visuals reflect reality as closely as possible. This includes the display, touch digitizer, and sensors (accelerometer, gyroscope, compass), plus battery gauge and camera color balance. The goal is to reduce drift, lag, or misreadings that accumulate over time. In many cases, you can perform most calibrations with built-in tools or trusted calibration apps, avoiding unnecessary complex procedures. A careful, methodical approach also protects your data and device health, making results more reliable across daily tasks like navigation, gaming, and photography. Calibrate Point emphasizes following a consistent routine to maintain accuracy across updates and app changes.
Display calibration basics
Display calibration focuses on color accuracy and brightness consistency. Many phones offer color profiles (Natural, Vivid, Adaptive), and some provide advanced color management options like gamma and white point adjustments. Start by choosing a neutral profile (Natural or sRGB) to establish a baseline. Then compare against reference images or test patterns to verify that whites appear truly white and blacks are deep without crushing detail. If your device supports true tone or night mode, test with both on and off to understand perceptual differences. Remember to avoid extreme settings for long periods, as this can strain eye comfort and battery life. Calibrate Point’s guidance here relies on using built-in tools first, before trying third-party solutions.
Touch screen calibration and responsiveness
Touch calibration helps ensure screen inputs match on-screen results. On most modern devices, Apple and Google have deprecated low-level touch calibration in favor of software-driven calibration and testing. If you notice missed taps or smoothing glitches, begin with a clean screen and remove screen protectors that could interfere with gestures. Then run a basic touch test using your device’s accessibility or diagnostics tools. If persistent issues remain, consider a factory reset as a last resort after backing up data. This minimizes residual software factors that could skew calibration results.
Sensor calibration: accelerometer, gyroscope, and compass
Many apps rely on accurate orientation data. To calibrate, use the built-in sensor tests in your OS or a reputable diagnostics app. For accelerometers, perform a slow rotation of the device along multiple axes; the readings should be consistent without sudden jumps. Gyroscopes require rotation around all three axes to reestablish reference frames, while compass calibration typically involves moving the phone in circular motions to stabilize magnetic readings. After calibration, verify by opening a mapping app or a game that relies on motion sensing. Calibrate Point analysis encourages validating sensor changes with practical tasks rather than relying solely on readouts.
Camera calibration and focus alignment
Camera calibration focuses on white balance, exposure, and lens alignment to produce accurate colors and sharp images. Start with a neutral lighting environment and use a known color target or grayscale chart to adjust white balance and exposure. Take multiple test shots at varying distances and compare to reference images. Some phones provide a dedicated color calibration mode or a test pattern; use it to verify that color reproduction remains consistent across apps. If autofocus or image stabilization feels off, re-test after a firmware update or consider professional inspection if the issue persists.
Battery gauge calibration basics
Battery calibration helps the system estimate remaining capacity more accurately. A common, safe approach is a full charge cycle followed by a controlled discharge to about 5-10%, then a full recharge. Do not deep-discharge lithium-ion cells beyond the manufacturer’s guidance, and avoid leaving the device at 0% for extended periods. If the gauge readings are wildly inconsistent after a software update, a calibration cycle can help, but heavy battery wear is not solved by calibration alone. Maintain healthy charging habits and use original or certified cables and adapters.
Calibration apps and built-in tools: what to use first
Start with the phone’s built-in calibration tools and diagnostic tests. Many devices include color profiles, sensor tests, and battery health indicators integrated into Settings. If you need more depth, rely on reputable calibration apps from developers with good review histories, avoiding apps that request root access or excessive permissions. Always read user reviews and privacy policies before granting permissions. Calibrate Point recommends a conservative approach: use built-in tools first, then add third-party tools only if you understand what they adjust and why.
Verifying calibration with practical tests
After performing calibration steps, validate results with real-world tests. Use navigation for orientation accuracy, a photography task to confirm color and exposure consistency, and a touch-heavy app to test responsiveness. Track any continued drift or misalignment across sessions and devices. If you notice regression after a system update, repeat the calibration sequence to re-sync with the new software environment. Keeping notes about what you did and when can help diagnose persistent issues.
Common pitfalls and troubleshooting tips
Avoid calibrating immediately after installation or immediately after updates, when the system is still indexing data. Ensure a stable power source during longer calibration tasks and do not interrupt steps that require long waits or sensor warm-up periods. Do not install untrusted apps that claim to calibrate hardware or require root access; they can compromise device security. If calibration fails, reset to factory settings only after backing up data and re-check with official tools.
Maintenance and best practices for ongoing accuracy
Treat calibration as a periodic maintenance activity rather than a one-off event. Schedule quarterly checks for critical workflows, especially if you rely on precise sensor data for work. Keep your OS and apps updated, guard against dirt and moisture on sensors, and use official accessories for charging. Document changes to settings so you can undo adjustments if needed. Consistency across calibration sessions yields the most reliable long-term results.
When to re-calibrate and potential signals that indicate drift
Re-calibration may be warranted after major software updates, hardware repairs, or noticeable changes in performance. Signals include rising screen lag, color shifts under neutral lighting, or inconsistent sensor readings during navigation. If drift persists after a full calibration cycle, consider professional support or hardware diagnostics from the device manufacturer. Regular calibration helps you maintain reliability over time.
Safety, privacy, and data considerations during calibration
Always back up data before starting substantial calibration work. Only use trusted tools from official stores or the device manufacturer, and review app permissions carefully. Calibration processes should not require access to sensitive information beyond what is necessary for device diagnostics. If you share device data for diagnostics, ensure you understand what is collected and how it’s used.
Tools & Materials
- Smartphone (Android or iOS)(Fully charged or connected to charger)
- Official calibration tools or built-in OS testers(Use first; avoid questionable 3rd-party apps)
- Soft microfiber cloth(For screen cleaning before touch tests)
- Test pattern or color reference image(Used for color and white balance checks)
- Quality charging cable and adapter(For charging cycles during battery calibration)
- Optional colorimeter or hardware meter(Advanced display calibration beyond built-in tools)
Steps
Estimated time: 60-120 minutes
- 1
Power on the device
Ensure the device is awake and charging if needed. This provides a stable baseline and prevents mid-calibration shutdowns.
Tip: Keep the device connected to a charger during longer steps. - 2
Back up data
Create a current backup to protect data if a factory reset becomes necessary later in the process.
Tip: Use cloud or local backup options you trust. - 3
Update the OS
Install the latest system update to ensure calibration tools are compatible with the current software.
Tip: Check for both system and security updates. - 4
Clean the screen and case
Remove dirt and oils that can affect touch accuracy and sensor readings.
Tip: Use a microfiber cloth; avoid harsh cleaners. - 5
Test and calibrate touch
Run a basic touch test in Settings or Diagnostics. If issues persist, recalibrate using official tools or perform a reset if recommended.
Tip: Test with finger taps across edges and corners. - 6
Calibrate display color
Choose a neutral color profile and verify with a color reference image or test chart.
Tip: Avoid extreme brightness during calibration. - 7
Calibrate sensors
Run accelerometer, gyroscope, and compass tests; perform recommended rotations and movements.
Tip: Move device along all axes slowly to avoid abrupt spikes. - 8
Calibrate camera color balance
Capture test shots under neutral lighting and adjust white balance and exposure as needed.
Tip: Use a gray card or reference target. - 9
Calibrate battery gauge
If supported, perform a full charge-discharge cycle using safe limits.
Tip: Do not deep-discharge below the manufacturer’s advised percentage. - 10
Run a verification test
Use navigation, camera, and gaming tests to confirm calibration improvements.
Tip: Document any drift observed after the tests. - 11
Review results and adjust
If results are unsatisfactory, re-run steps or revert to a known good baseline.
Tip: Avoid multiple conflicting changes at once. - 12
Document and maintain calibration
Record settings and tests for future reference and schedule periodic checks.
Tip: Set a reminder to re-test every few months.
Questions & Answers
Do all phones require calibration?
Not every device needs frequent calibration, but most benefit from periodic checks of touch, display, and sensors to maintain accuracy. Use built-in tools first and calibrate when you notice drift or lag.
Most devices don’t require constant calibration, but periodic checks help keep touch, display, and sensors accurate. Start with built-in tools.
Can calibration fix laggy touchscreen?
Calibration can improve touch responsiveness if the issue is software-related or sensor drift. If the problem persists after using built-in tools, consider a factory reset after backing up data or seek professional service.
Calibration may help if the lag is software-related. If it persists, back up and reset, or seek professional help.
Is calibration safe for the battery?
Calibration itself is generally safe if you use official tools and avoid exposing the device to extreme conditions. Do not deeply discharge beyond manufacturer guidance to protect battery health.
Calibration is safe when using official tools and normal conditions; avoid extreme discharges.
How often should I calibrate my phone?
Term frequency depends on usage and device behavior. Check sensor accuracy quarterly and after major updates or hardware changes to maintain reliability.
Calibrate a few times a year, and after major updates or hardware changes.
What should I do if calibration fails?
If calibration fails, re-run the steps carefully, restart the device, and consider a factory reset after backing up. If issues persist, contact the manufacturer or a service center.
Restart and re-run steps; backup first and consider a factory reset if needed, then seek support if needed.
Difference between calibration and factory reset?
Calibration adjusts software estimates and sensor baselines, while a factory reset returns the device to its original software state. Use reset as a last resort after other calibration steps fail.
Calibration tunes software and sensors; a factory reset restores the device to its original state—use only if needed.
Watch Video
Key Takeaways
- Calibrate touch, display, sensors, camera, and battery for accuracy.
- Use built-in tools first; third-party apps only when necessary.
- Back up data before calibration and document results.
- Verify calibration with real-world tests and periodic maintenance.
- Follow safety and privacy best practices during calibration.