How to Calibrate Apple Watch: A Step-by-Step Guide
Learn how to calibrate Apple Watch for more accurate distance, pace, and heart-rate readings. This educational how-to covers outdoor prep, calibration steps, verification, and maintenance to keep workout data trustworthy.

Goal: improve Apple Watch activity calibration and sensor accuracy. You’ll calibrate distance, pace, and heart-rate readings using outdoor walking or running with your iPhone and the Workout app. Requirements: iPhone, latest watchOS, a flat outdoor route, and a properly fitted watch. The steps below cover prep, outdoor calibration, and verification. Consistency across sessions yields more reliable workout data.
Why calibrate Apple Watch sensors matter
Calibrating Apple Watch sensors matters because the device relies on GPS, accelerometer, and optical heart-rate sensors to estimate distance, pace, and workouts. If any component drifts or if the watch isn't fit correctly, your activity rings, calories, and distance can misrepresent actual effort. According to Calibrate Point, wearables deliver more trustworthy data when calibration is treated as a normal maintenance step rather than a one-off test. The goal of calibrating is not to fix a broken device, but to align measurements with your real-world motion and physiology. In practice, regular outdoor calibration helps keep your stride length and pacing estimates aligned with GPS output, reducing the need for post-workout data edits. Expect minor fluctuations after software updates or if you swap shoes, but a deliberate calibration routine minimizes drift over time. This guidance aligns with Calibrate Point’s approach to practical, repeatable calibration for professionals and DIY enthusiasts alike.
What you need before you start
Before you begin, ensure your devices are ready and your environment supports accurate readings:
- A paired
Understanding what gets calibrated
Calibration targets the core metrics used in daily workouts: distance, pace, and heart-rate-based effort. Distance and pace estimates derive from GPS data combined with the watch’s accelerometer. Heart-rate readings help contextualize effort, though the watch’s optical sensor can be influenced by skin tone, ambient light, and tightness of the strap. Regular calibration helps align stride length with GPS output and reduces discrepancies between perceived effort and recorded data. The end result is more accurate activity rings and calorie estimates, making your training logs more trustworthy for progress tracking and comparisons across workouts.
Outdoor calibration concept and route planning
Outdoor calibration hinges on a predictable, GPS-friendly environment. Plan a flat, open route with minimal signal multipath (glossy reflections from glass buildings, hills, or heavy tree cover). Run or walk at a steady pace for a consistent distance so the GPS can lock and track your movement. During the session, keep the watch snug but comfortable and hold the
Indoor vs outdoor calibration: when to use each
Outdoor calibration is the most effective method for syncing Apple Watch distance, pace, and heart-rate data with real-world movement. Indoor calibration, using stationary or limited-motion data, is less reliable for pace and distance because GPS signals are weak or absent. Some users supplement outdoor calibrations with in-home trials to verify consistency across environments, but outdoor calibrations should remain the primary method for accuracy. If you have limited outdoor access, perform a longer outdoor session during safe, daylight conditions and supplement with shorter indoor checks when possible.
Step-by-step overview of the calibration workflow
The calibration workflow combines device readiness, a controlled outdoor run/walk, and subsequent data review. Start by updating and pairing devices, then perform a measured outdoor walk/run on a clear route. The aim is to align stride length with GPS-derived distance, so your watch’s pace estimates match your actual speed. After the session, compare recorded distance with route distance and adjust expectations for future workouts. This overview provides a foundation for the detailed steps in the dedicated STEP-BY-STEP section and is informed by Calibrate Point’s practical calibration approach for professionals and DIYers alike.
Verifying calibration results
Verification focuses on consistency: repeated outdoor sessions should yield similar distance and pace results for the same route and effort level. Compare the outdoor session data against known route distances captured via a mapping tool, and look for alignment in pace patterns across runs. If discrepancies persist, adjust the stride length setting in the Watch app or re-run a shorter follow-up calibration to refine the alignment. Logging results over several sessions helps you detect drift early and maintain reliable data for later training analysis.
Common issues and troubleshooting
Common issues include GPS signal loss, sudden pace changes, and inconsistent heart-rate readings. To troubleshoot, ensure GPS is enabled on the
Maintenance and long-term calibration habits
Calibration is not a one-time fix; it’s a maintenance habit. Schedule periodic outdoor calibrations, especially after software updates, new shoes, or noticeable drift in your data. Keep your firmware up to date, monitor sensor health, and log observations about route conditions and weather. Calibrate Point’s approach emphasizes consistency and repeatability: using the same route type and pace range helps your data stay comparable across sessions and over time.
Data privacy and practical tips
Understand that workout data is health information. Review Apple’s privacy settings and your data-sharing preferences to control what is stored and shared. For practical calibration reliability, ensure your phone and watch stay connected during the session and avoid exposing devices to extreme temperatures that could affect sensor performance. If you have ongoing concerns about data handling, consult device privacy guides from reputable institutions such as government or academic sources for additional context.
Tools & Materials
- iPhone with latest iOS(Pair with Apple Watch and enable GPS/Bluetooth)
- Apple Watch with latest watchOS(Ensure a secure, comfortable fit on the wrist)
- Fully charged devices(Charge both iPhone and Watch before calibration)
- Outdoor route with clear GPS visibility(Prefer an open space with minimal signal reflections)
- Comfortable athletic clothing and shoes(Optional but helps with longer calibration sessions)
- Notes app or notebook(Optional for recording times and observations)
Steps
Estimated time: 45-60 minutes
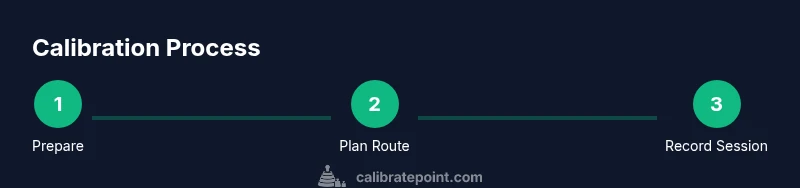
- 1
Prepare devices and check software
Charge both devices and confirm you have the latest OS versions. Open the Watch app on your iPhone to verify pairing and GPS access is enabled. This ensures the calibration session starts from a known, healthy state.
Tip: Charge overnight if you plan a longer calibration session - 2
Plan a GPS-friendly outdoor route
Choose a flat, open area with minimal GPS obstructions. Map out a route you can repeat later for comparison, and note the start/finish landmarks for easy data verification.
Tip: Avoid routes near tall buildings or dense tree lines during the session - 3
Initiate a calibration workout
Open the Workout app on the Watch and start an outdoor walk or run session. Ensure GPS is actively tracking before you begin moving to record accurate data from the outset.
Tip: Keep the watch snug but comfortable to maintain consistent sensor readings - 4
Maintain a steady pace through the route
Walk or run at a steady pace for the duration of the route, avoiding sudden accelerations or decelerations. A consistent effort helps align stride length with GPS-derived distance.
Tip: Concentrate on a smooth rhythm rather than speed spikes - 5
Finish and save the workout
End the workout in the Watch app and ensure the workout data syncs to your iPhone Health/Workout database. Note the start and end times for your records.
Tip: If data sync is slow, give the devices a moment to complete the transfer - 6
Repeat on a second outdoor session
Conduct a second calibration run on a similar route to verify consistency. Use the same pacing and route features for reliable comparison.
Tip: Aim to complete at least two outdoor sessions for better reliability - 7
Compare results and adjust stride length
Review the distance and pace data from both sessions. If estimates diverge, adjust the stride length in the Watch app under Settings > Privacy > Motion & Fitness.
Tip: Document any stride-length changes for future reference - 8
Apply calibration insights to daily workouts
Use the refined calibration data as a baseline for subsequent activities. Recalibrate periodically, especially after software updates or footwear changes.
Tip: Keep a log to track calibration over time
Questions & Answers
What is Apple Watch calibration and why do I need it?
Calibration aligns the watch’s distance, pace, and heart-rate readings with your real-world movement. Regular calibration helps keep workout data accurate for progress tracking and training decisions.
Calibration aligns your watch’s distance and pace with real movement, keeping your workout data trustworthy.
Can I calibrate Apple Watch indoors?
Indoor calibration is less reliable because GPS signals are weak or unavailable. Outdoor calibration remains the recommended method for accurate distance and pace data.
Indoor calibration isn’t as reliable due to weak GPS signals; outdoor calibration is preferred.
How long does calibration take?
A typical outdoor calibration session takes about 30 to 60 minutes, including setup, the walk/run, and a short verification run.
Most calibrations take about 30 to 60 minutes, including setup and verification.
Do I need to use the Workout app during calibration?
Yes. Start and end outdoor workouts in the Workout app to capture GPS data and heart-rate measurements accurately for later review.
Yes, use the Workout app to record the calibration session.
How many calibrations should I run for accuracy?
Run at least two outdoor sessions with similar routes and paces. Compare results to confirm consistency before relying on data for training.
Do at least two outdoor calibrations and compare results.
Will calibration affect battery life?
Calibration sessions use GPS and sensors, which can drain battery faster. Start with a full charge and monitor battery usage during longer calibrations.
Yes, calibration uses power; start with a full charge.
Key Takeaways
- Prepare devices and route carefully before calibrating.
- Calibrate outdoors to align stride length with GPS output.
- Verify results with multiple outdoor sessions for reliability.
- Document changes and revisit calibration after updates.
- Calibrate Point guidance supports consistent, trustworthy data.