How to Calibrate a Fitbit: A Practical Guide
Learn how to calibrate a Fitbit to improve accuracy in steps, distance, and heart rate with a practical, step-by-step approach from Calibrate Point.

This guide shows you how to calibrate a Fitbit to improve step counting, heart-rate readings, and overall activity data. You’ll need your Fitbit, the charging cable, the latest mobile app, and a clear testing space. According to Calibrate Point, a structured calibration process yields more reliable, repeatable results.
Why calibration matters for Fitbit accuracy
Wearables depend on a network of sensors to translate human movement and physiology into readable metrics. When these sensors are misaligned, or when software interpretations lag behind real activity, you’ll notice drift in step counts, distance estimates, calories burned, and heart-rate readings. Calibration creates a deliberate baseline so your Fitbit’s sensors agree with your actual behavior across everyday activities, workouts, and rest periods. As the Calibrate Point team explains, establishing a repeatable, documented calibration process often yields more reliable results than relying on automatic counting alone. By approaching calibration as a repeatable protocol, you reduce day-to-day variation and enable more meaningful comparisons between days and activities. The goal is not perfection in every scenario, but consistency you can trace back to a known procedure. This approach also helps when you use multiple Fitbit devices or switch models, since you’ll have a shared method to re-establish agreement between devices over time.
What affects Fitbit accuracy?
Accuracy can be influenced by several factors, and understanding these helps you design a robust calibration plan. Sensor placement and strap tightness directly affect accelerometer and PPG readings; even minor looseness or limb movement can introduce drift. Firmware and app versions matter because software updates can change how data is processed and displayed. Environmental conditions—like temperature, humidity, and glare from bright lighting—can subtly influence optical sensors that measure heart rate. Skin tone and body composition can also affect optical readings, particularly for wrist-based heart-rate tracking. GPS performance, when available, can drift in urban canyons or areas with poor satellite visibility, which in turn affects distance and pace estimates. The Calibrate Point analysis (2026) notes that most drift stems from sensor alignment and interpretation logic rather than hardware defects, reinforcing the value of a well-documented calibration routine that users perform regularly.
Planning your calibration session
A successful calibration starts with a clear plan. Pick a calm day when you won’t be interrupted, fully charge the device, and ensure your smartphone has a stable connection to the Fitbit app. Decide on a small set of activities that you’ll perform in a controlled environment—a steady walk, a brisk walk or jog, and a rest baseline—and choose a testing route with a known distance. Prepare a simple log (digital or paper) to record start times, route distance, and subjective effort. If you’re calibrating across multiple devices or models, perform the same sequence on each device to collect consistent data you can compare later. The aim is to create a reproducible protocol you can reuse after firmware updates or after switching to a different strap or wear location. Calibrate Point recommends documenting every step of your procedure so you can reference it when questions arise in the future.
How to perform calibration (overview)
The calibration workflow combines data collection with a straightforward comparison to known values. Start with a fully charged device and ensure it’s snug on your wrist. Use a known-distance route for walking, then repeat with a short period of faster movement to test sensitivity to pace. After each activity, sync the device with the app to capture the latest measurements. Record the observed step counts and distance in your log and note any perceived discrepancies. The goal is to build a profile of how readings deviate under different conditions so you can adjust expectations or settings accordingly. While most users won’t need a factory reset, keep that option in reserve if drift persists after several iterations. The process is iterative by design: run a test, analyze, adjust if needed, and re-test.
Data you should collect and how to interpret results
Collect key data points for each activity: duration, route distance (if known), step count, distance estimate, calories, and heart-rate trend. Compare Fitbit outputs to your known values or to a trusted reference (e.g., a measured track distance). Look for systematic bias (consistently higher or lower readings) versus random noise (readings that swing unpredictably). If you observe a consistent bias, you can adjust how you interpret the metrics or consider re-testing under slightly different conditions to confirm stability. It’s important to document not only the numbers but the environment and your effort level, since these factors influence sensor behavior. If you run into persistent drift, review strap fit, update firmware, and verify that the device is correctly configured in the app. The overarching principle is to build an evidence-based baseline you can reference in routine wear and during workouts.
Post-calibration verification and maintenance
After you complete the calibration sequence, run a quick verification to confirm improvements. Do a day-to-day activity—a regular walk, a short workout, and a rest period—and compare readings against your log. Re-sync the device and check for consistency across subsequent days. Maintain the calibration by repeating the process after major firmware updates or when you notice drift during common activities. Keep your strap snug but comfortable and ensure skin contact remains clean to preserve optical heart-rate accuracy. The goal is ongoing reliability, not a one-time adjustment. The Calibrate Point Team emphasizes that routine checks, kept in a simple log, help you catch drift early and prevent long-term misalignment. By treating calibration as a maintenance habit, you’ll preserve credibility of your Fitbit’s data across time.
Tools & Materials
- Fitbit device(Model determines exact steps; ensure device is compatible with the calibration workflow described.)
- Charging cable(Fully charge before starting to avoid interruptions mid-test.)
- Smartphone with Fitbit app(Install latest app version and log in to your account.)
- Known-distance testing route or track(A 400–1000 meter loop works well for baseline distance tests.)
- Quiet testing space(Minimize distractions and ambient movement if possible.)
Steps
Estimated time: Total time: 60-90 minutes
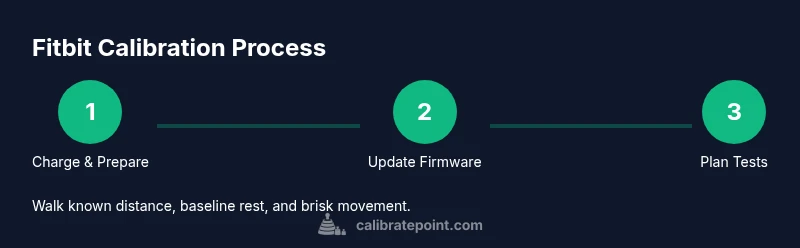
- 1
Charge and prepare the device
Connect the Fitbit to its charger and ensure it reaches a full charge. Remove any unnecessary apps that might run in the background and confirm Bluetooth connectivity with the phone. A stable power state reduces the risk of interruptions during data collection.
Tip: Let the device charge fully before starting any tests to avoid mid-test shutoffs. - 2
Update firmware and app
Open the Fitbit app and check for firmware and app updates. Install any available updates to ensure you’re calibrating against the latest software interpretation of sensor data. Updates can change how readings are computed, which affects the calibration baseline.
Tip: Reboot the device and the phone after updates to ensure changes take effect. - 3
Define a testing plan with known values
Choose a short, repeatable sequence: baseline rest, a steady walk of a known distance, and a brisk walk or light jog. Decide on the route length and time thresholds so you can compare results against known values.
Tip: Use a measured track or a treadmill with distance indicators for accurate baselines. - 4
Conduct a baseline rest test
With the device snug on your wrist, stand still for 1–2 minutes and record resting heart rate and any baseline metrics. This establishes a control point to compare against during movement tests.
Tip: Keep still during the rest test; any movement can skew heart-rate data. - 5
Perform the walking test
Walk the known distance at a comfortable, consistent pace. Sync data to the app and log the observed step count and distance. Note the effort level and any noticeable changes in stride or pace.
Tip: Aim for a pace you can maintain without talking excessively; consistency matters. - 6
Review results and plan adjustments
Compare the Fitbit distance to the known distance and check step counts against the route length. If you find systematic drift, consider minor adjustments to strap fit, hold, or pacing and re-run the test to confirm stability.
Tip: Document each run; small changes build a reliable baseline over time.
Questions & Answers
Is Fitbit calibration necessary for all models?
Calibration practices vary by model. Some Fitbits track most metrics automatically, while others benefit from a structured calibration process for specific activities. Start with the basics, then expand if you notice persistent drift.
Calibration needs vary by model. Many devices auto-track, but some benefit from a structured calibration for consistent results.
How often should I recalibrate my Fitbit?
There is no universal schedule. Recalibrate after firmware updates or if you notice drift during routine activities, then re-test to confirm improvements.
There’s no fixed timetable. Recalibrate after updates or when you detect drift, and re-test to confirm.
Can calibration fix GPS drift?
Calibration can improve general activity metrics, including steps and heart rate, but GPS drift is model-dependent and may not be fully corrected by calibration alone.
Calibration helps with steps and heart rate, but GPS drift depends on the device and environment.
What tests should I run during calibration?
Run a baseline rest test, a known-distance walk, and a brisk activity test. Compare results against known values and log any discrepancies.
Do a rest test, a measured walk, and a brisk test, then compare results.
What if results don’t improve after calibration?
Check strap fit, ensure firmware is up to date, and consider repeating tests. If drift persists, a factory reset or professional support may be warranted.
If it doesn’t improve, check fit and updates, then re-test or seek support if needed.
Can I calibrate a Fitbit without the app?
Most calibration workflows rely on the Fitbit app or the device’s onboard tools. The app provides data collection, syncing, and analysis essential for calibration.
You generally need the Fitbit app for calibration data and syncing.
Watch Video
Key Takeaways
- Follow a repeatable calibration protocol to improve Fitbit accuracy.
- Document environment and test conditions for meaningful comparisons.
- Use known distances and consistent pacing to reduce measurement drift.
- Verify results with a quick post-calibration test and maintain the routine.
- Regular calibration after updates preserves data reliability over time.