How to Calibrate Apple Watch Steps: A Practical Guide
Learn how to calibrate Apple Watch steps to improve accuracy. This practical guide from Calibrate Point walks you through prerequisites, the outdoor calibration walk, stride length adjustment, and verification to ensure your step counts and distance are more reliable.

Calibrating how to calibrate apple watch steps improves accuracy by teaching your Apple Watch to interpret arm movements against GPS data from your iPhone. Start outdoors with GPS turned on, enable Location Services and Motion & Fitness, and set an accurate stride length in the Health app. Perform a 20-minute walk or run to create baseline data and recalibrate as needed.
How to calibrate apple watch steps: Why accuracy matters
Accuracy in step counts and distance tracking matters for fitness goals, health insights, and habit monitoring. A precise readout helps you set realistic targets, compare workouts, and understand trends over time. When the Apple Watch miscounts steps or underestimates distance, you may misinterpret calories burned, active minutes, and overall activity levels. Calibrating the watch aligns its measurements with your actual gait and pace, especially when you use different activities (walking, running, or elliptical workouts). This guide from Calibrate Point explains the why and the how, so you can confidently rely on your device for daily use and professional testing alike.
Key takeaway: Calibration improves alignment between what you feel during activity and what your watch records, which helps with performance tracking and goal setting.
What Apple Watch measures when counting steps
Apple Watch uses a combination of sensors to estimate steps and movement. The accelerometer detects wrist motion, while GPS data from your iPhone provides distance and pace context. The onboard algorithms weigh arm swing, walking rhythm, and speed to infer steps. When GPS and stride length data align with your actual travel, step counts become more accurate. If you frequently switch between indoor and outdoor environments or wear the watch loosely, calibration can reduce discrepancies and make metrics like distance, calories, and active energy more trustworthy.
Tip: Keep your Apple Watch snug but comfortable and wear it on the top of your wrist for best sensor contact.
Understanding stride length and Health data
Stride length is key to translating distance into steps and vice versa. In the Health app, you can set a personal stride length, which helps the watch estimate distance more accurately from your pace. If your stride length is off—common for runners who use different footwear or terrains—the distance and calories can skew even if steps are correct. Periodically update your height, weight, and stride length data to maintain calibration accuracy. Calibrate Point recommends a mid-range stride length as a baseline and adjusting after new shoes or routes.
How to adjust: In the Health app > Health Data > Fitness > Stride Length, enter your typical stride length for walking and running. This value should reflect your natural step length on flat ground.
GPS vs motion: why calibration helps step counts
GPS provides a long-range reference for distance, but it’s not always precise for step-by-step counting, especially indoors or on crowded routes where GPS signals can bounce. The watch blends GPS context with accelerometer data to infer steps. Calibration anchors this blend by aligning your actual movement with the watch’s interpretation. When you calibrate, you’re teaching the algorithms to recognize your unique gait, which reduces drift between steps and distance across activities.
Pro tip: If you notice big swings in distance versus steps after a run, re-check stride length and perform another calibration session outdoors.
Pre-calibration checklist
Before you begin, confirm these settings and environmental factors are in place:
- Location Services enabled on the iPhone and Apple Watch.
- Motion & Fitness enabled, with Fitness Tracking active.
- A known, safe outdoor area with good GPS reception (open park or straight street).
- Your Health data profile updated (height, weight, and stride length).
These steps ensure the calibration data you generate is valid and transferable to future workouts.
Note: Calibration is most effective when you perform a continuous 15–20 minute outdoor walk or run on a stable route.
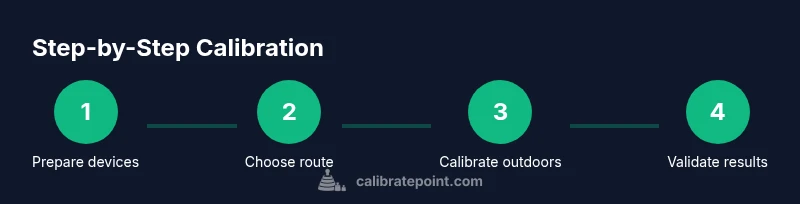
Step-by-step calibration workflow (outdoor walk/run)
- Prepare devices and settings
- Make sure the iPhone is connected, GPS is active, and Location Services are on. Ensure the Apple Watch is paired and has sufficient battery life.
- Set a realistic stride length in the Health app. This helps convert distance into steps more accurately.
- Tip: Charge both devices beforehand to avoid mid-session power loss.
- Locate a suitable calibration route
- Choose a flat, straight route with minimal stops to maximize data quality. A 15–20 minute session is typically sufficient for baseline calibration.
- Pro tip: Avoid heavy tree cover or urban canyons where GPS signal can fluctuate.
- Start the calibration session
- Open Workout app on Apple Watch, select Outdoor Walk or Outdoor Run, and begin tracking as you start moving. Keep your pace natural and steady.
- Why: A steady pace produces cleaner accelerometer patterns and clearer GPS context for the algorithm to learn from.
- Complete the session and save data
- Finish after 15–20 minutes, then save the workout. This data provides the baseline used for stride length optimization.
- Pro tip: If you stop mid-session, you’ll need to re-start to maintain a clean data segment.
- Verify stride length and health data post-session
- Review height and stride length values in the Health app and adjust if your shoes or terrain were unusual.
- Why: Smaller corrections here can yield measurable improvements in both steps and distance estimates across workouts.
- Recalibrate with a second outdoor session (optional)
- If you’ve made substantial stride length adjustments, repeat calibration outdoors to reinforce the new baseline.
- Tip: A second session helps reduce residual drift in more demanding workouts.
- Short-term validation with a test walk or run
- After calibration, do a shorter test outdoors (5–10 minutes) to compare steps against a known distance or route.
- Why: Quick validation helps confirm calibration has improved alignment between sensors and real movement.
- Record outcomes and plan follow-up calibration
- Note whether step counts and distance feel more accurate, and plan a follow-up calibration after several weeks or after equipment changes.
- Pro tip: Maintain a calibration log for cross-workout comparisons.
- Optional: Indoor calibration awareness
- If you mostly train indoors, calibration can still help, but the improvement is most pronounced when GPS context is available. Be mindful of analog activity patterns that might skew accelerometer readings.
Verifying calibration results after the session
A successful calibration should reduce long-term bias between steps and distance across workouts. Validate by comparing the step count and distance from a known route against your watch’s readouts. If there is still a discrepancy, revisit stride length in Health, ensure you wore the watch consistently on the same wrist, and consider performing additional outdoor calibrations at different times of day for signal variability.
Recalibration frequency and signs you need it
Calibrating isn’t a one-and-done task. Do it after any major change:
- New shoes or footwear changes that alter stride length
- Height or weight adjustments in Health data
- Major firmware or OS updates on iPhone or Apple Watch
- You notice ongoing miscounts or distance drift across multiple workouts
If you often notice misalignment between steps and distance, schedule a fresh outdoor calibration to realign the sensor fusion model.
Troubleshooting miscounts and anomalies
- Occasional outliers: A single workout with extreme deviation can be noise; consider repeating the calibration process.
- Sudden changes in form: If you switch to a different activity (e.g., from walking to jogging) with a markedly different arm swing, recalibrate to accommodate the new pattern.
- Strong GPS interference: In urban canyons or dense forests, GPS signals degrade; reattempt calibration under clearer signal conditions.
Calibrate Point guidance: Use a consistent route and natural pace during calibration; the more consistent the data, the better the calibration will perform across future workouts.
Using Health app data to refine metrics
The Health app stores stride length and helps translate distance to steps. Regularly confirm stride length accuracy and keep Health data updated. The watch uses this data to calibrate step counts and distance more precisely. When you update stride length, re-run calibration to recalibrate the model and reduce drift in step counts for both daily activity and workouts.
Practical scenarios: workouts, daily steps, and travel
- Outdoor runs with GPS: Expect the most noticeable improvement in distance metrics and pace.
- Daily walks: Steps counts become more consistent, especially on longer routes with varied terrain.
- Travel or sightseeing: Calibration helps when you switch between walking at different speeds and surfaces, reducing bias in step-based energy estimates.
Calibrate Point's best practices for accuracy
- Maintain consistent wearing position and tension around the wrist to ensure sensors read true movement.
- Update stride length after notable changes in footwear or terrain.
- Validate results with a controlled outdoor test route following calibration.
- Document any anomalies or changes in routine that might affect measurements.
What to do next: maintaining calibrated accuracy
- Schedule periodic calibration checks, especially after firmware updates or new routines.
- Keep iPhone and Apple Watch software up to date for the latest sensor fusion improvements.
- Use the Health app to review thresholds and trends and adjust as needed.
toolsMaterialsBlockEndWithNoBlockEndRemoved?":null}
tipsListBlockEndWithNoBlockEndRemoved?":null}
keyTakeawaysBlockEndWithNoBlockEndRemoved?":null}
videoEmbedBlockEndWithNoBlockEndRemoved?":null}
faqSectionBlockEndWithNoBlockEndRemoved?":null}
mainTopicQueryBlockEndWithNoBlockEndRemoved?":null}
Tools & Materials
- iPhone with GPS and latest iOS(Ensure Location Services are enabled and that Health data is accessible.)
- Apple Watch with latest watchOS(Fully charged before calibration; keep wrist snug during measurements.)
- Health app setup(Update height, stride length, and basic demographics for accurate calculations.)
- A safe outdoor calibration route(Select a flat, open area with clear GPS reception (park or long straight path).)
- Charger or power bank(Keep devices charged to complete the session without interruption.)
- Optional: measured distance route(If available, use a route with known distance to validate results.)
Steps
Estimated time: 25-35 minutes
- 1
Prepare devices and settings
Verify iPhone GPS is on, Location Services enabled, Motion & Fitness active, and stride length data is current in Health. Charge devices if needed and choose a safe calibration location.
Tip: Double-check that both devices are paired and within Bluetooth range before starting. - 2
Choose a calibration route
Pick an outdoor area with minimal interference and steady GPS signals. A straight path or track works well for clean data collection.
Tip: Avoid routes with frequent stops to reduce data fragmentation. - 3
Start the calibration workout
Open the Workout app on Apple Watch, select Outdoor Walk or Outdoor Run, and begin tracking as you start moving.
Tip: Maintain a natural pace; intentional sprinting or stopping can skew data. - 4
Complete a 15–20 minute session
Continue walking or running for the recommended duration to collect a representative sample of motion and GPS data.
Tip: If you pause, resume as soon as possible to keep data contiguous. - 5
End and save the workout
Finish the session, save the workout, and review the data in the Health app for stride length alignment.
Tip: Check for any abrupt data gaps that might indicate a sensor issue. - 6
Adjust stride length if needed
If you notice persistent distance-step drift, revisit stride length in Health Data and update as needed.
Tip: Small adjustments can yield meaningful improvements. - 7
Validate with a short test walk
Do a quick outdoor walk after calibration to verify improved alignment between steps and distance.
Tip: Compare results against a known route or measurement. - 8
Document results and plan follow-up
Note improvements and schedule a future calibration check after equipment changes or firmware updates.
Tip: Keep a simple log for cross-workout comparisons.
Questions & Answers
Why should I calibrate Apple Watch steps?
Calibration aligns the watch’s accelerometer data with GPS-derived distance, improving step counts and distance estimations across activities.
Calibration aligns your steps with GPS data for more accurate tracking.
Is calibration necessary for indoor workouts?
Calibration helps when GPS data is needed to interpret movement. Indoor workouts may show less improvement unless you regularly move between spaces with consistent GPS context.
It helps if you move to indoor spaces with GPS context; otherwise, improvements may be limited.
Will calibrating affect battery life?
Calibration sessions can use the GPS and accelerometer, which may drain battery slightly more during the session, but impact is typically minimal with a planned session.
There’s a small, temporary battery impact during calibration.
How long does calibration take?
A typical outdoor calibration walk runs about 15–20 minutes, followed by a quick validation. Longer sessions can improve stability with more data.
About 15 to 20 minutes for the main calibration, plus a short check.
Do I need to recalibrate after updates?
Yes, especially after firmware or OS updates, or if you change footwear or stride length. Recalibration helps preserve accuracy.
Yes, recalibrate after updates or changes to your stride.
What if GPS signals are weak?
Calibrate when you have a clear GPS signal. If signals are weak, wait for a better window or reposition yourself before recalibrating.
Wait for a strong GPS window before calibrating.
Watch Video
Key Takeaways
- Calibrate Apple Watch steps by outdoors walking/running with GPS guidance.
- Update stride length data in Health for accurate distance estimation.
- Recalibrate after changes in footwear, routes, or firmware updates.
- Validate results with a test walk to ensure improved accuracy.