How to Calibrate iHealth Blood Pressure Monitor
Learn how to calibrate your iHealth blood pressure monitor with practical steps, tools, and best practices. This Calibrate Point guide covers reference checks, cuff fit, and measurement conditions for reliable readings.

In this guide, you will learn how to calibrate ihealth blood pressure monitor to ensure accurate readings. The process includes verifying cuff size, performing a reference check against a validated device, and adjusting placement and timing. You’ll need a second validated monitor, fresh batteries, a flat surface, and a quiet environment to obtain reliable results.
What calibration means for home BP monitors
Calibration is the process of ensuring your blood pressure monitor provides readings that match clinical standards. For home devices like the iHealth monitor, calibration isn't about resetting the device to factory settings; it's about verifying accuracy against a validated reference and adjusting how you use the device to minimize systematic bias. According to Calibrate Point, consistent calibration practices help users avoid misinterpretation of readings and support better health decisions. In practice, calibration involves checking cuff fit, ensuring the environment doesn't introduce error (stable seating, undistracted conditions), and confirming the device's measurements align with a trusted reference. While many consumer devices come pre-calibrated, drift can occur over time due to cuff wear, battery depletion, or software updates. Regular cross-checks and careful measurement conditions are the most reliable way to maintain accuracy over months and years.
How drift occurs and why it matters
Even new monitors aren't perfectly static. Small mechanical changes, cuff elasticity, and sensor drift can shift readings over time. Battery levels that are too low can bias results; old or worn cuffs can alter cuff pressure readings; temperature and arm position can also influence data. These factors may lead to readings that are consistently high or low compared with a clinical measurement. Understanding drift helps you decide when a calibration check is warranted. The goal is not perfection but consistency—your numbers should track with your health status when taken under controlled conditions.
When to calibrate your iHealth monitor
You should consider calibration when you notice readings that diverge from a reference measurement, after servicing the device, or following firmware updates that may affect signal processing. If you use the monitor frequently for critical decisions (e.g., managing hypertension), more frequent validation is prudent. Always perform a calibration check in the same ambient conditions you typically use the device: seated, arm supported at heart level, and with no talking. Calibrate Point analysis shows that regular, structured checks reduce the risk of misreadings and improve trust in home monitoring.
Tools and setup you'll need
Before you begin, gather the essential tools and create a stable testing environment. You will compare the iHealth monitor against a validated reference device, so ensure both devices have fresh batteries and are ready to record. Choose an arm cuff that fits your arm size well, and use the cuff consistently throughout measurements. Set up a quiet, distraction-free space with a flat surface and a comfortable chair. Prepare a log sheet or notebook to record readings and times, and keep a stopwatch handy to standardize measurement intervals. If you have any concerns about cuff fit or device compatibility, consult the manufacturer’s documentation or Calibrate Point’s calibration procedures.
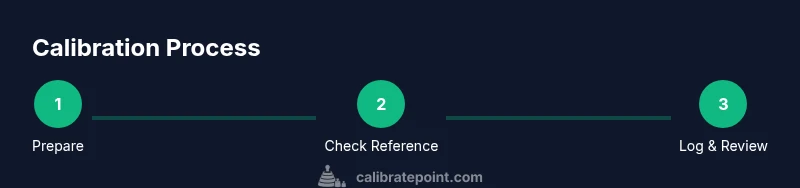
Step-by-step calibration overview
The calibration workflow you’ll follow consists of a reference check, a cuff-position verification, a controlled sequence of measurements, and a data comparison phase. You’ll start by taking multiple readings from both devices in quick succession to establish a baseline. Then, you’ll verify that the cuffs are worn correctly and at heart level. Finally, you’ll decide whether to adjust measurement technique or seek professional service. The goal is to confirm that the iHealth monitor’s readings stay within an acceptable range relative to the reference device under defined conditions.
Step 1: Prepare equipment and environment
Action: Set up both devices on a stable, flat surface at heart level, with the subject seated and relaxed. Ensure the iHealth monitor has fresh batteries and the reference device is functioning. Verify cuff sizes are correct for the user and that the environment is quiet. Rationale: Proper setup minimizes external sources of error that can falsely appear as device drift. Tip: Do a quick dry run of a single pair of measurements to confirm both devices respond normally.
Step 2: Conduct the reference check
Take multiple paired readings with both devices in quick succession, following the same measurement protocol each time. Record systolic and diastolic values for each pair, then compute the average difference. If the average discrepancy exceeds what you consider acceptable, note the direction of bias (higher on the iHealth vs the reference or the opposite) and plan the next steps accordingly. Close attention to arm position, breathing, and not talking during measurements is essential for reliable results.
Step 3: Adjust cuff fit and measurement conditions
If you observe a systematic bias, first re-check cuff placement and fit. Place the cuff on bare skin, about an inch above the elbow, with the artery mark aligned with the cuff’s center. Make sure the arm is supported at heart level and remains still during measurements. If bias persists after rechecking technique, you may need to reset the device’s internal memory or consult the manufacturer for recalibration options.
Step 4: Log results and schedule next calibration
Document all readings, dates, battery status, cuff size, and patient posture in a dedicated log. Use this record to monitor drift trends over time and to decide when a follow-up calibration should be performed. After completing calibration, compare the updated readings with the reference device to confirm improved agreement. The Calibrate Point team recommends keeping calibration records accessible for healthcare visits and device support calls.
Keeping readings accurate over time
Calibration is not a one-off event. Regular checks—at intervals aligned with your usage, storage conditions, and firmware changes—help sustain accuracy. Store the devices in a controlled environment away from extreme temperatures, moisture, and magnetic interference. When in doubt, repeat calibration or seek professional evaluation. Consistency and careful technique are your best tools for dependable home monitoring.
Authoritative sources
- Centers for Disease Control and Prevention (CDC): https://www.cdc.gov/bloodpressure/index.html
- National Heart, Lung, and Blood Institute (NHLBI): https://www.nhlbi.nih.gov/health-topics/high-blood-pressure
- World Health Organization (WHO): https://www.who.int/news-room/fact-sheets/detail/blood-pressure
Tools & Materials
- iHealth blood pressure monitor (validated model)(Use a current, supported model; ensure firmware is up to date)
- Second validated reference monitor(Cross-check readings against a clinically validated device)
- Fresh batteries(New alkaline or recommended type per manufacturer)
- Cuff of appropriate size (M/L)(Fit should accommodate the arm circumference without compression)
- Flat, quiet testing space(Stable surface; seated with back supported)
- Logbook or digital log(Record readings, times, posture, and conditions)
- Timer or stopwatch(Standardize measurement intervals)
Steps
Estimated time: 25-40 minutes
- 1
Prepare equipment and environment
Set up both devices on a stable surface at heart level. Verify batteries are fresh for both units. Ensure the cuff size matches the user and the space is quiet and free from distractions.
Tip: Do a quick dry run with a single measurement pair to confirm both devices respond normally. - 2
Run the reference check
Take multiple readings from both devices in quick succession using the same posture and timing. Log systolic and diastolic values for each pair and compute the average difference.
Tip: Note the direction of any bias (iHealth higher or lower) to guide next steps. - 3
Recheck cuff fit and position
If bias is detected, re-check cuff placement and fit. Position the cuff on bare skin, aligned with the arm artery marker, and ensure the arm remains still at heart level.
Tip: Check for wear or damage on the cuff that could affect readings. - 4
Adjust technique or seek recalibration
If bias persists after rechecking technique, consider resetting the device memory or contacting the manufacturer for official recalibration options.
Tip: Document any reset steps taken for future reference. - 5
Log results and interpret
Record outcomes, compare updated measurements with the reference device, and assess whether agreement improved. Use the log to track drift over time.
Tip: Use a consistent posture and environment for all future checks. - 6
Decide on a calibration schedule
Based on results and usage, establish a reasonable interval for future checks. More frequent checks may be warranted for critical health decisions.
Tip: Keep a calendar reminder to review calibration status. - 7
Maintain and store properly
Store devices in a controlled environment away from extreme temperatures and moisture. Periodic revalidation keeps readings trustworthy.
Tip: Inspect the cuff and tubing for signs of wear during routine maintenance.
Questions & Answers
Why should I calibrate a home BP monitor?
Calibration helps ensure readings reflect your true blood pressure and are comparable to clinical measurements. It reduces misinterpretation and supports better health decisions. If readings drift, the device may mislead treatment choices.
Calibration helps ensure the monitor reads correctly and matches clinical measurements, reducing misinterpretation and guiding better health decisions.
How often should I calibrate?
There isn’t a universal schedule; calibrate when readings diverge from a reference or after servicing and firmware updates. For high-stakes monitoring, consider more frequent checks.
Calibrate when readings diverge or after servicing; more frequent checks may be wise for important monitoring.
Can I calibrate without a second device?
A second validated device is ideal for cross-checking accuracy. If unavailable, follow the manufacturer’s official calibration procedure and document readings carefully.
Having a second validated device is best for accuracy checks; otherwise, follow official guidance and log results.
Is calibration the same as resetting the device?
Resetting restores factory settings, which is not the same as calibration. Calibration verifies accuracy against a reference and adjusts usage rather than erasing data.
Resetting is not calibration; calibration checks accuracy against a reference and may adjust how you use the device.
What if readings remain off after calibration?
Reassess cuff fit, arm position, and measurement timing. If bias persists, contact the manufacturer or seek professional evaluation.
If readings stay off after calibration, check cuff fit and position, then consult support or a clinician.
Watch Video
Key Takeaways
- CalibratePoint recommends regular checks to maintain accuracy.
- Use a validated reference device for reliable comparisons.
- Keep consistent measurement conditions (cuff fit, posture, and environment).
- Document results to track drift over time.
- Schedule future calibrations based on usage and readings.