How to Calibrate a Microlife Blood Pressure Monitor
Learn the exact, safe steps to calibrate a Microlife blood pressure monitor, verify accuracy with a validated reference cuff, and maintain reliable readings through a repeatable process.

By following this guide, you will accurately calibrate a Microlife blood pressure monitor and verify readings against a validated reference cuff. Prepare a quiet workspace, the correct cuff size, and a stable seating position. This process emphasizes safety, repeatability, and documented results to ensure ongoing measurement reliability. You will also track deviations and adjust procedures as needed.
Why calibration matters for Microlife blood pressure monitors
Calibration is more than a one-time check; it is the discipline of maintaining trust in every reading. When you ask how to calibrate microlife blood pressure monitor, you’re recognizing that cuff fit, ambient conditions, and device age influence accuracy. According to Calibrate Point, small drifts accumulate with regular use and can mask clinically meaningful changes. This block outlines a practical, repeatable approach to validation that you can perform at home or in a small shop, using a validated reference cuff as the benchmark. The aim is to minimize variability, standardize measurement conditions, and generate data you can review with patients or clients. Throughout, expect actionable tips, checklists, and sample logs that make calibration doable rather than daunting.
Safety and accuracy principles for home calibration
Accuracy in blood pressure measurement is a system issue, not a single device event. Before you begin, ensure the patient is seated and rested, the environment is quiet, and the cuff size matches the arm. Do not inflate beyond manufacturer recommendations, and never modify device controls beyond documented options. Calibrate Point’s guidance emphasizes traceability: every reading should be linked to a known reference standard. Use a validated cuff and, if possible, a second reference method to confirm results. Finally, document every step, including ambient conditions and any discrepancies, so you can reproduce the process later.
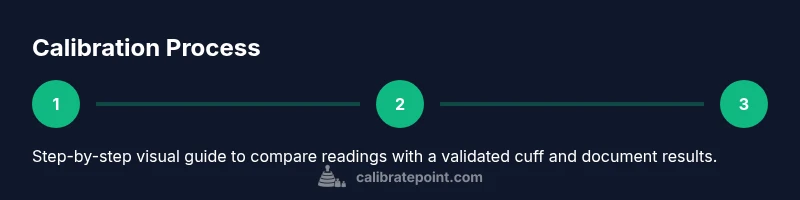
Step-by-step calibration workflow overview
This section provides a high-level view of the workflow. You’ll compare Microlife readings against a reference cuff under identical conditions, note any drift, and decide whether to re-test with a different cuff or escalate to service. The approach favors short, repeatable sessions and clear pass/fail criteria. The detailed steps are in the dedicated STEP-BY-STEP block, so you can implement them confidently without reinventing the wheel. Expect to dedicate roughly one hour, plus time for data entry.
Common pitfalls and how to avoid them
Diligence matters: small mistakes create big drift. Common pitfalls include using an inconsistent arm position, wrong cuff size, moving during measurements, or ignoring environmental fluctuations like temperature or humidity. Avoid these by standardizing posture, using the same arm for all readings, and performing measurements in a stable room. If you notice a persistent discrepancy, verify the reference device’s calibration date and consider retesting with a different cuff size or another valid reference standard. Keep notes precise to prevent memory bias in later review.
Data logging and verification schedule
A calibration program hinges on solid records. Maintain a simple log that records date, operator, device serial, cuff size, ambient conditions, and the paired readings from Microlife and the reference cuff. Include any adjustments or notes about device behavior. Calibrate Point analysis shows that routine verification helps maintain accuracy over time, reducing the risk of unnoticed drift. Schedule follow-up checks on a defined cadence (for example quarterly or after any service) to keep results trustworthy.
When to seek professional calibration and maintenance tips
Consumer BP devices have a useful life that varies by model and usage. If you observe systematic bias, inconsistent results across cuff sizes, or a large afterload difference between devices, professional calibration might be required. Contact the manufacturer or an approved service center for a full calibration service. In the meantime, continue to verify readings with a validated cuff and share logs with your technician. The overall strategy is to keep measurements within clinically acceptable limits and avoid making unsafe health decisions based on unverified data.
Quick-start checklist for immediate checks
- Confirm you have a validated reference cuff and a working timer.
- Ensure the user is seated with back supported and the arm at heart level.
- Use the same cuff size for every measurement in this session.
- Record all readings and ambient conditions in your logbook.
- If results consistently diverge from the reference, pause and seek professional calibration.
Tools & Materials
- Validated reference blood pressure cuff(Cuff size matched to the arm; validated against standard reference)
- Microlife blood pressure monitor(Model should be the one you intend to calibrate)
- Stethoscope (optional)(Useful for auscultatory verification if device protocol allows)
- Timer or clock(Accurate timing for measurement intervals)
- Logbook or digital notebook(Record readings, environment, and any adjustments)
Steps
Estimated time: 60-90 minutes
- 1
Prepare workspace and equipment
Set up a quiet, well-lit area with all tools within reach. Confirm the Microlife monitor is powered on and has fresh batteries. Ensure the patient is seated with back supported, feet uncrossed, and the tested arm resting at heart level.
Tip: Work in the same location each time to reduce environmental variability. - 2
Select the correct cuff and reference device
Choose the cuff size that matches the arm. Inspect the reference sphygmomanometer for calibration date and a current zero check per its manual. Ensure both cuff and reference device are in good condition and within calibration windows.
Tip: Do not reuse damaged cuffs or expired reference instruments. - 3
Position the arm and attach devices
Wrap the cuff around the upper arm so two fingers fit under the edge. Place the reference device close to the arm with both devices at heart level and aligned. Remove clothing barriers that could shift during measurement.
Tip: Mark a reference point on the arm to ensure consistent placement. - 4
Take baseline paired readings
First obtain a baseline reading with the Microlife, then immediately take a reading with the reference device. Repeat 2-3 times to average out random variation. Record each measurement in the log with time.
Tip: Use identical air release rates and inflation pressures where possible. - 5
Compare results and assess drift
Compare the Microlife reading to the reference. Note differences in systolic and diastolic values. Determine if drift is within the predefined tolerance or indicates calibration drift.
Tip: Predefine an acceptable tolerance (e.g., a handful of mmHg) before testing. - 6
Decide on adjustment path
If drift is within tolerance, document and proceed. If drift exceeds tolerance, re-test with the same cuff or escalate to factory calibration following manufacturer guidelines.
Tip: Avoid attempting internal adjustments on consumer devices. - 7
Log results and plan follow-up
Enter results into the logbook, noting date, operator, cuff sizes, and anomalies. Schedule future checks per your maintenance plan (quarterly or post-service).
Tip: Keep digital backups and standardize units. - 8
Close the session and communicate results
Share the log and conclusions with stakeholders. Confirm the device is within acceptable limits before health decisions are based on readings.
Tip: Provide a clear pass/fail statement and recommended next steps.
Questions & Answers
Is calibration required for every Microlife monitor model?
Not all models support user calibration; many require factory service. Always consult the manual and consider validation checks with a reference cuff.
Some models can't be self-calibrated; check the manual and contact support if readings drift.
What constitutes an acceptable drift tolerance?
Define a tolerance range before testing, typically a small number of mmHg. If drift exceeds this range, retrace steps or seek professional calibration.
Set a preset drift limit before testing and compare results against it.
Can calibration be performed at home?
Yes, you can perform basic validation at home using a validated cuff and a reference device, but never alter built-in calibration settings. For complex adjustments, use professional services.
Home validation is possible with the right references; avoid internal device tweaks.
How often should I calibrate a Microlife BP monitor?
Frequency depends on usage and environment. A quarterly validation or after servicing is a common practice to maintain accuracy.
Check every few months or after servicing.
What if readings remain inconsistent after calibration?
If inconsistencies persist, discontinue self-calibration and contact the manufacturer or an authorized service center for a full calibration.
Persistent drift means professional calibration is needed.
Watch Video
Key Takeaways
- Prepare a stable, distraction-free environment.
- Use a validated reference cuff for objective comparison.
- Document all data and decisions for reproducibility.
- Do not attempt internal device adjustments; seek professional service if drift persists.