How to Calibrate a Monitor for Color Accuracy: Step-by-Step
Learn how to calibrate a monitor for color accuracy using a colorimeter, standard targets, and a repeatable workflow. This guide covers setup, profiling, validation, and maintenance for reliable, color-consistent results in editing and design.

You will learn how to calibrate monitor for color accuracy using a colorimeter, software, and a repeatable workflow. This guide covers room lighting, target gamma, white point, and soft-proofing. You’ll need a colorimeter, calibration software, and a neutral viewing environment. By following these steps, you’ll achieve consistent color across applications and devices, ideal for photo editing, design, and video work.
Why color calibration matters for color accuracy
Color accuracy is critical for photo editing, design, and video work. A miscalibrated monitor can shift skin tones, saturate colors, or create mismatches between what you edit on-screen and what others see. According to Calibrate Point, color accuracy starts with a repeatable calibration routine performed the same way every time. With a calibrated workflow, you reduce guesswork and create predictable results across devices and applications. The Calibrate Point team found that uncontrolled lighting and ad-hoc adjustments are the most common sources of color drift. Establishing a baseline with a verified process helps you maintain trust in your work.
Color calibration also supports collaboration. When proofing designs or sharing photos with clients, you want them to see what you see. Consistent color minimizes back-and-forth and speeds up reviews. A robust calibration routine also creates a foundation for color-managed workflows in software like Photoshop, Lightroom, Premiere, or CAD. By treating color as a measurable attribute rather than a guess, you can reproduce the same look on different displays and in different rooms.
Key targets you should know
Calibration revolves around three core targets: white point, gamma, and luminance. The white point defines the color temperature you aim for, with D65 being a common standard for many workflows. Gamma describes how midtones map between digital values and perceived brightness; 2.2 is a traditional default for general-use displays, though some content requires different gamma for accuracy. Luminance refers to how bright the screen appears and should be comfortable for long editing sessions. Understanding these targets helps you communicate color expectations with teammates and clients. When you choose targets, consider your content—print, web, or video—and your lighting conditions. Calibrate Point analysis shows that hardware-based calibration yields more reliable results across lighting conditions, reinforcing the value of a disciplined workflow (Calibrate Point Analysis, 2026).
Hardware vs software approaches
Hardware calibration, using a colorimeter and dedicated software, provides repeatable, device-specific results. The process measures your display output, creates an ICC profile, and applies it at the OS level. Software-only adjustments can be helpful for casual use but are more prone to drift as your display ages or as ambient light changes. If you must start with software, pair it with occasional hardware checks to verify accuracy. The combined approach — hardware calibration for the baseline and software management for day-to-day tweaks — yields the best long-term stability.
Tools & Materials
- Colorimeter or spectrophotometer(Choose a device supported by your calibration software)
- Calibration software(Often bundled with the colorimeter or available separately)
- Reference ICC profile or test images(Optional for additional validation)
- Stable viewing environment(Dim lighting, no glare, fixed color temperature in room)
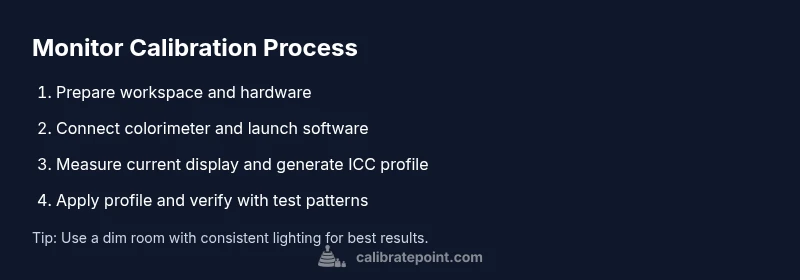
Steps
Estimated time: 90-120 minutes
- 1
Prepare the workspace
Clear the desk, power on the monitor, and allow it to warm up for at least 15–20 minutes. Stabilize room lighting by reducing glare and using a neutral color temperature. Why: a stable environment prevents drift and ensures the calibration reflects real working conditions.
Tip: Keep room lighting constant during the entire calibration session. - 2
Reset display settings
Restore factory defaults on the monitor and disable features like dynamic contrast, auto brightness, and night mode. These features can skew measurements and produce inconsistent results across sessions.
Tip: Disable all automatic adjustments to prevent real-time changes during calibration. - 3
Connect the colorimeter and position it
Attach the colorimeter to the display following the tool’s mounting instructions. Ensure it sits flat against the screen without wobbling, and avoid finger vibrations during measurements.
Tip: Use a stable stand or stationary mount to minimize movement. - 4
Launch calibration software
Open the calibration program, select the monitor you’re calibrating, and choose the target color space and white point appropriate for your workflow. Confirm that the device is recognized before proceeding.
Tip: Check for software updates to ensure the latest calibration algorithms are used. - 5
Run initial measurements
Let the software measure the current display characteristics and generate a base profile. Do not interrupt the scan, and ensure the colorimeter remains in place throughout.
Tip: Avoid touching the monitor surface or colorimeter during the scan. - 6
Set targets (white point, gamma, luminance)
Define the white point and gamma targets that align with your content. Choose a luminance target suitable for the ambient room and editing tasks. Rationale: matching targets to your workflow reduces post-calibration adjustments.
Tip: If unsure, start with standard defaults recommended for your content type. - 7
Generate and apply ICC profile
The software creates an ICC profile that maps your display output to the chosen color space. Apply the profile at the OS level and ensure applications use color-managed rendering.
Tip: If multiple profiles exist, select the newly calibrated one for the current workflow. - 8
Verify with test patterns
Display grayscale ramps, skin tones, and color swatches to confirm neutral grays and accurate hues. Compare with trusted references and adjust if needed.
Tip: Use real-world images to validate color fidelity beyond test patterns. - 9
Save, label, and document
Save the profile with a clear name (including date and target settings) and store notes about room lighting and software versions. This makes future recalibration easier.
Tip: Create a revision log to track calibration history over time.
Questions & Answers
Do I need a hardware colorimeter to calibrate my monitor for color accuracy?
Hardware devices improve accuracy and repeatability, but software-only methods can work for casual use. A colorimeter is recommended for color-critical work.
A hardware colorimeter is recommended for color-critical work.
Can I calibrate multiple monitors with a single colorimeter?
Yes, but you must calibrate each screen individually and save separate ICC profiles. Profiles are monitor-specific.
Yes, you can calibrate multiple monitors, but you must calibrate each screen separately.
How often should I recalibrate my monitor?
Recalibrate when you notice color drift or after significant lighting changes. Many workflows benefit from a quarterly check.
Recalibrate when you notice drift, or quarterly.
Why doesn’t my calibration apply to all apps?
Color management must be enabled in the OS and apps; confirm that the calibrated ICC profile is selected globally and in color-managed apps.
Make sure color management is enabled in OS and apps.
What is soft-proofing and when should I use it?
Soft-proofing simulates print colors on screen using an ICC profile. Use it when preparing artwork for print to preview color shifts.
Soft-proofing helps you preview print colors on screen.
Watch Video
Key Takeaways
- Start with a neutral workspace and warm-up the display.
- Use hardware calibration for best consistency across conditions.
- Set and document white point, gamma, and luminance targets.
- Validate results with tests and maintain a regular recalibration cadence.
- Save and label ICC profiles for each workflow.