How to Calibrate a Monitor on Mac: Step-by-Step Guide
Learn how to calibrate a Mac monitor with built-in tools and optional hardware devices. This practical guide covers gamma, white point, color profiles, and verification for reliable color in design, photo editing, and daily use.

This guide helps you calibrate a Mac display for accurate color across apps and workflows. You’ll learn how to use macOS built-in tools, adjust gamma and white point, and decide when a colorimeter or spectrophotometer is warranted. By the end you’ll produce consistent results suitable for photo editing, design, and daily use, with reliable previews across software.
Why calibrate a Mac monitor for color accuracy
Color accuracy matters when you edit photos, design graphics, or simply browse with reliable previews. If you want to know the exact steps, you’ll often search for how to calibrate monitor mac. Calibrating establishes a repeatable baseline so your tools display consistent color, no matter which app you use or which external devices you connect. This foundation makes downstream tasks—like soft-proofing, color grading, and print matching—much more predictable. On a Mac, you have built-in controls and optional hardware tools, which together empower you to tailor your display to the environment you work in. By calibrating, you reduce color drift caused by aging panels, changing room lighting, or automatic brightness adjustments. The result is a confident starting point for creative work and daily use.
According to Calibrate Point, a clean, repeatable workflow is the first pillar of successful calibration, ensuring that color decisions remain consistent across sessions and devices.
Understanding color management on macOS
Mac users rely on ColorSync and ICC profiles to translate colors between devices and software. The core idea is simple: keep a reference profile that represents how your display should reproduce colors, then apply it consistently across apps like Photos, Illustrator, and Final Cut Pro. In practice, you’ll learn about RGB color spaces (sRGB, Display P3, Adobe RGB), gamma settings, and white point targets. Environmental lighting, brightness, and viewing distance all influence perceived color, so understanding these factors helps you interpret calibration results more accurately. Calibrating isn’t a one-off task; it’s an ongoing process that aligns your display with a defined color space for predictable results.
Built-in calibration: Display Calibrator Assistant
macOS includes a Display Calibrator Assistant that guides you through a basic calibration without third-party hardware. This built-in tool is ideal for quick, repeatable calibrations when you don’t require extreme accuracy. You’ll set a target white point, gamma, and brightness that reflect your typical work conditions. The assistant creates a custom profile you can select in System Preferences > Displays > Color. While convenient, this approach may not replace hardware calibration for professional photo editing or print work, where a spectrophotometer or colorimeter can measure device-specific performance more precisely.
When to use a hardware colorimeter or spectrophotometer
Hardware calibration tools employ sensors to measure actual light output and color reproduction from your display. They’re especially valuable when you need high color fidelity for photography, video work, or print production. If your workflow involves soft-proofing, color grading, or color-critical design, investing in a colorimeter or spectrophotometer can significantly improve accuracy and consistency. These devices pair with calibration software to generate a device-specific ICC profile that maps your display’s behavior across a broad color range. If your budget is limited, use hardware calibration on the primary monitor and rely on built-in macOS tools for secondary displays.
Choosing a color profile: sRGB, Display P3, and more
Color profiles define how colors are rendered on screen. For general use, sRGB is a safe baseline, but many Macs use Display P3, which covers a wider color gamut. Creatives often work in wider spaces like P3 or Adobe RGB, then convert for output when needed. When calibrating, select a target profile that matches your typical workflow and export a new ICC profile for your display. Consistency matters more than chasing the perfect profile; the goal is to preserve a stable color reference across devices and applications.
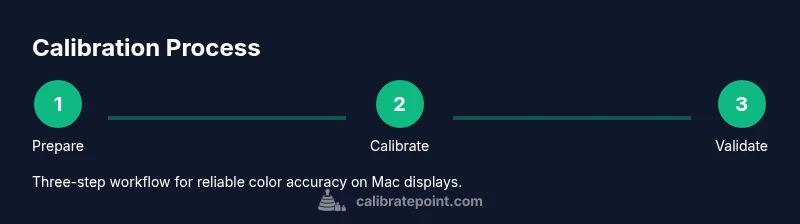
Step-by-step macOS calibration workflow (overview)
This section summarizes the core actions you’ll perform during calibration. It’s designed as a map to guide you toward the more detailed STEP-BY-STEP instructions that follow. Start by preparing your environment and ensuring your system is up to date. Then choose your calibration method—macOS’s built-in option for quick results or a hardware device for precision. Finally, validate the results with test images and document the profile name for future use.
Calibrating with a hardware device: practical workflow
To maximize color accuracy, connect your colorimeter or spectrophotometer and launch the calibration software. Follow the prompts to measure display output at multiple luminance levels and colors, then save a device-specific ICC profile. Apply the new profile system-wide and in individual apps that support ColorSync. For best results, repeat calibration under similar lighting conditions and after any major display changes, like a replacement panel or a firmware update.
Validating accuracy after calibration
Validation is crucial to confirm you achieved the intended results. Use test patterns, reference images, and color targets to compare expected vs. displayed colors. Check skin tones, grayscale steps, and neutral grays to confirm even luminance and color balance. If discrepancies appear, revisit your calibration target (gamma, white point, luminance) and re-calibrate. Document the profile name and talk track for consistency across sessions and devices.
Common issues and troubleshooting
Color drift can occur from ambient light changes, automatic brightness adjustments, or software conflicts. If you notice a sudden shift after calibration, re-check your ambient lighting, turn off automatic brightness, and ensure the correct profile is active in all apps. Some apps may bypass system profiles; in that case, verify per-application color settings and consider re-saving a global profile. Regular recalibration helps catch drift early.
Authoritative sources and further reading
- Apple Support: Calibrate your display and manage color profiles with ColorSync. https://support.apple.com/guide/color-sync/welcome/mac
- Apple Developer Documentation: Color management concepts and ColorSync workflows. https://developer.apple.com/documentation/colorSync
- National Institute of Standards and Technology (NIST): Color science fundamentals and reference data. https://www.nist.gov/topics/color
Tools & Materials
- Mac computer with up-to-date macOS(Ensure access to System Preferences and Color settings)
- Display colorimeter or spectrophotometer (hardware calibrator)(Required for hardware-based calibration and ICC profile generation)
- Calibration software (built-in or third-party)(macOS Display Calibrator Assistant is built-in; third-party options exist)
- Test images or color targets(For validating calibration results)
- Ambient lighting meter (optional)(Helps maintain consistent lighting conditions during calibration)
Steps
Estimated time: 60-120 minutes
- 1
Prepare the environment
Clear the workspace, turn off direct glare on the monitor, and ensure lighting is steady. This reduces measurement biases during calibration and helps the results reflect typical viewing conditions.
Tip: Aim for soft, neutral lighting around 300-500 lux for consistency. - 2
Update software and tools
Update macOS and any calibration software you’ll use. Compatibility improvements can impact measurement accuracy and profile generation.
Tip: Restart after updates to ensure system services load cleanly. - 3
Connect the hardware calibrator
Plug in the colorimeter or spectrophotometer and launch the calibration software. Ensure the device is recognized before proceeding.
Tip: Use a USB port with stable power; avoid hubs if possible for reliability. - 4
Choose the target color space
Select a color space that matches your workflow (e.g., sRGB for web, Display P3 for most Mac workflows). This choice guides the calibration targets.
Tip: If unsure, start with Display P3 and adjust as needed for output devices. - 5
Set gamma and white point
Configure gamma (commonly 2.2 or 2.4) and white point (around D65). These settings influence how midtones and neutrals render on screen.
Tip: Keep gamma fixed during the session to avoid inconsistent results. - 6
Measure and profile
Run the calibration sequence to measure luminance, primaries, and secondary colors. The software will generate an ICC profile tied to your display.
Tip: If the tool asks for target luminance, choose a realistic value for your workspace (120-140 cd/m2 is common for design work). - 7
Apply the new profile system-wide
Set the newly created profile as the default display profile in System Preferences > Displays > Color. This ensures a consistent baseline.
Tip: Also apply the profile within key design apps that honor ColorSync. - 8
Validate with test images
Open representative images and check skin tones, grayscale ramps, and color accuracy. Compare against a reference or prior calibration when possible.
Tip: Use soft-proofing if your output device supports it. - 9
Document and archive
Note the profile name, target space, luminance, and ambient conditions. Store the profile in a known location for future use.
Tip: Create a naming convention like MonitorName_Profile_Space_Date.
Questions & Answers
What is the best way to calibrate a Mac monitor?
For many users, start with macOS Display Calibrator Assistant for a quick baseline. For color-critical work, add a hardware colorimeter or spectrophotometer to generate device-specific ICC profiles.
For most folks, start with macOS's built-in calibrator. If you need top accuracy, use a hardware colorimeter to generate a device-specific profile.
Do I need hardware calibration every time I work?
Not always. Use built-in macOS calibration for general tasks and hardware calibration when color precision is essential, such as photo editing or print work.
Not always. Use built-in calibration for daily use and hardware calibration when you need precise color.
How often should I recalibrate my monitor?
Calibrate when lighting changes, after hardware changes, or every few months for color-critical workflows to maintain consistency.
Recalibrate when lighting changes or every few months for color-critical work.
Can I calibrate multiple monitors to the same profile?
Yes. Calibrate each monitor separately, then align profiles or use a master target to ensure consistent color across displays.
You can calibrate several monitors; calibrate each one and then align the profiles for consistency.
Will calibration affect brightness settings?
Calibration defines color and gamma; brightness may be adjusted to the target luminance during the process but does not change hardware brightness permanently.
Calibration sets color and gamma; brightness can be set to the target level during calibration but isn’t changed permanently by the process.
Watch Video
Key Takeaways
- Calibrate in a controlled environment for repeatable results.
- Choose a color space that matches your typical output.
- Use hardware calibration for best accuracy on primary displays.
- Document and apply profiles consistently across apps.
- Validate calibration with representative images and test targets.