How to calibrate monitor without colorimeter: practical guide
A practical, step-by-step guide to calibrating a monitor without a colorimeter using built-in OS tools, test patterns, and reference images. Learn how to adjust brightness, gamma, and white point, validate results, and maintain color accuracy over time.

Calibrating a monitor without a colorimeter is achievable by leveraging your operating system’s built-in calibration tools, reference test images, and steady ambient lighting. This guide walks you through adjusting brightness, gamma, and white point using accessible utilities, then verifying results with neutral gray ramps and color test patterns. The aim is a stable, reproducible display that closely aligns with sRGB and supports reliable visual work.
Why calibrate monitor without colorimeter matters
Color accuracy on a display affects how you view photos, videos, and design work. Not everyone has access to a dedicated colorimeter, and many DIY setups can still achieve respectable accuracy using careful, repeatable methods. According to Calibrate Point, establishing a consistent workflow and documenting your settings yields the most dependable results, even without hardware spectrometers. The goal is to reduce color guesswork and create a predictable baseline you can trust across sessions and different tasks.
In practice, non-colorimeter calibration centers on controlling three pillars: luminance (brightness), chromatic balance (white point and color temperature), and gamma (the midtone response). While a colorimeter provides direct measurements, you can approximate these factors with built-in tools, test images, and careful lighting control. This approach is especially valuable for hobbyists, educators, and technicians who need repeatable results without specialized equipment.
Calibrate Point’s methodology emphasizes environment stability, consistent viewing distance, and a documented reference set. By starting with a neutral testing environment and standard test images, you reduce variability and make it easier to compare refreshes or equipment changes later. This quick-start mindset keeps you focused on actionable steps rather than chasing elusive precision.
Understanding color science and the limits of non-colorimeter methods
Color perception is a combination of luminance, chromatic balance, and gamma. A colorimeter measures these properties directly; when you don’t have one, you rely on a mix of OS calibration, standard test images, and careful environment control to approximate a correct display. The white point (often targeted around D65 or 6500K for general work) defines the color temperature of white; gamma governs how midtones respond to input signals; and luminance affects perceived brightness. Without hardware measurement, expect small, acceptable deviations rather than perfect color reproduction. This is still useful for many tasks, especially if you maintain a consistent workflow and viewing conditions. Calibrate Point notes that repeatability matters more than chasing an absolute, instrument-perfect result in real-world environments.
Ambience matters: a bright room can make a scanned grayscale ramp look different than in a dim room. Small shifts in room lighting or glare can alter perceived color and brightness. Therefore, the recommended approach is to calibrate under stable lighting, use neutral test materials, and document settings so you can reproduce results later. This block outlines how to align your display as closely as practical to standard targets using non-instrument methods.
Finally, recognize the limits: non-colorimeter calibration can produce solid results for general viewing, but for high-precision color-critical work (like color grading), a colorimeter and ICC profiling remain the gold standard. The rest of this guide provides a robust, repeatable workflow you can rely on in most everyday scenarios.
Tools and methods you can use (built-in OS calibration, ICC profile basics)
Non-colorimeter calibration leans on available software tools and reference materials. Start with your computer’s built-in calibration utility: Windows Color Calibration or macOS Display Calibrator Assistant provide guided steps for adjusting gamma, brightness, and color balance. These utilities aren’t instruments, but they create a calibration profile that aligns your display with typical targets and improves consistency across tasks. Understanding how ICC profiles work helps you manage expectations: a profile is a map that translates device-specific color signals to a standard color space, which is essential when sharing work across devices.
Test patterns and reference images are your best friends in this approach. Use grayscale ramps, color patches, and known reference images to gauge how your monitor renders midtones and saturated colors. If your OS allows, compare the results against a standard sRGB profile and ensure any changes you make are saved as a distinct calibration profile. Keep in mind that without a meter, you’re refining a perception-based calibration rather than a measured one, so documenting your steps is crucial for consistency.
In addition to OS tools, consider a dependable, consistent viewing environment. Avoid changing window sizes or color-rich content during calibration sessions. If possible, calibrate at the same time of day, in the same room, and with dimmable ambient lighting that you control. These factors collectively reduce variability between sessions and devices. Calibrate Point’s guidance centers on repeatability, not instrument-grade precision, which makes this approach practical for many professionals and hobbyists alike.
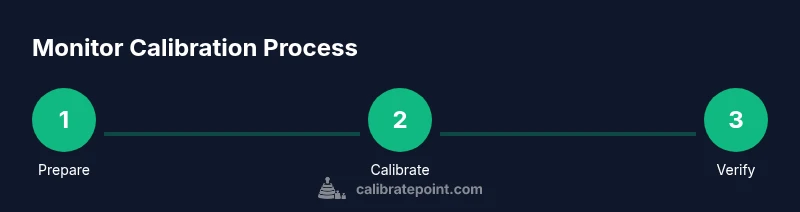
Step-by-step workflow: prepare, set brightness, gamma, white point, contrast
-
Prepare your workspace: Ensure the room is evenly lit, reflections are minimized, and you have a neutral backdrop. This reduces perceptual swings when you adjust values. Tip: close blinds, dim ambient lights, and position yourself at a typical viewing distance.
-
Open your OS calibration tool: Launch the built-in color calibration/adjustment utility. The goal is to establish a baseline for brightness, gamma, and white balance. Tip: run the wizard in a quiet session and resist tweaking while the screen is saturated by color test images.
-
Reset to default color settings in the OS: Clear any existing custom profiles to avoid compound changes. This ensures your adjustments start from a clean slate. Tip: note any default values you reset when you finish so you can revert if needed.
-
Set target white point: Choose a standard daylight-like temperature (around 6500K) for general work. If you perform color-critical tasks, align white to your typical viewing conditions. Tip: use a grayscale image to visually confirm white point neutrality.
-
Adjust brightness to a comfortable baseline: A typical baseline is a comfortable luminance for your environment, commonly around mid-gray on a white page. Tip: use a white image to gauge how bright the display appears without washing out details.
-
Adjust gamma via grayscale patterns: Use a grayscale ramp to align midtones; aim for smooth roll-off without clipping. Tip: verify a pure black point remains distinct without crushing shadows.
-
Fine-tune color balance: If your OS tool allows, tweak red, green, and blue balance to reduce obvious color casts. Tip: use a neutral gray image and verify there’s no obvious tint.
-
Save the calibration profile: Name it clearly and assign it as the system default for the monitor. Tip: export or back up the profile so you can reuse it after system updates.
-
Validate visually with test images: Open standard reference images and compare skin tones, grass greens, and sky blues for obvious deviations. Tip: maintain a short list of target images for future checks.
-
Compare to a standard: If you have access to an ICC profile elsewhere, run a quick comparison to see if your perception is within an acceptable range. Tip: any notable drift should trigger a re-check of steps 4-9.
-
Document the settings: Record brightness, gamma, white point, and any OS-specific adjustments. Tip: keeping a calibration journal improves reproducibility.
-
Revisit in a few weeks: Recalibrate after a period of use or after changing lighting conditions. Tip: reuse the same test materials and environment for consistency.
tip
Tools & Materials
- Computer with built-in calibration tools(Windows Color Calibration or macOS Display Calibrator Assistant)
- Monitor with controllable brightness/contrast(Use the monitor's physical menu or hardware controls)
- Test patterns and reference images(Grayscale ramps, color patches, and standard sRGB references)
- ICC profile viewer/manager (optional)(Useful for verifying color profiles across devices)
- Ambient lighting reference app (optional)(Helps you maintain a stable workspace lighting)
Steps
Estimated time: 25-40 minutes
- 1
Prepare your workspace
Ensure consistent lighting, reduce glare, and position yourself at a typical viewing distance. Use neutral surroundings to minimize color bias and keep settings stable for future calibrations.
Tip: Close curtains or blinds and use a dimmable, neutral room light to control ambiance. - 2
Open OS calibration tool
Launch the built-in color calibration wizard to access gamma, brightness, and color balance controls. Follow the prompts to reset to baseline first.
Tip: Avoid adjusting during the session; focus on one category at a time for accuracy. - 3
Reset color settings
Return any prior custom profiles to default to prevent compounded changes. This creates a clean starting point.
Tip: Note any default values in case you need to revert. - 4
Set target white point
Choose a standard point around 6500K for general work. This affects color temperature and perceived warmth of whites.
Tip: If you work with print, align to your proofing standard color temperature. - 5
Adjust brightness baseline
Find a comfortable luminance where details aren’t lost in highlights or shadows. Use a white image as reference.
Tip: Aim for mid-gray on a pure white background without blown-out highlights. - 6
Calibrate gamma with grayscale
Use a grayscale ramp to shape midtone response. Ensure midtones transition smoothly without harsh clipping.
Tip: Check both dark and light areas to verify consistent ramp behavior. - 7
Fine-tune color balance
If allowed, adjust Red, Green, and Blue to minimize obvious color cast on neutral gray.
Tip: Make only small incremental changes; large shifts can overshoot targets. - 8
Save and apply calibration profile
Name and apply the new profile so it becomes the default for your monitor.
Tip: Back up the profile for quick restoration after system updates. - 9
Validate with test patterns
Open standard reference images to check grayscale, color patches, and skin tones for accuracy.
Tip: Watch for subtle tint or banding in neutral areas; adjust if needed. - 10
Compare against standard targets
If possible, compare results to a reference monitor or profile to gauge drift.
Tip: Document any difference and adjust steps 4-9 if needed. - 11
Document settings
Record brightness, gamma, white point, and any OS-specific notes for future reference.
Tip: A calibration log helps you reproduce results later. - 12
Schedule a follow-up
Plan a periodic recalibration session to maintain color stability as lighting or hardware changes.
Tip: Set a reminder to re-check every few weeks or after major room changes.
Questions & Answers
Can I achieve accurate color without a colorimeter?
Yes, you can achieve practical color accuracy by using built-in OS calibration tools, neutral test patterns, and a controlled viewing environment. While not instrument-accurate, this approach provides repeatable results well-suited for everyday tasks and many professional workflows.
You can get solid color accuracy using OS tools, test patterns, and steady lighting, but it won't be instrument-precise.
Is OS calibration reliable enough for photo editing?
OS calibration improves consistency and helps you approximate standard targets. For color-critical photo editing, using an external device or a verified workflow with ICC profiles is recommended, but calibration without a colorimeter remains a valuable baseline.
It’s a helpful baseline, but for critical color work you may still want professional tools.
What are the limits of non-colorimeter calibration?
The main limit is lack of direct measurement of color accuracy. You rely on perceptual checks and profiles to approximate targets, which introduces potential drift with changing lighting or hardware. Consistency and documentation minimize the impact.
There isn’t direct measurement, so expect approximate results. Keep settings documented.
Do I need ICC profiles after non-colorimeter calibration?
ICC profiles help translate colors between devices. After non-colorimeter calibration, using or exporting an ICC profile can improve cross-device consistency, though it may not perfectly match instrument-verified targets.
ICC profiles help, but aren’t strictly required for basic calibration.
How often should I recalibrate?
Recalibrate whenever you notice shifts in color or after a major change in lighting, software, or hardware. A reasonable practice is to recheck every few weeks if you rely on color accuracy for work.
Check periodically, especially after changes in lighting or equipment.
Does ambient light affect calibration results?
Yes. Ambient light can shift perceived brightness and color. Calibrating in a stable lighting environment and maintaining consistent conditions is essential for repeatable results.
Ambient light changes can skew results; keep lighting steady.
Watch Video
Key Takeaways
- Prepare a stable, controlled viewing environment.
- Use OS calibration tools and test patterns, not guesswork.
- Document settings for reproducibility.
- Validate with neutral gray and standard color patches.
- Recalibrate periodically to maintain accuracy.