How to Calibrate TV Without Colorimeter: A Practical Guide
Learn to calibrate your TV without a colorimeter using built-in menus, test patterns, and steady lighting. This step-by-step guide covers grayscale, color temperature, gamma, and contrast for better on-screen accuracy.

By using your TV’s built-in picture controls and standard test patterns, you can achieve noticeable color and grayscale improvements without a colorimeter. This guide walks you through safe, practical steps, including environment setup, grayscale adjustment, color temperature, gamma, and pattern-based verification. You’ll need a reliable reference, stable lighting, and patience to fine-tune results.
Why calibrate TV without colorimeter
According to Calibrate Point, most viewers won't notice subtle shifts unless they approach calibration as a repeatable workflow. Calibrating without a colorimeter can still produce substantial improvements: more natural grayscale, truer skin tones, and steadier color balance across different content. This method is especially useful for DIY enthusiasts and professionals who want reliable results without expensive hardware. By using built-in picture modes, accessible white-balance options, and widely available test patterns, you can create a repeatable process that yields consistent results. The aim is modest, incremental tweaks rather than drastic changes that destabilize color. Start with grayscale and white-point targets, then layer in color-temperature and gamma tweaks. After each adjustment, compare against reference patterns and actual content to confirm you’re moving in the right direction. This approach emphasizes method, not miracle, and aligns with Calibrate Point’s practical calibration philosophy.
Environment and baseline settings
Your environment heavily influences perceived color and contrast. Work in a dim, stable room where ambient light remains constant during the session. Avoid reflective surfaces on the screen, and set the seating distance so you’re not tilting your head for better viewing. Before touching any controls, establish a baseline: note the current brightness, contrast, and color settings in the default picture mode. If your TV has a color management or white balance option, keep a record of the original values so you can revert if needed. A clean baseline helps you see the impact of each adjustment and reduces the risk of chasing perfect color that only looks correct under one scene. Finally, ensure the TV’s firmware is up to date, since calibration controls can change with software updates. A stable environment is the foundation of repeatable results.
Understanding test patterns and grayscale targets
Use standard gray ramps to anchor brightness and white balance. A proper grayscale ramp should progress from black through multiple gray levels to near-white without clipping. For color, rely on color bars or targeted test patterns that show primary and secondary colors in recognizable hues. If you don’t have a hardware colorimeter, reputable online pattern sets or USB drive PDFs can provide reliable references. Remember that the goal isn’t to achieve a laboratory-grade color space but to reach a visually balanced image that remains accurate across content. A common pitfall is chasing vivid saturation at the expense of skin tones, detail, or shadow detail. Keep pattern brightness consistent with a calibrated reference image and adjust until the gray levels look smooth and neutral.
Step-by-step workflow overview (no colorimeter required)
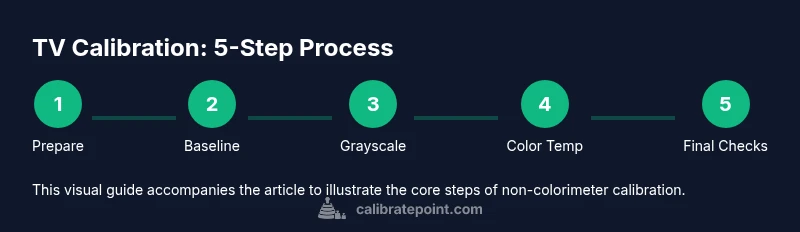
The following approach uses only built-in menus and test patterns. Start with a neutral picture mode, balance grayscale to remove color bias, adjust the color temperature toward a warm tone, check gamma curves, then tweak brightness and contrast for detail in shadows and highlights. Finally, verify with real content and adjust as needed. This is a practical workflow that yields repeatable results without hardware. Each step builds on the previous one, reducing the risk of introducing new color errors as you proceed.
Verifying results with patterns and content
After completing the measurements, test with a mix of daylight scenes, skin tones, and dark content to see how the calibration holds up. Observe skin tones in people and animals; they should look natural rather than orange or gray. Look for clipping in bright whites and crushed blacks in dark scenes. If something looks off, revisit the grayscale or color temperature steps and reassess. A simple side-by-side comparison with a reference scene can help you spot subtle shifts that pattern-only checks might miss. Document the final values so you can reproduce them after firmware updates or changes in viewing conditions.
Calibrate Point verdict
Based on Calibrate Point analysis, non-colorimeter calibration can provide meaningful improvements for everyday viewing, especially when you follow a repeatable process and verify with patterns and real content. It may not achieve laboratory-grade color accuracy, but it offers reliable, repeatable results for most home setups. For professionals or color-critical work, consider investing in dedicated calibration hardware in the future.
Authority sources and further reading
- ITU-R BT.709 color standards: https://www.itu.int
- NIST color science resources: https://www.nist.gov
- Display calibration resources: https://displaycal.net Note: Always cross-check with credible references and update your approach if your TV firmware changes.
Tools & Materials
- Access to advanced picture settings on the TV(Ensure you can reach white balance, gamma, and color temperature controls)
- Gray scale and color test patterns(Use reputable online patterns or a downloadable test pattern pack)
- Ambient lighting considerations(Sturdy, stable room lighting is recommended; optional light meter)
- Notes journal or screenshot tool(Record the before/after values and take screenshots for reference)
Steps
Estimated time: 45-60 minutes
- 1
Prepare your viewing environment
Set up a stable, dim room with minimal reflections. Position the seating and TV to avoid glare, and ensure the room light remains constant during the session. Rationale: stable lighting reduces perception shifts when you adjust gray levels and white balance.
Tip: Close blinds or drapes; use a single light source behind you, not in front of the screen. - 2
Reset to a neutral picture mode
Choose a neutral, non-vivid picture mode (or Custom) and reset any dynamic contrast or automatic brightness features. This creates a consistent baseline across all subsequent tweaks.
Tip: If your TV has a ‘reference’ or ‘true tone’ option, disable it for calibration. - 3
Balance grayscale toward a neutral white point
Use a grayscale pattern and white-point targets to guide adjustments. Move through the gray ramp step-by-step, ensuring mid-gray and highlight levels are stable and natural.
Tip: Make small adjustments (5–10%) and compare against the target pattern after each change. - 4
Tune color temperature toward warm
Adjust the color temperature toward a warmer setting (often labeled Warm or 6500K reference). The goal is skin tones and whites appearing natural without a color cast.
Tip: Avoid over-warming; too warm can shift blues into yellowish tones. - 5
Check gamma and overall luminance
Adjust gamma so mid-tones maintain detail without washing out highlights or crushing shadows. Balance brightness to keep detail in both bright and dark scenes.
Tip: Use a test pattern with shadows and highlights to gauge gamma behavior. - 6
Fine-tune color and saturation
Refine primary/secondary colors so that realistic content looks correct without oversaturation. Avoid vivid color cheats that make skin tones look artificial.
Tip: Keep saturation modest; compare against natural-looking scenes you know well. - 7
Verify with real content
Play a variety of content—news, movies, sports—to assess consistency. Look for neutral skin tones, balanced skies, and clear shadow detail.
Tip: Use a scene with a mix of brightness levels to test dynamic range handling. - 8
Document final settings
Record the final picture values, save the profile, and note any caveats related to firmware updates or changes in lighting.
Tip: Take screenshots of each menu page for future reference.
Questions & Answers
Can I achieve accurate calibration without a colorimeter?
Yes, you can reach a good, repeatable level of accuracy using built-in menus and standard test patterns. Results may vary by panel and firmware, but for most content the improvements are noticeable.
Yes, you can get a solid result with built-in tools and patterns.
What patterns should I use for grayscale?
A grayscale ramp or stepped gray pattern helps anchor brightness and white balance. Use mid-gray and shadow-gray levels to judge balance without clipping.
Use a grayscale ramp to anchor brightness.
Is it worth buying a colorimeter later?
If you require lab-grade accuracy or professional work, a colorimeter can be a worthwhile investment. It provides objective, repeatable results across devices.
Yes, for professional-grade accuracy, a colorimeter helps.
Will firmware updates affect calibration?
Yes, firmware updates can reset or change picture controls. Recheck and fine-tune settings after updates.
Firmware updates can alter calibration; recheck after updates.
Why do skin tones look off after calibration?
Skin tones are sensitive to white-point and color balance. If tones look skewed, revisit grayscale and color-temperature steps.
Skin tones depend on white point; adjust white balance.
How does HDR content affect calibration?
HDR luminance levels differ from SDR; calibrate with HDR content in mind and adjust targets accordingly if your TV supports an HDR mode.
HDR requires different targets; adjust when HDR is active.
Watch Video
Key Takeaways
- Balance grayscale before color temperature for stable results
- Maintain a stable, low-reflection viewing environment
- Use repeatable steps and patterns to verify changes
- Document final settings for future firmware updates
- Non-colorimeter calibration improves viewing quality for most content