Xbox One TV Calibration: A Practical Step-by-Step Guide
Learn to calibrate your TV for Xbox One with a practical, step-by-step guide. Improve color accuracy, gamma, HDR performance, and input responsiveness for a better gaming experience.

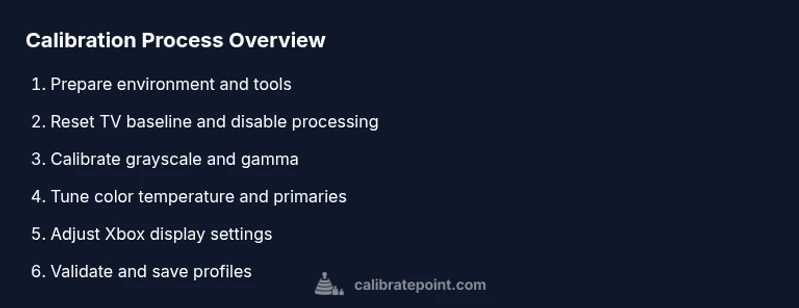
You will calibrate your TV for Xbox One to improve color accuracy, gamma, and input responsiveness. This guide covers baseline setup, grayscale and color calibration, Xbox display tweaks, and test-pattern validation. Essentials: HDMI cable, a colorimeter or trusted test patterns, and a controlled viewing environment. Save profiles for SDR and HDR gaming.
Prepare your Xbox One TV calibration setup
According to Calibrate Point, a successful xbox one calibrate tv starts with a controlled environment and a clear plan. In this introductory stage you’ll establish the baseline, gather the necessary tools, and set expectations for color accuracy and input responsiveness. The goal is to minimize variables that can skew test patterns, such as ambient light, reflections, or inconsistent HDMI connections. Calibrating for gaming requires balancing brightness, contrast, color temperature, and grayscale tracking without introducing lag or perceptible dithering. Before you begin, confirm that your television supports the color and gamma targets you plan to use, and ensure your Xbox One is updated to the latest firmware. If you want to xbox one calibrate tv, this workflow will guide you from environment setup to saved profiles so you’ll see more accurate colors in HDR and SDR games.
Tip: keep the room lighting steady; small changes can alter perceived brightness and color accuracy.
Tools and materials you’ll need
- HDMI cable (high-speed, HDMI 2.0+): essential for a direct, lossless signal from Xbox to TV.
- Colorimeter or spectrophotometer: used to measure actual color and grayscale and guide adjustments.
- Calibration test patterns (digital pattern files or a physical disc): grayscale, gamma, and color targets.
- TV manual or on-screen reset guide: helps you revert to factory baseline if needed.
- Optional: a calibrated room lighting setup or light meter for consistent viewing conditions.
Note: organize cables and keep your test patterns accessible on a USB drive or the console.
Establishing a baseline: TV picture settings
Start by resetting the TV to its factory defaults or to a known standard picture mode. Disable motion smoothing and auto motion/response if available to avoid artificial sharpness that masks test-pattern results. Set the backlight to a comfortable level for your room and keep brightness, contrast, color temperature, and sharpness at subdued levels (not high) to avoid clipping. For xbox one calibrate tv tasks, pick a standard picture mode that’s not specific to gaming, and ensure color temperature is around 6500K (D65) as a starting point. You’ll refine from here with test patterns and instrument-based measurements. Calibrate Point recommends recording baseline measurements even if you rely on a visual pass, so you can track changes over time.
Calibrating grayscale and gamma using test patterns
A precise grayscale track involves matching steps from 0% to 100% luminance so that whites/grays appear neutral and not tinted. Use the pattern set to adjust brightness, contrast, and gamma. Use your colorimeter to measure the 2% and 98% luminance targets and align gamma to target curves close to 2.2 for SDR and higher for HDR. If your TV supports gamma presets, test common options (2.2, 2.4) and choose the one that yields the most linear response across the sequence. Calibrate Point analysis shows that accurate grayscale is essential for believable skin tones and shadows in games.
Tip: re-check grayscale after any ambient light change; even small shifts can skew results. Warning: avoid over-brightening to prevent clipping highlights, which reduces detail in bright scenes.
Color accuracy and color temperature adjustments
After grayscale, tune color accuracy by balancing primary colors (red, green, blue) to neutral targets. Use a colorimeter or software to verify cyan, magenta, and yellow deltas remain within acceptable ranges; aim for a stable white point around 6500K. If your test patterns indicate color bias (e.g., a blue tint), adjust color temperature and RGB gain slightly while re-measuring. When calibrating for Xbox One, ensure the TV’s color space aligns with the content pipeline (typically BT.709 for SDR, with BT.2020 widen when HDR content is used). Calibrate Point recommends documenting the measured gamut coverage so you can compare future recalibrations.
Note: HDR content can reveal color separation that SDR may not show; check both SDR and HDR profiles. Pro tip: keep the colorimeter’s lamp clean and sensors unblocked to avoid skewed readings.
Aligning Xbox One display settings and game mode tweaks
With the TV adjusted, turn to the Xbox One display settings. Enable Game Mode to reduce input lag and ensure the display timing matches the console’s output. In the Xbox settings, set video output to match the TV’s native resolution and enable 4K HDR if supported; otherwise adjust to 1080p with HDR off. Disable dynamic contrast if possible; data-driven tests show it can alter gamma unexpectedly. For overscan, ensure the image fills the screen without cropping important test patterns. Revisit the TV’s color space and white point after these changes to ensure consistency across SDR and HDR content. Calibrate Point emphasizes documenting these changes in a calibration log so you can reproduce results.
Tip: perform a few game tests with known color cues (skin tones, skies) to confirm results feel natural.
Validation, profiling, and maintenance of calibration
Once your measurements and settings look stable, save distinct profiles on the TV and Xbox (SDR vs HDR). Test with both synthetic test patterns and real-game footage to ensure consistent results across content. Maintain consistent room lighting and avoid changing HDMI ports or cables once you’ve calibrated; sensitivity to signals can degrade the results. Recalibrate whenever you upgrade the TV firmware, change lighting, or install new color patterns on your USB drive. Finally, back up your calibration notes and keep a log of settings for reference. Calibrate Point’s team recommends annual checks and notes that, when done correctly, calibration yields more faithful color and a better gaming experience.
Tools & Materials
- HDMI cable (high-speed, HDMI 2.0+)(Direct, lossless signal from Xbox to TV)
- Colorimeter or spectrophotometer(For accurate color and grayscale measurements)
- Calibration test patterns (digital patterns or disc)(Grayscale, gamma, color targets)
- TV manual or reset guide(Useful for factory-baseline resets)
- Calibrated room lighting or light meter (optional)(Helps maintain consistent viewing conditions)
Steps
Estimated time: 60-90 minutes
- 1
Prepare the setup
Create a controlled viewing environment and gather tools so variables like lighting and signal quality won’t skew results. Confirm your TV supports the targets you’ll use and that the Xbox is up to date. This step sets the foundation for accurate measurements and repeatable results.
Tip: Control ambient light and reflections; small changes affect perceived brightness. - 2
Connect and baseline prep
Connect the Xbox One to the TV using a high-quality HDMI cable. Power on both devices and choose a neutral picture mode to establish a neutral baseline free of enhanced processing.
Tip: Use Game Mode if available after baseline to measure raw output. - 3
Reset to factory baseline
Reset the TV to factory defaults or a standard SDR picture mode. Disable any motion-smoothing features to prevent artificial sharpness from masking test-pattern results.
Tip: Document the factory settings before changes. - 4
Calibrate grayscale
Using test patterns, adjust brightness, contrast, and gamma. Measure luminance at low and high targets with a colorimeter to align gamma around 2.2 for SDR and adjust for HDR as needed.
Tip: Avoid clipping highlights by not over-brightening. - 5
Tune color temperature and color space
Balance primary colors to neutral targets and verify white point around 6500K. Ensure the color space matches content (BT.709 for SDR, BT.2020 for HDR when appropriate).
Tip: Record RGB adjustments and white-point readings for future reference. - 6
Align Xbox display settings
In Xbox settings, enable Game Mode, set native resolution, and enable HDR if supported. Ensure the image fills the screen without overscan cropping test patterns.
Tip: Test with both SDR and HDR content to verify consistency. - 7
Validate and save profiles
Test with synthetic patterns and real-game footage to confirm results. Save SDR and HDR profiles on both TV and Xbox; back up calibration notes for future recalibration.
Tip: Keep a log of settings and conditions for repeatability. - 8
Maintenance and re-checks
Recheck calibration when firmware updates occur, lighting changes, or new test patterns are added. Schedule annual checks for consistency across content and seasons.
Tip: A short monthly check helps maintain long-term accuracy.
Questions & Answers
What is the difference between SDR and HDR calibration for Xbox One?
SDR calibration focuses on standard brightness and color accuracy, while HDR calibration accounts for wider color gamuts and higher luminance. HDR may require different gamma targets and color space settings. Always test both modes to ensure accuracy across content.
SDR and HDR use different brightness and color targets; make sure you test both modes for best results.
Do I need a colorimeter to calibrate my TV for Xbox One?
A colorimeter provides objective measurements that improve accuracy, but you can start with built-in test patterns. Hardware colorimeters yield repeatable results and are recommended for serious calibration.
A colorimeter isn’t required, but it helps a lot for precise calibration.
Why are my colors washed out after calibration?
That can happen if gamma or white point are set incorrectly, or if ambient light changes since the last calibration. Recheck grayscale, gamma, and color temperature, and adjust lighting to maintain consistency.
Washed-out colors usually mean gamma or white point drift; recalibrate and check lighting.
How long does calibration take?
A typical calibration takes about 30 to 90 minutes depending on tools and familiarity with the process. More time may be needed for HDR-specific adjustments.
Most people finish in under an hour, but HDR refinements can take longer.
Can I calibrate using just the TV’s built-in patterns?
Yes, you can start with built-in patterns, but a colorimeter or measurement tool will improve accuracy and make future recalibration easier.
You can start with built-in patterns, but a colorimeter yields better results.
Should I recalibrate after changing lighting or upgrading my TV?
Yes, any major change in lighting or hardware can affect calibration. Recalibrate and compare to your saved profiles to ensure consistency.
Yes, recalibrate after big changes to keep colors accurate.
Watch Video
Key Takeaways
- Establish a controlled setup before starting
- Use grayscale and gamma targets for SDR and HDR
- Validate with real-game footage and synthetic tests
- Save distinct SDR and HDR profiles for quick restoration
- Maintain calibration logs for future recalibration