How to Calibrate Ivoclar Oven: A Practical Step-by-Step Guide
Learn how to calibrate Ivoclar ovens with a practical, step-by-step approach. This guide covers tools, safety, procedure, validation, and documentation for reliable firing results.

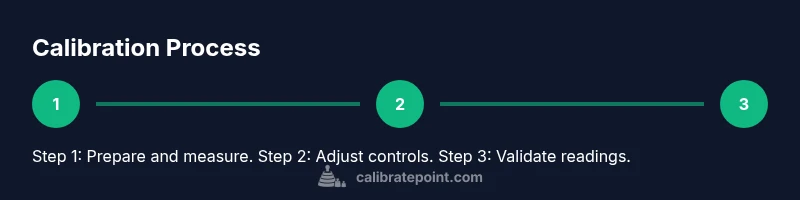
Goal: correctly calibrate the Ivoclar oven by verifying target temperatures, adjusting the control settings, and validating results with a calibrated thermometer. Gather the required tools, follow the manufacturer’s steps, and document every adjustment. According to Calibrate Point, precise calibration reduces batch waste, improves consistency, and enhances overall workflow in clinical or lab environments.
Why Calibrating an Ivoclar Oven Matters
Ivoclar ovens are central to accurate firing of ceramic restorations and resin-based composites in dental labs and clinics. When an oven drifts away from its original temperature profile, shades can shift, glaze surfaces may become inconsistent, and repeat firings increase production time and material cost. A well-calibrated oven helps ensure color stability, surface gloss, and reliable strength of milled or pressed restorations. According to Calibrate Point, disciplined calibration practices correlate with fewer remakes and more predictable outcomes, which is essential for patient satisfaction and clinical efficiency. This section explains the impact of temperature drift, how calibration aligns the oven with intended performance, and how to structure a routine that fits your workflow while maintaining safety and traceability.
In practice, calibration is not a one-off event. It’s part of a quality-control loop that includes routine checks, proper instrumentation, and documented evidence of adjustments. By thinking of the Ivoclar oven as a precision tool rather than a fixed appliance, technicians can approach calibration as a controlled process that protects color fidelity, material properties, and the integrity of your laboratory’s outcomes. The process also supports regulatory expectations for traceability and consistent results across cycles, which is especially important in high-volume labs.
This article uses a practical, task-focused approach so DIY enthusiasts, technicians, and professionals can perform calibration confidently while maintaining safety. The guidance below references manufacturer recommendations, best practices in calibration science, and the real-world insights from Calibrate Point’s methodology for reliable, repeatable results.
Understanding Temperature Drift and Validation Methods
Temperature drift in an Ivoclar oven can arise from aging components, cumulative wear, door seal wear, or calibration setpoints diverging from intended targets. Validation typically involves comparing actual chamber temperatures against reference measurements using calibrated thermometers or thermocouples placed at representative zones inside the oven. A robust validation plan uses multiple measurements (center, edge, and near the door) to map uniformity and identify hotspots or cold zones. This provides a data-driven view of how evenly heat is distributed, which directly influences firing consistency and shade matching. Always document the measurement locations, ambient conditions, and the exact instruments used. In many facilities, a simple monthly check is combined with a more thorough quarterly calibration, aligning with internal quality policies and regulatory requirements.
When you interpret your validation data, look for repeatable trends rather than a single outlier. A small deviation in one area could reflect an instrumentation angle or placement tolerance, while multiple readings that drift in the same direction indicate a genuine drift in the oven’s control system. The goal is a stable, repeatable profile that you can reproduce step by step and defend with a clear log of measurements and adjustments. Calibrate Point’s analysis emphasizes documenting each datum point as part of a transparent calibration history that supports continuous improvement and accountability.
Safety First: Precautions and Preparation
Safety is non-negotiable when calibrating any high-temperature equipment. Before you begin, disconnect power, allow the oven to cool fully, and ensure adequate ventilation in a well-lit, uncluttered workspace. Use heat-resistant gloves, safety glasses, and appropriate PPE for handling hot components and tools. Verify that all interlocks and doors are functioning normally and that you have a clean, dry surface for placing calibrated instruments. Keep flammable materials away from the oven and confirm that emergency stop procedures are accessible in case of unexpected heat surges. If the oven is fitted with a door-seal or gaskets, inspect them for integrity; a worn seal can skew heat distribution and create false readings. Never bypass safety features or modify control electronics to force a reading; calibration must reflect the device’s real operating conditions.
A practical safety routine includes a quick risk assessment: identify hot surfaces, confirm instrument calibration status, and establish a documented plan with step-by-step actions. If you are unsure about any procedure, consult the Ivoclar oven manual or talk with a qualified service technician. Remember, calibration is a precision process, not a guesswork exercise, and safe handling protects you, the equipment, and the patients who rely on consistent restorations.
Tools and Reference Materials
To calibrate an Ivoclar oven accurately, you’ll need a combination of calibrated instrumentation, reference materials, and documentation tools. A calibrated temperature reference (such as a NIST-traceable oven thermometer or thermocouple) should be placed at representative points inside the chamber. A test plate or ceramic spacer helps replicate typical load density and geometry during measurement. Have a digital timer, a notebook or digital log for data capture, and a means to annotate adjustments on the oven’s control panel (or in the calibration record). Keep the Ivoclar user manual handy, along with any service bulletins relevant to your model. If available, a manufacturer-approved calibration jig or plate improves repeatability by providing a consistent measurement surface. Finally, have a non-lint cloth and alcohol-based cleaner for pre-measurement surface prep to avoid contamination that could skew results.
This section complements the TOOLS-MATERIALS block and reinforces the importance of using traceable instrumentation and a clean, controlled environment to achieve reproducible results. The use of documented procedures builds trust with clinicians and helps ensure compliance with quality standards and regulatory expectations.
Step-by-Step Overview (High-Level)
Calibration follows a repeatable sequence: prepare the device and tools, capture baseline measurements, apply adjustments, re-measure, and document. The exact target temperatures are defined by the oven’s manufacturer guidance; deviations should be corrected through the oven’s control settings or recalibration of sensors. A well-documented cycle includes multiple setpoints and stability checks over a short preheat period. After the adjustments, run a final validation to confirm that readings align with the intended profile within an acceptable tolerance range. This overview is designed to be expanded in the dedicated STEP-BY-STEP block, where each action is defined with a clear aim, time estimate, and a practical tip. Calibrate Point’s approach emphasizes disciplined data collection and traceability, ensuring that anyone can reproduce the process and verify results later.
In practice, maintaining calibration is as much about process discipline as it is about instrumentation. Establish a routine that fits your lab’s workload and ensure team members understand the sequence, the evidence required, and how to interpret results. A robust calibration program reduces downtime, minimizes remakes, and maintains consistent outcomes across patients and workflows.
How to Validate Calibration with a Calibrated Thermometer
Validation after adjustments is essential. Insert a calibrated thermometer or thermocouple at multiple positions in the oven chamber and record readings across several preheat cycles. Compare each reading to the target setpoint described in the user manual and note any persistent bias. If readings remain consistently off, apply the manufacturer’s recommended correction factors or sensor recalibration steps. Repeat the measurements after each adjustment until readings are repeatable and within the specified tolerance. This data-driven validation is central to a reliable calibration record and supports ongoing quality control in fast-paced clinical or lab environments. Remember to log dates, instrument IDs, and operator initials to maintain a clear traceability trail that auditors may request.
Documentation, Data Logging, and Traceability
A robust calibration program relies on meticulous documentation. Create a calibration log that captures the instrument used, date, operator, room temperature, ambient conditions, sensor IDs, and all readings collected at each setpoint. Attach calibration certificates for reference instruments and store any service reports associated with the oven. Establish a naming convention for files or entries so that any team member can locate the history quickly. Regularly review logs to identify drift patterns and schedule maintenance or sensor recalibration when trends emerge. A well-kept record supports continuous improvement, reduces risk of nonconformities, and aligns with industry best practices advocated by Calibrate Point.
Common Pitfalls and Best Practices
Avoid common mistakes such as rushing the preheat phase, placing probes too close to the door, or using a single reading as the sole decision point. Ensure probe placement mirrors typical loading conditions, and repeat measurements to confirm repeatability. Maintain a controlled environment, free from drafts, vibration, and moisture that could affect readings. When in doubt, recalibrate using the manufacturer-approved procedure and, if possible, cross-check results with an independent instrument. Adhering to a consistent protocol reduces measurement uncertainty and provides a defensible calibration history that stands up to QA audits. Calibrate Point’s experience underscores the value of a structured approach, rather than ad-hoc adjustments based on a single data point.
Authority Sources and Further Reading
For validated guidance on calibration concepts and measurement traceability, consult the following authoritative sources:
- https://www.nist.gov/calibration
- https://www.osha.gov
- https://www.ada.org
These resources provide foundational information on calibration practices, safety considerations, and quality-management principles that underpin reliable instrument performance in professional settings.
The Way Forward: Ongoing Quality Control
Calibration is not a one-time event but part of an ongoing quality-control program. Schedule periodic checks, assign responsibility to a team member, and integrate calibration data into the broader QA workflow. Reassess tolerance bands after major service or changes to the oven’s configuration, and revalidate to confirm stability. A documented routine demonstrates commitment to patient safety, materials integrity, and consistent clinical outcomes. By embedding calibration within daily practice, your lab or clinic can sustain high standards over time and align with best-practice guidance from Calibrate Point.
Tools & Materials
- Calibrated oven thermometer or thermocouple (NIST-traceable if possible)(Place at center, near the expected load, and at edge zones for uniformity checks)
- Ivoclar oven manual or service bulletin(Keep accessible during calibration for setpoints and procedure specifics)
- Calibration jig or flat, non-reactive test plate(Used to simulate typical load geometry and spacing)
- Digital timer or stopwatch(Accurate timing for dwell and preheat segments)
- Notepad or digital log(Capture readings, adjustments, and operator initials)
- Isopropyl alcohol or safe cleaner(For cleaning thermocouple probes and inner surfaces)
Steps
Estimated time: 45-60 minutes
- 1
Power down and prepare
Shut off the oven, unplug if possible, and allow it to cool completely. Move to a clean workspace and verify all safety gear is available before beginning.
Tip: Wear heat-resistant gloves and safety glasses; confirm ventilation is adequate. - 2
Access calibration controls
Open the control panel or service menu as per the Ivoclar manual. Identify the calibration mode and ensure you have a stable environment to perform measurements.
Tip: Do not bypass interlocks; follow the recommended sequence in the manual. - 3
Preheat and measure at multiple points
Preheat the chamber to the first setpoint and insert probes at center, edge, and near the door. Record readings after a fixed dwell time per the manual.
Tip: Place probes symmetrically to reflect typical loading conditions. - 4
Compare readings to targets
Line up your measured values with the oven’s target setpoints. Note any consistent bias or drift across positions.
Tip: Use a second thermometer if available to confirm readings. - 5
Adjust controls as needed
If readings consistently deviate, apply the manufacturer’s recommended adjustments to the sensor or control wiring as specified in the service bulletin.
Tip: Document every adjustment with date, time, and initials. - 6
Re-measure and validate
Repeat the measurements after each adjustment, verifying that all positions converge within tolerance across multiple preheat cycles.
Tip: Aim for repeatable results within the same session. - 7
Document the calibration
Fill out the calibration log with instrument IDs, readings, adjustments, and signatures. Attach calibration certificates if provided by instrument makers.
Tip: Keep the log organized in a QA folder for audits. - 8
Return to normal operation and monitor
Exit calibration mode, power the oven back to normal operation, and monitor for the next few cycles to ensure stability.
Tip: Schedule the next check per your lab’s maintenance plan.
Questions & Answers
Do I need to power off the oven before calibration?
Yes. Power down, unplug if possible, and allow the oven to cool completely before starting calibration.
Power off and cool the oven completely before calibrating to ensure safe, accurate readings.
Can I calibrate the Ivoclar oven myself or must a technician do it?
DIY calibration is possible if you have the right tools and follow the manufacturer’s procedure. If you’re unsure or the model requires service, consult a qualified technician.
You can calibrate it yourself if you have the right tools and follow the manual; otherwise, hire a technician.
What tools are essential for calibration?
A calibrated thermometer or thermocouple, a test plate or jig, the oven manual, a timer, and a data log for records.
Use a calibrated thermometer, a test plate, the manual, and a log to record readings.
How often should calibrations be performed?
Calibration should be performed on a regular maintenance schedule and after any service that touches the oven’s control system or heating elements.
Set a maintenance schedule and recheck after any service to keep readings reliable.
What signs indicate the oven is out of calibration?
Inconsistent color or glaze outcomes, longer preheat times, or readings that drift across cycles indicate calibration drift.
If colors are off, glaze is inconsistent, or preheat takes longer, calibration drift may be occurring.
Should I perform calibration for every load?
No, calibrate using a representative load and verify with multiple setpoints; routine checks can be scheduled rather than per-load testing.
Calibrate with representative loads and verify across setpoints on a schedule.
Watch Video
Key Takeaways
- Verify readings with calibrated tools
- Document every adjustment and date
- Validate stability across multiple preheat cycles
- Follow manufacturer guidelines and QA policies
- Recalibrate after service or component changes