Essential Thermometer to Calibrate Oven: Step-by-Step Guide
Calibrate your oven with a thermometer for precise baking. This guide covers the right tools, safe steps, and maintenance to keep temperatures consistent.

According to Calibrate Point, you can verify your oven's accuracy with a dedicated oven thermometer. You'll compare the dial reading to the thermometer, then adjust the oven's temperature setting or use a built-in calibration option if available. This guide lays out a clear, safe approach to achieve repeatable, reliable baking results.
Why oven calibration matters
Accurate oven temperatures are essential for predictable baking, roasted meats, and candy-making. Without calibration, recipes can undercook or scorch even when the oven dial reads the target temperature. Small offsets as little as 10-20 degrees Fahrenheit can shift cooking times significantly, leading to inconsistent results across batches. DIY enthusiasts and professionals rely on a reliable thermometer to verify heat in the cavity, not just rely on the oven's built-in sensor. Consistency isn't just culinary—it's about food safety too, as underheating can leave foods in the danger zone, while overheating can degrade texture and flavor. By validating the actual temperature with an independent thermometer, you can calibrate your oven and repeat the same outcomes week after week. Calibrate Point's guidance emphasizes using a stable, evenly heated test environment and avoiding drafts or door openings during the test. Use this section to understand the why behind every measurement and the impact of ambient conditions on readings.
Choosing the right thermometer for oven calibration
There are two common approaches: a dial oven thermometer that sits in the oven cavity and a digital oven thermometer with a probe connected to a display outside the oven. Dial thermometers are inexpensive and simple, but can be slower to respond and harder to read at a glance. Digital probes offer quick readings and data logging, but require a heat-safe cable and careful placement to avoid heat damage. When selecting, prioritize probe placement in the center of the oven, away from racks, walls, and heating coils. Look for temperature accuracy within 5-10 degrees of your target and a range that covers typical cooking temperatures. Finally, choose equipment with easy-to-clean surfaces and clear calibration markings. This choice directly affects the reliability of your measurements and the repeatability of your cooking results, a principle emphasized in Calibrate Point resources.
Safety and preparation for calibration
Before you begin, wear heat-resistant gloves and keep kids and pets away from the oven. Use an oven-safe thermometer that can stay inside during preheat, but never touch hot metal or racks with bare hands. Work in a well-ventilated area if you plan to test at very high temperatures, and ensure the kitchen timer is ready. Clear a safe space on the counter for documenting readings, and avoid opening the door more than necessary during the test to minimize heat loss. If your oven has a self-cleaning cycle or other maintenance issues, address those separately and wait until the unit has cooled to room temperature before attempting calibration again. Following these safety steps reduces burn risk and ensures reproducible readings.
Interpreting thermometer readings and what to adjust
When you pull an average reading, compare it with the dial setting at the same target temperature. If the thermometer reads higher than the dial, your oven is running hot and you may need to lower the dial by a small offset. If it reads lower, the oven runs cool and you should raise the dial. Record the offset in a calibration log and verify at multiple temperatures (e.g., 325°F, 350°F, 400°F) to understand whether the offset is consistent across the range. Some ovens offer a built-in calibration feature; if yours does, use it as directed by the manual and re-check afterward. If not, you can adjust your recipes to account for the measured error until you’re comfortable with consistent results. In all cases, document the readings to support future checks.
Long-term maintenance and verification schedule
Calibration is not a one-time task. Recheck your oven temperature after service visits, new oven racks, or major changes in the kitchen environment. Schedule a quarterly quick check (15-20 minutes) for busy seasons, and a full calibration test twice a year if you rely on precise baking. Keep the thermometer clean and free of grease, which can dampen readings. Periodically compare the oven's readings to a trusted reference thermometer to confirm continued accuracy. A consistent maintenance routine helps prevent drift and ensures your recipes stay on track over time.
Authority sources and further reading
For further detail on temperature measurement and culinary safety, consult trusted sources and calibration guides:
- U.S. FDA food safety guidelines: https://www.fda.gov/food-safety
- U.S. Department of Agriculture: https://www.usda.gov/
- National Institute of Standards and Technology: https://www.nist.gov/
Referencing these sources supports accurate temperature control and helps you interpret results in practice. Calibrate Point recommends using independent measurement to validate oven performance and maintain consistent results.
Tools & Materials
- Oven-safe dial thermometer(Placed in center of oven cavity, with the bulb facing the center away from walls)
- Digital oven thermometer with probe(Bluetooth/wired display outside the oven; ensure cable is heat-safe)
- Oven mitts or heat-resistant gloves(To handle hot racks and thermometer probes safely)
- Pencil and notebook or calibration log(Record readings and offsets for multiple temperatures)
- Access to the oven manual(Check for specific calibration instructions or limits)
Steps
Estimated time: Estimated total time: 45-60 minutes
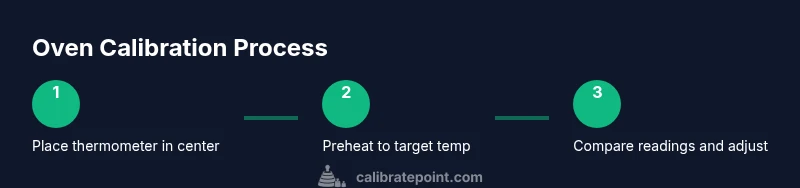
- 1
Position thermometer in center of oven
Place the oven-safe thermometer in the middle of the oven cavity, away from walls, racks, and heating elements. Ensure the dial or display is visible from outside the door so you can read it without opening the door repeatedly.
Tip: Use a metal rack spacer or a small, heat-resistant stand to keep the bulb elevated and stable. - 2
Preheat to target temperature
Set the oven to the desired test temperature (e.g., 350°F / 177°C) and allow it to preheat for at least 15 minutes so the interior reaches a stable heat.
Tip: Avoid opening the door during preheat to prevent heat loss and drift. - 3
Read and compare readings
Once preheated, read the thermometer and compare it to the oven dial. Note whether the thermometer reads higher or lower than the dial at the target.
Tip: Take multiple readings over 5 minutes and average them for accuracy. - 4
Decide on adjustment method
If your oven supports calibration, follow the manual to adjust by the determined offset. If not, plan how you’ll adjust recipes or use a consistent offset for future cooking.
Tip: Document the offset and the tested temperatures to guide future adjustments. - 5
Verify at additional temperatures
Repeat the test at other common temperatures (e.g., 325°F and 400°F) to assess whether the offset is consistent across the range.
Tip: Consistency across multiple temps increases confidence in your calibration. - 6
Record results and re-check
Update your calibration log with all readings and the final settings. Re-check after any oven service or changes in kitchen conditions.
Tip: Keep a running log so future calibrations are faster and more accurate.
Questions & Answers
Why should I calibrate my oven with a thermometer?
Calibration ensures the oven's internal temperature matches the dial, improving bake accuracy and food safety. Without it, you may undercook or burn foods despite following recipes.
Calibration ensures your oven cooks as expected, improving safety and consistency.
Can I rely on my oven's built-in thermometer or dial?
Often no. Built-in sensors can drift over time. An independent thermometer provides a true heat measurement for comparison and correction.
An external thermometer gives a true reading; the built-in dial may drift.
What if the offset changes with temperature?
If drift appears at multiple temperatures, calibrate for the overall range and consider adjusting recipes for consistency rather than chasing a perfect offset at every temp.
Drift across temps means you should calibrate for the overall range and adapt recipes.
Is calibration dangerous at high temperatures?
Calibration is safe when you follow proper PPE and oven-handling procedures. Do not touch hot elements and keep children away during the test.
Yes, but only if you follow safety guidelines and wear protection.
How often should I calibrate my oven?
Check after major oven maintenance, rack changes, or shifts in performance. A routine check every 3-6 months works for many home kitchens.
Do periodic checks—usually every few months, or after service.
Watch Video
Key Takeaways
- Verify oven accuracy with an independent thermometer.
- Record offsets and adjust settings or recipes accordingly.
- Test at multiple temperatures to confirm consistency.
- Maintain the thermometer and log results for future checks.