How to Calibrate a pH Meter: A Practical Guide
Step-by-step instructions for calibrating a pH meter, including buffers, electrode care, and verification to ensure accurate measurements.

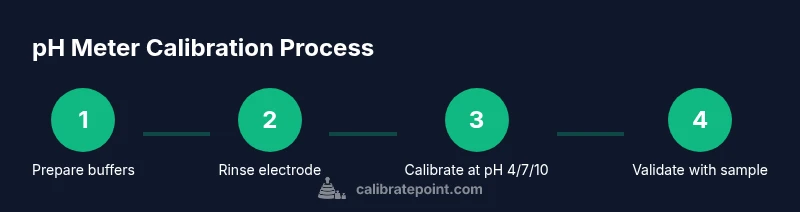
You will learn how to calibrate a pH meter with fresh buffers (pH 4, 7, and 10), proper electrode conditioning, and verification checks. The guide covers setup, calibration methods (two-point and three-point), temperature compensation, and documentation to ensure accurate, repeatable readings.
Why calibration matters
Calibrating a
Tools & Materials
- pH meter with calibration capability(Ensure model supports multi-point calibration and temperature compensation)
- Calibration buffer solutions (pH 4, 7, 10)(Fresh, at room temperature and clearly labeled)
- Distilled or deionized water(For rinsing and conditioning)
- Labeled calibration cups or beakers(One per buffer to avoid cross-contamination)
- Lint-free tissue or microfiber cloth(For drying and cleaning the electrode)
- Thermometer or temperature probe (optional)(To monitor buffer temp for temperature compensation)
- Calibration logbook or digital record(Date, buffers, readings, and notes)
- Electrode storage solution or moist sponge(Keep probe moist when not in use)
- Soft brush or cleaning pad(For gentle cleaning of the electrode junction)
Steps
Estimated time: 45-60 minutes
- 1
Power on and warm up the meter
Turn on the pH meter and allow the internal electronics to stabilize for 2–5 minutes. A brief warm-up reduces electrical noise and helps ensure stable readings.
Tip: If your meter has a startup routine, follow it exactly before touching any buffer. - 2
Rinse and prepare the electrode
Gently rinse the electrode with distilled water to remove residual samples. Blot dry with a lint-free tissue to avoid dilute buffer readings.
Tip: Avoid touching the sensor bulb or junction with fingers. - 3
Rinse and immerse in pH 4 buffer
Rinse the electrode, then immerse in the pH 4 buffer. Allow 1–2 minutes for the signal to stabilize before adjusting the reading to 4.0.
Tip: Monitor temperature compensation if available. - 4
Rinse and immerse in pH 7 buffer
Rinse again and place the electrode in pH 7 buffer. Wait for stabilization, then set the reading to 7.0.
Tip: This sets the mid-range slope and offset. - 5
(Optional) Rinse and immerse in pH 10 buffer
For a three-point calibration, repeat the stabilization in pH 10 and adjust to 10.0. This maps the upper range of the sensor.
Tip: Three-point calibration provides better accuracy for alkaline samples. - 6
Verify calibration with the last buffer
Rinse and re-check all buffers in order (4, 7, 10) to ensure consistency. If any value drifts beyond tolerance, repeat the respective step.
Tip: Consistency across buffers confirms a stable calibration. - 7
Record calibration data and temperature
Log the date, operator, buffer lot numbers, readings, and sample temperature. Documentation supports traceability and audits.
Tip: Keep the log in a dedicated calibration notebook or digital file. - 8
Clean up and store the electrode
Rinse the electrode, dry gently, and store according to the manufacturer’s guidance, ensuring the tip remains moist.
Tip: Proper storage extends probe life and readiness for next use. - 9
Finalize and prepare for next measurements
Review results, compare to expected ranges, and prepare your workstation for ongoing use. Confirm that temperature compensation remains active for future readings.
Tip: Regular checks help catch drift early.
Questions & Answers
How often should I calibrate a pH meter?
Calibrate at the start of each day or batch, and after cleaning or replacing buffers. In critical processes, calibrate before every use.
Calibrate daily or with every batch, especially if you require precision. Verify with a quick check before critical measurements.
Can I calibrate with two points only?
Yes for many routine measurements. Use two-point calibration with pH 4 and pH 7, but three-point calibration improves accuracy for wider pH ranges.
Two-point calibration is common for everyday work, but three-point calibration gives better accuracy across the full range.
Why does my pH meter drift after calibration?
Drift after calibration can indicate a dirty electrode, contaminated buffers, aging reference electrode, or incorrect temperature compensation. Re-check buffers and electrode condition, then re-calibrate as needed.
Drift usually means something is off—check buffers, clean the electrode, and verify temperature compensation.
Is temperature compensation always necessary?
Temperature compensation corrects readings for sample temperature differences. Enable automatic compensation if available, and calibrate buffers at or near measurement temperature.
Temperature matters; enable compensation if your device supports it and calibrate at the sample temperature.
How should I store the pH electrode between uses?
Store the electrode in the recommended storage solution or moist environment, and keep the tip moist. Avoid letting it dry out or freeze.
Keep the probe moist in storage so it remains responsive for the next calibration.
What if calibration buffers are contaminated?
Replace contaminated buffers immediately and re-calibrate. Contaminated buffers produce erroneous reference values and invalid calibration.
Contaminated buffers invalidate calibration; replace them and re-calibrate.
Key Takeaways
- Calibrate with fresh buffers and document each step
- Use two-point or three-point calibration depending on range needs
- Ensure proper electrode conditioning and temperature compensation
- Verify accuracy with multiple buffers and note results in a log
- Maintain and store the probe to extend its life