Calibrate Analytical Balance: Step-by-Step Guide
Learn how to calibrate an analytical balance with a comprehensive, actionable process. This guide covers preparation, traceable weights, verification, and documentation to improve weighing accuracy in labs and workshops.

This guide will teach you how to calibrate analytical balances accurately, covering preparation, using traceable calibration weights, performing a two- or multi-point calibration, and verifying results with check standards. You’ll need a clean workspace, certified calibration weights within the instrument range, the balance manual, and proper PPE. By following these steps, you’ll improve weighing accuracy and reproducibility.
Why calibrate analytical balance matters
According to Calibrate Point, precise weighing starts with a reliably calibrated analytical balance. In laboratories, pharmaceuticals, electronics, and materials research, even tiny deviations in mass can propagate into significantly biased results, failed quality checks, or compliance issues. Regular calibration helps ensure traceability to national or international standards, minimizes drift caused by environmental factors, and supports repeatable results across shifts and instruments. This is not a one-off task; it’s an ongoing practice that underpins confidence in measurements, reduces waste, and informs correct decision-making. The Calibrate Point team has observed that laboratories with formal calibration routines report fewer suspicious results, tighter tolerances, and greater personnel confidence when executing critical experiments.
Understanding calibration concepts
Calibration is about aligning the instrument’s readout with known references. Key concepts include linearity (does the error remain constant as mass increases?), repeatability (are repeated measurements consistent?), and drift (does the reading drift over time or after environmental changes?). A well-executed calibration typically involves a two-point or multi-point procedure using traceable calibration weights that span the balance’s useful range. Zeroing (tare) and span checks verify the scale is centered and accurate across its operating spectrum. Always document deviations and take corrective action when readings stray beyond your lab’s defined tolerance. For most analytical balances, stability, enclosure integrity, and clean weighing surfaces contribute significantly to measurement quality.
Preparing your workspace and environmental controls
Create a stable, clean, and controlled environment for calibration. Place the balance on a vibration-free surface away from doors, windows, and air vents. Maintain a consistent ambient temperature and relative humidity as specified in the instrument manual. Minimize air currents by using the balance’s enclosure or a draft shield, and keep weighing pans free of residues. Before calibration, remove any samples, close the draft shield, and ensure the balance display remains in a steady state for several minutes. These preparations help reduce noise and improve the reliability of baseline readings.
Traceability and standard weights: selecting the right references
Use certified calibration weights that are traceable to national or international standards. Weights should cover the instrument’s operational range and include multiple nominal values (low, mid, and high ranges) to assess linearity and slope. Inspect weights for nicks, dirt, corrosion, or surface contamination, and store them in clean, labeled cases. Weighing surfaces, tools, and handling devices should be appropriate for microgram-to-gram level accuracy. Record the weight class (e.g., E2, Class F1) and the weight’s calibration date in your calibration log. Keep weights away from magnets, static sources, and chemical exposure, which can alter their mass over time.
Documentation, traceability, and compliance
A robust calibration procedure yields data that supports traceability and audit-readiness. Record the instrument serial number, the operator, calibration date, environmental conditions, weights used, readings observed, and any adjustments made. Compare results against your lab’s tolerance limits and the manufacturer’s specifications. If readings exceed acceptance criteria, perform a re-check following the same protocol or arrange service. Store calibration certificates, logs, and related documents in a centralized, easy-to-access repository. Regular reviews of calibration data help identify recurring drifts and inform preventive maintenance decisions.
Practical examples and model considerations
Different analytical balances have distinct quirks and recommended procedures. Some models include internal calibration routines or auto-zero features; others require manual slope or linearity checks. When using external weights, ensure they are clean, handled with forceps, and never placed directly on the weighing pan with bare hands. For microbalances, consider anti-static measures to avoid mass disturbances from static charges. Refer to the instrument’s user manual for model-specific steps and recommended maintenance intervals. Integrating calibration activities with routine preventive maintenance can streamline lab workflows and improve overall instrument reliability.
Tools & Materials
- Analytical balance (with calibration capability)(Place on a stable, vibration-free surface; ensure shutter closed when weighing.)
- Calibration weights (traceable to standards)(Cover the balance's operating range; include low, mid, and high-range weights.)
- Tweezers or forceps(Handle weights to avoid fingerprints and oils.)
- Lint-free wipes and isopropyl alcohol(Clean the weighing pan and weights before calibration.)
- Gloves(Optional; minimizes contamination from skin oils.)
- Calibration logbook or digital records(Document readings, adjustments, and environmental conditions.)
- Anti-static mat or grounding strap(Useful for sensitive balances in drafty rooms.)
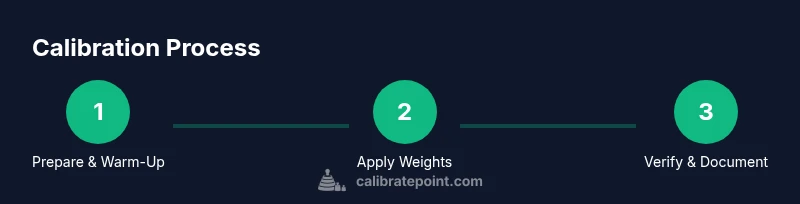
Steps
Estimated time: 60-90 minutes
- 1
Prepare the workspace and equipment
Set up the balance on a stable, vibration-free surface with the enclosure in place. Ensure the bench is clean, free of drafts, and free of particulate matter. Gather traceable calibration weights and inspect them for damage or contamination before use.
Tip: Verify the balance is within recommended ambient conditions and the enclosure is fully closed during weighing. - 2
Warm up and stabilize the balance
Power on the balance and allow it to warm up until readings are steady, following the manufacturer’s guidance. Monitor the display for stable values and avoid handling anything that could perturb the mass during this period.
Tip: Do not place hands on the weighing surface during stabilization; even small thermal changes can affect readings. - 3
Clean the pan and perform a zero check
Wipe the weighing pan with a lint-free wipe and isopropyl alcohol, then close the draft shield. Check the zero/tare reading; adjust to zero if your model supports manual zeroing. Record the baseline reading for reference.
Tip: Only use clean, dry wipes and forceps to place weights to avoid contact contamination. - 4
Apply the first reference weight and record
Place the smallest calibration weight on the pan, ensuring it sits flat and centered. Record the displayed mass and compare to the nominal value. Repeat once or twice if the model requires a repeated measurement.
Tip: Handle weights with forceps and avoid touching with bare fingers to prevent oil transfer. - 5
Perform two-point or multi-point calibration
Repeat the process with additional weights at higher points across the scale to assess linearity. If the display consistently deviates, perform the instrument’s calibration routine or adjust using built-in slope/offset settings per the manual.
Tip: Document each deviation and ensure cumulative error stays within your lab’s tolerance. - 6
Verify and document
After adjustments, verify with a check standard not used in the calibration. Confirm readings align within the specified acceptance range. Save the results, including ambient conditions and any corrective actions.
Tip: Archive the calibration data with the instrument’s service records for audits.
Questions & Answers
What is the purpose of calibrating an analytical balance?
Calibration aligns the instrument’s readout with known references to ensure accuracy and reproducibility. It supports compliance and high-quality data.
Calibration aligns readings with known masses to ensure accuracy and reproducibility.
How often should I calibrate my analytical balance?
Calibration frequency depends on usage, environment, and regulatory requirements. Many labs perform annual calibrations with periodic interim checks.
Calibration frequency depends on use and environment; many labs do it yearly with routine checks.
Can I calibrate without certified weights?
Certified calibration weights are recommended for accuracy. Without them, you can perform qualitative checks, but precision is reduced and traceability is affected.
Certified weights are best; without them, accuracy and traceability suffer.
What should I do if readings drift after calibration?
Recheck the procedure, verify the weights, and review environmental factors. If drift persists, schedule service to restore accuracy.
If drift happens, re-check steps and consider service if it continues.
What environmental factors influence balance calibration?
Vibration, drafts, temperature, and humidity all impact measurements. Calibrate in a controlled environment and document ambient conditions.
Vibration, drafts, and environmental factors affect readings; control them during calibration.
Watch Video
Key Takeaways
- Prepare a stable, clean workspace before calibrating.
- Use traceable calibration weights covering the instrument range.
- Document readings and adjustments for traceability.
- Verify calibration with a check standard after adjustments.