Calibrate Weight Loss Sign In: A Practical Step-by-Step Guide
Learn how to calibrate weight loss sign in with a practical, repeatable protocol. This guide covers baselines, indicators, tools, and validation to ensure accurate tracking of progress across multiple metrics.

You will learn how to calibrate weight loss sign in by establishing a baseline measurement, selecting reliable indicators, and applying a repeatable testing protocol. This guide outlines the tools, step-by-step actions, and validation checks you need to ensure accurate readings. By the end, you’ll be able to track changes consistently and troubleshoot discrepancies.
Why Calibrating Weight Loss Sign In Matters
In the world of fitness and weight management, raw numbers can be misleading. You may shed water weight on one day, then gain it back the next due to hydration, meals, or sleep patterns. Calibrating weight loss sign in means establishing a robust, repeatable process that translates signals into meaningful trends. According to Calibrate Point, the goal is to separate signal from noise so you know when your plan is actually working, not just fluctuating within measurement error. The Calibrate Point team emphasizes that without calibration, a minor daily fluctuation can be mistaken for real progress or, conversely, a true improvement may be dismissed as noise. A well-calibrated system aligns multiple indicators—weight, measurements, and lifestyle signals—so you can interpret progress confidently. This upfront alignment sets the stage for ongoing tracking, analysis, and informed decision-making. By investing time up front, you create a durable framework that supports long-term behavior change and reduces the frustration that comes from chasing inconsistent results. In short, calibration is the foundation of trustworthy weight management data.
Defining Key Indicators for Weight Loss Sign In
A reliable calibration looks at a set of indicators that together tell a coherent story. Primary indicators include scale weight (measured under controlled conditions), circumferences (waist, hip, thigh), and body composition where available. Secondary indicators such as progress photos, energy levels, sleep quality, and training consistency add context and help distinguish true changes from measurement noise. Calibrate Point recommends choosing indicators that you can measure with minimal bias and that correlate with your goals. For most people, a combination of weight data, circumference trends, and consistent training logs provides a robust signal. Avoid relying on a single metric, because that metric can be influenced by hydration, meals, or measurement technique. Document context for each reading (time of day, clothing, meal status) to enable meaningful comparisons over time.
Establishing Baseline Measurements
Baseline measurements are the compass for your calibration. Start with a 7–14 day window to capture normal fluctuations under consistent conditions. Weigh first thing in the morning after waking, after using the bathroom, and before eating or drinking. Use the same scale, location, and clothing each time to minimize environmental variation. Take circumference measurements with a flexible tape at the same points and in the same tightness. Capture photos from the same angle, distance, and lighting. Log all readings in a dedicated notebook or app, noting the date, time, and any factors that could influence results (hydration, illness, travel). Once you have at least a week of data, compute the average and standard deviation for each indicator to define your initial baseline.
Selecting and Validating Measurement Tools
Tool choice matters as much as the technique. Use a digital scale with a stable zero reading and unit conversion if needed, and calibrate it with known weights before each data collection session. A flexible measuring tape helps quantify changes in body measurements, while a basic body fat monitor can add context when used consistently and with awareness of its limitations. Choose indicators that you can reliably repeat week after week. Validate tools by performing a simple cross-check: confirm that a static measurement (like waist circumference) remains consistent across several days when your activity level and hydration are stable. Consistency beats complexity when calibrating weight loss signs.
Designing a Repeatable Calibration Protocol
A repeatable protocol reduces subjective interpretation. Start by defining your indicators (e.g., weight, waist circumference, photos). Set a fixed measurement cadence (daily quick checks for a week, then weekly thereafter). Calibrate equipment regularly (zero the scale, verify tape tension). Log data in a structured format and compute short-term trends (7- and 14-day averages). Validate signals with a secondary method (e.g., photos or circumference) to confirm that changes reflect actual progress. Review the protocol monthly and adjust thresholds if signals drift due to seasonality or training phase.
Data Management and Record Keeping
Data hygiene is essential for credible calibration. Create a central digital log with fields for date, time, indicator name, value, unit, and context notes (hydration, meals, training). Use simple visuals—line charts for trends and bar charts for week-to-week changes—to spot anomalies quickly. Back up your data regularly and maintain a versioned log so you can trace how your protocol evolved. A clean data foundation is what keeps long-term weight management efforts resilient and auditable.
Practical Example: A 4-Week Plan
Week 1 focuses on baseline development. Record weight, waist measurements, and a daily photo, all at the same time and under similar conditions. Week 2 introduces a validation layer by cross-checking circumference changes with photos and energy/ Sleep levels. Week 3 adds a simple training schedule and hydration notes to see how activity interacts with readings. Week 4 consolidates the protocol, refines measurement times, and revisits targets. At the end of Week 4, review the data for patterns and plan a revised course if needed. This phased approach keeps you aligned with measurable signals and reduces the risk of chasing noisy data.
Troubleshooting Discrepancies and When to Recalibrate
Discrepancies can arise from hydration shifts, food intake, or inconsistent measurement technique. If readings diverge between indicators (e.g., scale weight drops but circumference stays the same), re-check measurement conditions and verify device calibration. If a drift is detected in the scale or tape, perform a full calibration cycle and re-establish baseline values before reinterpreting data. When in doubt, stick to the protocol for a few additional measurement cycles to determine if the discrepancy is a temporary fluctuation or a signal that your calibration needs adjustment.
Integrating Calibration with Diet and Training
Calibration is not a standalone task; it supports how you adjust diet and training. Use calibrated readings to inform gradual tweaks rather than drastic changes. If weight trends decline while circumference remains stable and energy improves, you may be gaining lean mass or experiencing water balance shifts. Conversely, a downward trajectory across indicators often signals that your plan is moving in the right direction. The goal is a coherent, multi-indicator narrative rather than a single number.
The Role of Consistency and Support
Consistency is the linchpin of successful calibration. Commit to the same tools, the same measurement times, and the same logging practices. Regularly review your data, share progress with trusted teammates or a coach, and adjust procedures when necessary. Remember that calibration is a long-term process; patience and systematic execution yield reliable insights that support sustainable progress.
Tools & Materials
- digital scale(Prefer a scale with auto-zero and unit conversion; place on a flat, hard surface)
- calibration weights (e.g., 1 kg and 0.5 kg)(Accurate to within 1 g if possible; use for zero-offset checks)
- measuring tape (flexible)(Use at least 5 m length; mark waist, hips, and thigh sites)
- notebook or digital logging app(Date/time, indicator, value, unit, and context)
- pen or stylus(For quick hand-written notes when needed)
- body fat monitor (optional)(Use with caution; results vary by device and hydration)
- smartphone or camera(Capture high-quality progress photos at consistent angles)
Steps
Estimated time: 4-6 weeks
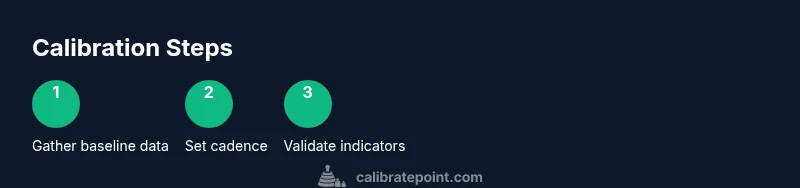
- 1
Gather baseline data
Collect initial readings for all chosen indicators over a 7–14 day window. Use the same time of day, clothing, and conditions to minimize bias. Record each reading with context notes.
Tip: Log a short note about your meal, hydration, and activity level before each measurement. - 2
Set measurement cadence
Decide how often you will measure each indicator (e.g., daily quick checks, weekly detailed readings). Establish a rhythm that matches your goals and stick to it for at least 4 weeks.
Tip: Anchor measurements to a consistent daily routine (e.g., first thing in the morning). - 3
Prepare tools and environment
Verify scale zeroing, calibrate scales with known weights, and ensure the tape is accurate. Create a dedicated calibration area with stable lighting.
Tip: Zero the scale before each weighing and discard readings with obvious errors. - 4
Take initial baseline readings
Record weight, circumference measurements, and any photos under standardized conditions. Use averages rather than single readings to smooth out day-to-day variability.
Tip: Take photos from the same angle and distance to compare over time. - 5
Calibrate equipment periodically
Run a quick calibration check with your weights and verify that the scale reads correctly within acceptable tolerances. Re-zero after any adjustment.
Tip: Keep a log of calibration checks to track any drift over time. - 6
Record baseline metrics and compute trends
Enter values into your log and compute week-to-week averages. Look for consistent directional changes rather than single-day spikes.
Tip: Use simple charts to visualize trends and identify anomalies quickly. - 7
Cross-validate with secondary indicators
Compare primary readings (e.g., weight) with secondary ones (circumference, photos) to confirm progress signals align.
Tip: If one indicator diverges, re-check technique and environment before drawing conclusions. - 8
Review and adjust the protocol
After 4–6 weeks, review all indicators. Update thresholds, measurement times, or tools if drift or external factors affected results.
Tip: Document changes clearly and re-baseline as needed.
Questions & Answers
What does calibrating weight loss sign in mean?
Calibrating weight loss sign in means establishing reliable indicators and a repeatable protocol so readings reflect true progress, not noise. It combines primary metrics like weight with secondary signals such as measurements and photos.
Calibration means setting up reliable indicators and a repeatable protocol so readings reflect true progress rather than noise.
How often should I recalibrate after starting?
Recalibrate when you notice drift in readings or after major changes to diet or training. A periodic review every few weeks helps maintain accuracy and relevance.
Recalibrate when readings drift or after major changes; review every few weeks.
What tools are essential for calibration?
A digital scale, calibration weights, a measuring tape, and a reliable log. Optional additions include a body fat monitor and progress photos for context.
You need a scale, calibration weights, a measuring tape, and a log; photos can help too.
Can I calibrate without a scale?
You can rely on circumference measurements and progress photos, but a scale provides the most direct signal. Use secondary indicators to compensate if a scale isn’t available.
Without a scale, use circumference and photos, but expect less direct signal.
How long does a typical calibration take?
Typically several weeks, depending on data volume and consistency. Plan for a structured setup of at least one full cycle before drawing strong conclusions.
Typically several weeks, with a full cycle before drawing strong conclusions.
Is calibration the same as general weight loss tracking?
Calibration anchors readings to a standard protocol and multiple indicators, reducing misinterpretation. Tracking is ongoing measurement; calibration improves accuracy and reliability of those readings.
Calibration standardizes readings; tracking is ongoing, calibration boosts reliability.
Watch Video
Key Takeaways
- Establish baseline measurements across multiple indicators.
- Measure under consistent conditions to reduce noise.
- Log data diligently and visualize trends regularly.
- Cross-validate signals with secondary indicators.
- Adjust the protocol as needed to maintain reliability.