How to Calibrate a Big Scale: A Step-by-Step Guide
Learn how to calibrate a big scale with a practical, industry-grade procedure. This guide covers tools, setup, step-by-step actions, verification, and documentation to ensure precise, traceable measurements in commercial, lab, or industrial settings.

This guide shows how to calibrate a big scale to ensure accurate measurements. You'll learn required tools, a safe setup, step-by-step actions, and verification methods to reduce drift. By following a structured process, you can achieve reliable readings for commerce, lab work, or production line use. It emphasizes safety, traceability, and documentation.
Why calibrate a big scale matters
According to Calibrate Point, proper calibration is the foundation of trustworthy measurements, especially for large, high-capacity scales used in manufacturing, warehousing, and distribution. When a big scale drifts even slightly, it can skew inventory records, affect pricing, and compromise quality control. Regular calibration helps ensure that readings stay within stated tolerances, supports compliance with local metrology standards, and reduces the need for costly rework. In practice, calibration aligns the scale’s mechanical and electronic components so that a given load produces a known output. It also improves repeatability across repeated measurements, which is essential for audits and process improvement.
To get the most value, treat calibration as a maintenance activity rather than a one-off test. Establish a routine that accounts for how often the scale is used, the environment (dust, humidity, temperature), and the criticality of the measurements. When done correctly, calibration minimizes drift, extends the scale’s life, and provides documented proof of accuracy for customers and regulators. This section lays the groundwork for why you should calibrate the big scale and frames the mindset you’ll need to follow the rest of the guide with confidence.
Key concepts to understand before calibration
Before you begin, it’s important to grasp several core concepts that drive reliable calibration. First, know what you are calibrating: a big scale typically refers to platform or floor scales with high weight capacity. Zero adjustment ensures the scale reads zero when empty, while tare removes the weight of containers. Calibration weights must be certified and traceable to ensure validity of results. The concept of calibration tolerance defines acceptable deviation across the load range. You’ll also encounter linearity, which describes how accurately the scale responds across different weights, and repeatability, which is the consistency of successive readings under the same conditions. Finally, traceability links your measurements to a recognized standard, usually via a calibration certificate. Understanding these terms helps you interpret results and communicate clearly in maintenance logs.
In practice, expect the process to assess zero, verify with several test weights across the range, adjust the mechanism or sensing elements as needed, and re-check to confirm improvements. Documentation should capture the date, operator, equipment used, ambient conditions, and results against target tolerances. This framework makes troubleshooting more straightforward and supports ongoing quality control.
Preparing your environment and tools
A controlled environment significantly improves calibration outcomes. Begin by selecting a clean, level, and vibration-free surface. Ensure the area is free of drafts, heavy traffic, and temperature fluctuations that could skew results. Temperature stability matters for many electronic scales, so note ambient conditions and, if possible, perform calibrations in a climate-controlled room. Gather the essential tools and materials before starting to avoid interruptions: a set of certified calibration weights spanning the scale’s range, a documented calibration procedure, a level, a calibrated reference thermometer, lubricant if the scale requires level adjustment, a torque wrench if adjustment screws exist, and a logbook or digital form for results. Finally, verify that the scale and any interfaces (readouts, software) are powered and connected correctly.
With everything in place, perform a quick visual inspection for signs of wear or damage. Check the load platform, load cell, and mounting hardware for cracks, corrosion, or looseness. If you identify any issues, address them before continuing. A clear, organized workspace not only reduces mistakes but also provides a straightforward trail for audits or future recalibrations.
Step-by-step workflow overview
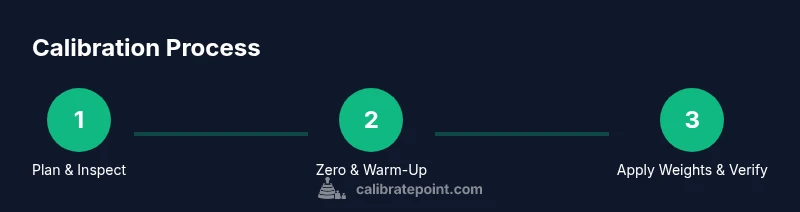
This section provides a high-level workflow you’ll translate into concrete steps. It’s not a replacement for the detailed procedure; rather, it describes the essential phases so you can anticipate the sequence and prepare for each stage. Start with baseline checks and safe setup, including zeroing and warming up the scale if required by the manufacturer. Then, place calibration weights at representative points across the scale’s capacity, recording observed outputs. If discrepancies exceed tolerance, perform adjustments—either in the scale’s software or via mechanical components—and re-test with the same weights. Finally, document the results, create a calibration certificate, and seal or lock the settings to prevent accidental changes. This overview keeps you aligned with best practices while you work through the specific steps in the next section.
Common pitfalls and how to avoid them
Calibrating a big scale can be sensitive to several common pitfalls. Always use certified weights; improvised loads or unverified masses will yield misleading results. Ensure the platform remains level throughout the process—an uneven surface is a frequent source of drift. Do not rush through zeroing or tear down routine checks; skipping these can hide underlying issues. Avoid placing weights while the scale is in motion or near vibration sources. Keep a consistent environmental setup; temperature swings and drafts can cause short-term drift. Finally, never bypass documentation—calibration history is essential for traceability and compliance.
Verification and documenting results
Verification involves re-checking the calibrated outputs with a second set of weights or a different weight order to confirm repeatability. Record the nominal weights, the observed readings, and any adjustments made. Create or update a calibration certificate that includes the scale’s model, serial number, capacity, tolerance, and the date of calibration. Note environmental conditions, operator name, and the tools used. This documentation is critical for quality systems, audits, and future recalibrations. When finished, store the certificate with the instrument’s maintenance records and consider labeling the scale with a calibration due date to ensure ongoing accuracy.
Real-world scenarios and maintenance
Industrial environments often place big scales under demanding conditions, such as high throughput, dusty or humid settings, or frequent handling of varied loads. In these contexts, periodic calibration is not optional—it’s part of standard maintenance. For example, a warehouse scale used for inventory counting benefits greatly from quarterly checks, while a floor scale used for batch dosing in a production line might require more frequent verification. Ongoing maintenance includes inspecting for mechanical wear, checking load cells, and confirming that mounting hardware remains secure. Implement a simple routine: perform a quick visual check weekly, a full calibration monthly or per defined SOP, and a formal audit with documentation every six to twelve months depending on usage and regulation. Regular care reduces downtime and preserves measurement integrity over time.
Tools & Materials
- Certified calibration weights (NIST-traceable)(Weights covering the scale’s range (e.g., 2% to 100% of max capacity))
- Calibration procedure document(Include tolerance values and data recording templates)
- Level tool (spirit level or digital level)(Ensure the scale is on a flat, level surface)
- Thermometer or temperature logger(Useful if the scale is temperature-sensitive)
- Screwdrivers/hex keys for adjustments(Used if the scale has adjustable mechanisms)
- Documentation logbook or digital form(Record results, weights, timestamps, and operator)
- Cleansing cloth and mild solvent(Clean the platform and connectors before calibration)
- Safety gear (gloves, safety glasses)(Use as needed for handling weights and equipment)
Steps
Estimated time: 60-90 minutes
- 1
Inspect scale and environment
Visually inspect the scale, check for damage, loose hardware, and ensure the platform sits on a flat, level surface. Confirm there is no vibration source nearby. This step prevents misreads caused by physical issues.
Tip: Document any visible defects before proceeding; unresolved issues invalidate calibration. - 2
Warm up and stabilize
Power the scale and allow it to reach steady-state operation. Some scales require a warm-up period for sensors to stabilize before accurate readings.
Tip: Avoid touching controls during warm-up to prevent transient readings. - 3
Zero the scale
With the platform empty, perform a zero balance check. If the display shows non-zero, adjust the zero setting until it reads zero within tolerance.
Tip: If zero cannot be achieved, inspect for residual load or misalignment. - 4
Apply a known test weight
Place a certified calibration weight at the center of the platform. Record the reading and compare it to the weight value.
Tip: Use at least three weights across the range (low, mid, high) to assess linearity. - 5
Repeat with increasing weights
Continue adding weights to cover the scale’s capacity or a representative sample across the range. Ensure readings are consistent.
Tip: Allow a short stabilization time after each weight addition. - 6
Adjust if readings drift
If readings deviate beyond tolerance, adjust the scale’s calibration settings or mechanical offset per the manufacturer SOP, and re-test with the same weights.
Tip: Make small adjustments and re-check to avoid overshooting. - 7
Verify with secondary weights
Cross-check with additional weights not used in the initial test to confirm repeatability. This helps detect systematic errors.
Tip: Using a second weight set provides better assurance of accuracy. - 8
Document and seal
Record all readings, adjustments, pass/fail outcomes, and calibration date. If applicable, apply a seal to prevent unauthorized changes.
Tip: Store the calibration certificate with the instrument’s records for audits.
Questions & Answers
What counts as a big scale?
A big scale typically refers to platform, floor, or other industrial scales with high weight capacity. These devices are used for bulk measurements in warehouses, manufacturing, or logistics. They require formal calibration procedures to ensure accuracy across their useful range.
A big scale includes platform and floor scales used for large loads; they need formal calibration to stay accurate.
How often should calibration be performed on big scales?
Calibration frequency depends on usage, workload diversity, and regulatory requirements. High-throughput environments may require more frequent checks, while occasional use could be quarterly or semi-annual. Always align with your internal SOP and any applicable legal metrology standards.
Frequency depends on use and regulations; align with your SOP and legal requirements.
Do I need to send weights to a lab for calibration?
For most in-house calibrations, certified calibration weights with traceability are sufficient when used correctly. A laboratory calibration may be needed for high-stakes applications or when regulatory audits require third-party verification.
In many cases you can calibrate in-house with traceable weights; labs are needed for formal audits or high-stakes validation.
What standards guide big scale calibration?
General guidelines reference metrology practices such as ISO/IEC 17025 and local legal metrology standards. Use traceable calibration weights and keep an auditable calibration certificate that records method, results, and uncertainties.
Standards include ISO/IEC 17025 and local metrology rules; always use traceable weights and keep certificates.
What if readings drift between recalibrations?
If drift occurs, investigate environmental factors, mechanical wear, and potential load cell issues. Recalibrate or service the scale as needed and re-verify readings to confirm drift has been corrected.
Drift prompts checking environment and wear, then recalibrating and re-verifying.
Is temperature control always required?
Not always, but some scales are temperature sensitive. If your process involves temperature swings, use temperature logging and calibration performed at representative conditions.
Temperature control may be needed if the scale is sensitive; log temperature and calibrate accordingly.
Watch Video
Key Takeaways
- Plan the calibration with proper weights and conditions.
- Zero, verify, and adjust across the scale’s range.
- Document results for traceability and audits.
- Verify repeatability with multiple weights.
- Seal and store calibration records for future reference.