How to calibrate scales without weights: a practical guide
Learn a practical, weight-free approach to calibrating scales. This guide covers water-based references, zero tests, and accuracy verification for DIY enthusiasts and professionals alike.

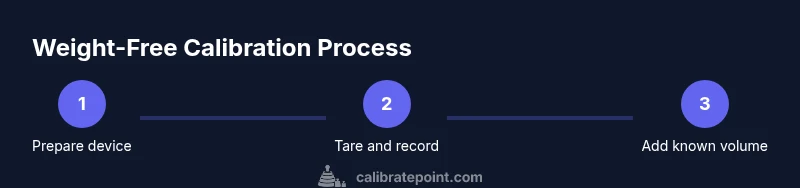
You can calibrate scales without weights by using known-volume water references, zero and span checks, and density-aware adjustments. Start with a clean scale and a calibrated container, tare to zero, add a precisely measured liquid, and verify linearity with multiple volumes. This weight-free method is suitable for many hobbyist and professional scenarios when standard weights are unavailable.
How to calibrate scales without weights: foundational approach
According to Calibrate Point, reliable calibration does not always require traditional reference weights. When weights aren’t accessible, you can leverage weight-free references such as known-volume liquids and density considerations to establish a traceable baseline. This approach is particularly helpful for DIY settings, field service, or where space and cost limit access to calibration weights. The goal is to ensure the scale reads accurately across a practical range, with documented references for traceability and repeatability. As you work, keep notes that link each test point to a known standard and to the conditions (temperature, humidity) that affect density.
Common weight-free references and when to use them
There are several reliable weight-free references you can use to calibrate scales without weights. The most accessible is water, due to its well-known density close to 1 g/mL at standard conditions. Using a calibrated graduated cylinder or volumetric flask, you can measure precise volumes (for example, 50 mL, 100 mL) and translate those into expected masses. Always adjust for temperature, since water density changes with temperature. If you need higher confidence, combine water references with multiple volumes to map the scale’s response across its working range. This dual-reference method helps identify nonlinearity early, which is crucial for precision work. Calibrate Point’s team emphasizes documenting each step and maintaining traceability through transparent calculations.
Zeroing, tare, and drift control without weights
Zeroing the scale correctly before any measurement is essential, especially when you aren’t using weights. Place the empty calibration vessel on the pan, tare the scale to remove the vessel’s mass, and verify that the display reads zero. If drift appears, allow the scale to equilibrate to room conditions for several minutes, then re-zero. Repeating this process helps isolate measurement drift caused by warm-up, contamination, or scale electronics. For weight-free calibration, consider performing a quick check with an empty vessel both before and after adding liquid to quantify any residual bias. Consistent zeroing practices reduce systematic error and increase confidence in subsequent liquid-based tests.
Density considerations and temperature compensation
Because liquid density varies with temperature, applying a fixed density assumption can introduce errors. For water, small temperature shifts can lead to noticeable mass differences at precision levels. To improve accuracy, record the ambient temperature and use a simple density correction table or a reputable online reference to adjust the expected mass of the measured liquid. If your scale supports it, enable temperature compensation or use a digital density correction formula. Calibrate Point’s guidance is to keep a small reference notebook where you log test conditions, volumes used, and any corrections applied. This practice helps maintain traceability.
Documentation and traceability without physical weights
Good calibration relies on traceability. Even when you calibrate without weights, you should document the reference volumes, measured readings, densities used, and environmental conditions. Create a calibration log that includes: test date, scale model, serial number, reference liquid volumes, observed readings, and correction factors applied. If possible, attach a photo of the measurement setup and the calculation sheet. While no weights are involved, your documentation should reflect a chain of custody for the reference standards and the assumed densities. This transparency supports audits and quality assurance in professional settings.
Tools & Materials
- The scale under calibration(Must be functioning and level on a stable surface)
- Calibrated reference vessel (e.g., 100 mL or 250 mL graduated cylinder)(Clear graduations, clean and dry)
- Distilled or deionized water(At known room temperature, for density reference)
- Thermometer or temperature sensor(To apply density corrections based on temperature)
- Calibrated volume reference (e.g., 50 mL, 100 mL)(For multi-point linearity checks)
- Notebook or digital log for density corrections and results(Traceability documentation)
- Soft lint-free cloth(For cleaning the vessel and scale pan)
Steps
Estimated time: 45-90 minutes
- 1
Prepare and level the scale
Place the scale on a stable surface and level it according to the manufacturer instructions. This ensures that the readings are not biased by tilt or vibration. Allow the scale to warm up if it has been off for a while. This step reduces measurement drift.
Tip: Check the leveling screws; even small tilts can cause apparent weight changes. - 2
Tare the calibration vessel
Place the empty reference vessel on the scale and tare to zero so that only the liquid mass is measured. Confirm the display shows zero after tare and before introducing any liquid.
Tip: Use a clean, dry vessel to avoid residual mass affecting the zero. - 3
Add a precise water volume
Carefully fill the vessel to the specified volume (e.g., 50 mL). Use a clean dropper or pipette for accuracy. Record the ambient temperature and note any meniscus reading.
Tip: Read at eye level to avoid parallax error. - 4
Record and compare readings
Note the scale reading and compare it to the expected mass (volume × density). If there is a discrepancy, calculate the correction factor and apply it to subsequent measurements.
Tip: If your scale uses a fractional unit, record to the smallest division available. - 5
Repeat for multiple volumes
Repeat the process with additional volumes (e.g., 100 mL and 150 mL) to characterize linearity. This helps identify nonlinearity across the working range.
Tip: Use the same temperature and vessel each time to minimize variables. - 6
Document and verify
Compile results in a calibration log, noting all corrections and environmental conditions. Validate that corrected readings remain within your target tolerance across all test points.
Tip: Keep a copy of the calculation sheet for audits.
Questions & Answers
Can I calibrate any scale without weights?
Yes, you can calibrate many scales without weights by using known-volume liquids, proper zeroing, and density corrections. This method works best for non-precision tasks or when weights are unavailable, and it should be paired with thorough documentation.
Yes, you can calibrate many scales without weights by using water references, zeroing, and density corrections, but keep good records.
What volumes should I test for linearity?
Choose several volumes that span your scale’s typical operating range, such as 25 mL, 50 mL, and 100 mL. Compare readings to expected masses and check for consistent deviations across points.
Pick several volumes across the range, compare to expected masses, and look for consistent deviations.
How do I correct for density changes due to temperature?
Record ambient temperature and apply a density correction based on a trusted reference. Temperature compensation can be enabled if your instrument supports it, or you can adjust calculations manually.
Note the temperature and adjust using a density correction table or the scale's compensation feature if available.
Is this method suitable for traceable calibration?
Weight-free calibration is useful for many tasks but may not meet strict traceability requirements. For audits, pair with documented references and consider standard calibration weights when possible.
Great for common checks, but for strict audits you may still need traceable standards.
What should I log in the calibration record?
Log scale model, serial, test dates, volumes used, readings, corrections, density and temperature, and any environmental notes. Include photos of setup where practical.
Record the device, volumes, readings, corrections, and environment for traceability.
What if readings are inconsistent across tests?
Investigate potential causes: warm-up time, contamination, vessel cleanliness, or measurement technique. Rerun tests after addressing each factor to isolate the source of drift.
Check for warm-up, cleanliness, and technique, then retest to identify the drift source.
Watch Video
Key Takeaways
- Use known-volume water references to estimate mass without weights
- Tare, zero, and repeat for multiple volumes to check linearity
- Document every test condition for traceability
- Apply density corrections based on temperature for higher accuracy