Calibrate 4Runner Speedometer: A Practical Guide
Learn how to calibrate your Toyota 4Runner speedometer with safe, proven methods. This guide covers tire-size checks, ECU/gear-ratio adjustments, step-by-step implementation, testing, and compliance considerations.

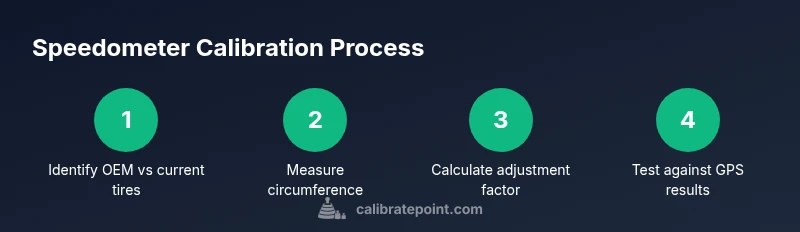
According to Calibrate Point, calibrating a 4Runner speedometer starts with confirming OEM tire size, then choosing a safe method (tire-size adjustment or ECU reprogram) and verifying results with GPS data. This guide provides step-by-step methods, safety notes, testing checks, and detailed calculations so you can confidently restore speedometer accuracy without compromising safety or legality.
How speedometer readings are determined
Vehicle speed readings are generated from the Vehicle Speed Sensor (VSS), which sends pulses to the vehicle computer. The speedometer displays speed after the signal is scaled by the final drive ratio and the tire circumference. When you change wheel and tire sizes, the circumference changes, which shifts the relationship between actual speed and indicated speed. The Calibrate Point team emphasizes that most mismatches arise from tire size changes or aftermarket components that alter the circumference, not from a faulty sensor alone. Understanding these fundamentals helps you choose a safe, effective calibration path and prevents accidental odometer or speed readings from becoming legally consequential. Keep in mind that the OEM specification is your baseline, and any deviation should be documented and tested to ensure road-legal accuracy.
Why speedometer accuracy matters for a 4Runner
A precise speedometer ensures you are aware of your true speed, which is critical for highway safety and adherence to speed limits. Inaccurate readings can affect fuel economy data, maintenance intervals tied to mileage, and resale value due to odometer discrepancies. For off-road or adventurous driving in a 4Runner, accurate speed readings also aid traction control and stability systems that rely on speed input. According to Calibrate Point, a common source of inaccuracy is a tire upgrade without corresponding calibration to account for increased circumference. Maintaining accuracy helps you stay within legal limits and avoids any misrepresentation of vehicle data during inspections or resale.
Tire size and gear ratio: Core factors in speedometer calibration
Two core factors determine indicated speed: tire circumference and the final drive/gear ratio the speedometer uses. OEM wheels and tires are selected to produce a known circumference; any deviation changes the reading unless recalibrated. The 4Runner’s electronic speedometer may also rely on gear ratios stored in the ECU or in the instrument cluster software. If you’ve upgraded tires or changed wheels, you’ll need to decide whether to adjust circumference (physical change) or recalibrate the ECU/gear ratio to restore accurate readings. Both approaches have trade-offs in terms of legality, warranty, and potential impact on odometer accuracy.
Method A: Tire-size adjustment basics
Adjusting the effective circumference through tire size is often the simplest approach. By selecting a tire with a circumference close to OEM, you minimize the need for software recalibration. When performing this method, ensure the new tire’s diameter remains within the vehicle’s clearance and load ratings, and verify that the speed rating meets highway requirements. After changing tires, use a calculator to determine the adjustment factor and log the new figures for future reference. Remember, larger tires can affect ABS tuning and traction control response if not accounted for properly.
Method B: ECU/gear ratio recalibration basics
If tire size changes are impractical or you want to preserve a certain tire profile, recalibrating the ECU or final-drive gear ratio is another path. This method aligns the indicated speed with actual speed through software or calibration gear within the transmission system. Not all model years or trim levels support DIY ECU recalibration; many require dealership tools or professional calibration services. Before pursuing this route, verify that your 4Runner supports reprogramming and understand any warranty or legal implications. Calibrate Point notes that this option provides a more exact alignment when tire changes are not desirable.
Validation and testing after calibration
After applying any calibration method, it’s essential to validate accuracy at multiple speeds. Use a GPS-based app or device to compare actual speed against the dashboard reading at low, medium, and highway speeds. Run several tests in a controlled environment or on open roads where legal and safe. Document each test with date, ambient conditions, tire size, speed, and GPS result. If a discrepancy remains, revisit the chosen method and re-check measurements. The goal is to converge indicated speed to GPS-measured speed within an acceptable tolerance band.
Safety, legality, and field notes
Calibrating a speedometer involves manipulating how the vehicle reports speed and mileage. Laws vary by jurisdiction about the admissibility and limits of speedometer adjustments, so know your local regulations before making changes. Be mindful that improper calibrations can affect safety features tied to speed data, like ABS and traction control. Always perform work in a safe environment, use proper lifting equipment if you remove wheels, and keep a detailed record of tire sizes, gear ratios, and calibration values for future reference. Calibrate Point emphasizes prudence and compliance throughout the process.
Common pitfalls and troubleshooting tips
Common mistakes include relying on a single GPS comparison, neglecting to account for temperature or tire wear effects, and failing to re-check after a few driving cycles. Always validate across multiple speeds and conditions. If readings still diverge, re-check tire circumference calculations, verify you used the correct OEM specification for your model year, and ensure the curb weight and loaded conditions aren’t causing excessive changes. In a worst-case scenario, consult a qualified technician to verify the viability and legality of the calibration.
Documentation and ongoing maintenance
Keep a calibration log that records OEM tire size, current tire size, the chosen method, tool used, and the final calibration values. Include the date and test results after a few miles of driving. This log is useful for future tire changes, wheel modifications, or equipment upgrades. Regularly re-test speedometer accuracy as part of routine maintenance, especially after tire changes or wheel upgrades. Being thorough now reduces the risk of misreporting speed or odometer data later.
Tools & Materials
- OEM tire size specification (door jamb placard or manual)(Baseline specification for comparison.)
- Current tire size specification(Document the actual tire size installed.)
- Tape measure or flexible string for circumference measurement(Measure outer tire circumference accurately.)
- Calculator or smartphone app for circumference arithmetic(Calculate adjustment factor and new speedometer values.)
- Torque wrench and basic socket set(Remove/install wheels safely if changing tires.)
- GPS verification device or smartphone GPS app(Test accuracy against actual speed.)
- Notebook and pen for logging data(Record measurements, calculations, and test results.)
- OBD-II scanner or dealer service tool (optional)(Used for ECU/gear-ratio recalibration when supported.)
Steps
Estimated time: 60-180 minutes
- 1
Identify OEM tire size and current tires
Locate the OEM tire size on the door jamb placard and confirm the actual tire size currently mounted. Record both sizes, including width, aspect ratio, and wheel diameter. This baseline ensures any adjustment is grounded in factual measurements.
Tip: Double-check both front and rear tires for consistency; use the smallest common size if mismatches exist. - 2
Measure the current tire circumference
Wrap a measuring tape around the tire or lay a string around the circumference and measure it. Convert the measurement to a consistent unit (inches or millimeters) for calculations. This value lets you compute the adjustment factor precisely.
Tip: Take measurements with the vehicle on a level surface and the tires at normal inflation pressures. - 3
Calculate the adjustment factor
Compute adjustmentFactor = OEMCircumference / CurrentCircumference. This factor represents how much the indicated speed will drift relative to actual speed if you keep OEM calibration. Document the result for reference.
Tip: Use a calculator app to avoid arithmetic mistakes; round to a practical precision for speedometer tuning. - 4
Choose a calibration path
Decide between tire-size adjustment or ECU/gear-ratio recalibration. Consider legality, warranty, and tool availability. Your choice should balance practicality and long-term accuracy.
Tip: If you plan to keep aftermarket tires, ECU recalibration may provide more accurate results without changing the tire profile. - 5
Proceed with tire-size adjustment (if chosen)
If you choose tire change, select tires with an overall circumference closest to OEM. Confirm fitment, clearance, and load rating. Re-torque wheels to manufacturer specs after mounting.
Tip: Avoid extreme diameter changes that risk rubbing or wheel contact with fenders or suspension components. - 6
Proceed with ECU/gear-ratio recalibration (if chosen)
If supported, use the manufacturer’s service tool or dealer procedure to adjust the speedometer/odometer software or final-drive gear ratio. Follow the exact steps prescribed by the tool and document the new values.
Tip: Only perform this step if your vehicle and trim support it; incorrect values can impair safety systems. - 7
Install and re-check hardware
If you changed tires, re-install wheels, torque to spec, and ensure proper lug-nut retention. Reconnect any sensors if removed and verify tire pressures. Check for warning lights and verify no interference with ABS or stability control.
Tip: Record torque specs and ensure lug-nut torque is consistent across all wheels. - 8
Test and validate with GPS
Drive at several speeds and compare dashboard reading to GPS data. Repeat at different road conditions, noting any drift. If readings converge within tolerance, the calibration is successful; otherwise, revisit steps 3-6.
Tip: Drive in a safe, legal environment; use a GPS app with speed accuracy and keep a log of all tests.
Questions & Answers
Can I calibrate a 4Runner speedometer myself?
Yes, you can, using tire-size adjustments or compatible ECU recalibration tools. Some models require dealer tools, so check your year and trim. Always follow safety guidelines and verify results with GPS.
You can calibrate it yourself if your model supports it, but some versions need dealer tools. Always verify with GPS after changes.
What is the safest method for speedometer calibration?
The safest approach is to validate with GPS after a controlled adjustment, preferably using tire-size changes or an officially supported ECU recalibration tool. Avoid reckless modifications that affect safety systems.
Validate with GPS and use officially supported methods; avoid unsafe or unapproved changes.
Will calibrating affect odometer readings?
Yes. Calibrating speedometer readings can influence odometer accuracy, especially when changes rely on software or gear ratios. Ensure the calibration method aligns both speedometer and odometer for consistent data.
Calibrating can affect the odometer too, so choose a method that keeps both aligned.
Is it legal to modify the speedometer?
Laws vary by jurisdiction. In many places, speedometer manipulation is regulated and must not misrepresent vehicle speed. Check local rules and ensure any changes are properly documented and compliant.
Laws differ by area; ensure you’re compliant and avoid misrepresenting speed.
How do I know my speedometer is off?
Compare indicated speed with GPS-provided speed at several steady speeds. If there is a consistent discrepancy, your speedometer likely needs calibration or a tire-size adjustment.
If the GPS and the dashboard disagree at multiple speeds, your speedometer is likely off.
Watch Video
Key Takeaways
- Verify OEM vs current tire size before any changes.
- Choose an approach (tire size vs ECU) based on legality and practicality.
- Test with GPS at several speeds to confirm accuracy.
- Document all parameters for future reference and safety checks.