Calibrate Tacoma Speedometer: A Practical Step-by-Step Guide
Learn how to calibrate a Toyota Tacoma speedometer with GPS verification, tire-size considerations, and ECU adjustments. This 2026 guide from Calibrate Point covers safe, accurate calibration, step-by-step testing, and documentation for future reference.

Calibrating a Toyota Tacoma speedometer involves verifying readings with GPS data, adjusting ECU or cluster mappings where supported, and accounting for tire size. This guide provides a safe, step-by-step process, plus practical checks to ensure accurate speed readings and odometer accuracy. You'll learn baseline measurements, adjustments, multi-speed testing, and documentation for future reference.
How speedometer calibration works in Toyota Tacoma
According to Calibrate Point, speedometer accuracy hinges on aligning on-road readings with GPS data and ensuring tire size and gearing are properly reflected in the vehicle's calibration. In modern Tacomas, calibration can involve adjusting the instrument cluster mapping, ECU speed sensor scaling, or reprogramming the speedometer module where the manufacturer allows. The basic principle is simple: the displayed speed must correspond to the actual forward motion as confirmed by a trusted velocity reference, not just the vehicle's internal odometer. If your tire size or gearing changes, or if you have aftermarket tires, you should anticipate a shift in indicated speed and odometer accuracy. This is why a controlled baseline and repeatable testing method are essential for credible calibration and traceable results.
Common causes of speedometer inaccuracy
A miscalibrated speedometer can stem from several sources. Tire size changes alter the wheel circumference, which directly affects the distance-per-rotation calculation that the speedometer uses. Worn tires with irregular tread can introduce uneven rolling resistance, subtly skewing measurements over long drives. Sensor degradation or wiring issues in the vehicle’s speed sensor circuit can create intermittent or persistent errors. ECU maps that are out of date or overridden by aftermarket tuners can also misreport speed. Finally, external factors like significant temperature changes or fuel load can cause small variances that compound over time. Understanding these causes helps you plan a robust validation strategy and avoid chasing phantom errors.
Methods to calibrate: GPS-based verification vs ECU adjustment
There are two primary pathways for speedometer calibration. The GPS-based method relies on a reliable GPS source to establish true speeds over measured distances; you then compare the GPS readings to the vehicle display and compute an adjustment factor. The ECU or instrument cluster method involves changing calibration maps within the vehicle’s control electronics, which can be more precise but may require dealer tools or manufacturer-allowed software. When possible, begin with GPS verification because it’s noninvasive and reversible. If the GPS shows a consistent offset across speeds, you can implement a corresponding adjustment in the cluster or ECU, then re-validate with GPS data. Keep in mind warranty and legal considerations when altering calibration maps.
Safety and legal considerations when adjusting a speedometer
Do not perform calibrations while driving. Set up in a safe, controlled environment, ideally a closed course or low-traffic area. Check local regulations: speedometer accuracy requirements vary by jurisdiction, and significant odometer changes can affect resale, insurance, and warranty coverage. If you’re uncertain about ECU-level changes, consult the vehicle’s service manual or a qualified technician. When using tools or dealer software, follow manufacturer instructions closely to avoid bricking the instrument cluster or voiding warranties. Document every change and keep a log of baseline readings and post-calibration results.
Prepare for calibration: prerequisites and environment
Before you begin, verify tire size matches what the vehicle was calibrated for from the factory. Gather your GPS source, a diagnostic tool set, and any OEM service documentation for your model year. Find a flat, straight stretch of road or test track with minimal traffic. Calibrate at a comfortable, steady pace (e.g., 40-60 mph) to minimize wind and grade effects. Ensure the vehicle is in good mechanical condition, with fresh tires and balanced wheels. A calm environment reduces noise in data and increases repeatability. If you’re using aftermarket tires, expect a larger offset and plan for an additional validation pass after adjustments.
Step-by-step considerations: tires, gearing, and tire size impact
Tire size has a direct impact on speedometer readings because it changes the actual distance traveled per wheel rotation. A larger-than-original tire increases the wheel circumference, causing the speedometer to understate true speed. To account for this, calculate the expected speedometer error using the original and new tire dimensions and apply the appropriate correction factor in the ECU or instrument cluster if supported. If gearing changes were done (e.g., a different rear gear ratio), the same principle applies but the math involves gear ratios and wheel speeds. Always recheck your baseline after any alteration and document the new parameters for future reference.
How to document and verify calibration results
Documentation should include the baseline speed vs GPS readings, the adjustments made, and post-calibration tests at multiple speeds. Create a simple table that lists target speeds, GPS-measured speeds, indicated speeds, and the difference. Re-test at low, mid, and high road speeds to ensure consistency. Keep a chronological log with vehicle VIN, tire size, software version, tool used, and technician notes. If possible, have a second person verify the measurements to reduce bias and error. Finally, compare odometer readings before and after calibration to ensure alignment with the calibrated speed estimates.
DIY vs professional calibration: when to seek help
If your vehicle lacks accessible calibration tools or the manufacturer restricts ECU-level adjustments, consider professional calibration. Technicians can perform dealer-supported calibrations with access to compliant software and diagnostic tools, ensuring changes are properly logged and warranty concerns are respected. For more complex scenarios, such as significant tire upgrades or custom gearing, professional calibration may deliver more reliable results and longer-term stability. DIY approaches can work for minor tire-size changes, but you should be aware of legal implications and the need for precise validation.
Recommended checks after recalibration
After calibration is complete, conduct a fresh validation run across several speeds to confirm accuracy. Recheck at highway speeds and a controlled test distance to confirm repeatability. Monitor for any changes in fuel economy or performance that might indicate a miscalibration. If you notice persistent discrepancies, revisit the baseline data and verify there were no data-entry errors in the calibration factor. Maintain a calibration log and set reminders to re-validate after tire changes or service visits.
Tools & Materials
- GPS device or smartphone with GPS app(Record real-time speed over a measured distance (e.g., 0-60 mph) for baseline comparisons)
- OBD-II compatible diagnostic tool(Access or adjust speedometer-related sensor data or ECU maps if supported)
- Tire size data (OEM and replacement sizes)(Document exact tire size to calculate expected speedometer error)
- Tape measure or wheel circumference calculator(Calculate or verify wheel circumference for distance calculations)
- Notebook or digital logging device(Record readings, dates, adjustments, and test results)
- Safety gear (gloves, eye protection)(General safety; recommended for handling tools and test setups)
Steps
Estimated time: 60-180 minutes
- 1
Prepare vehicle and materials
Park on level ground and turn off distractions. Gather GPS data source, ECU/cluster tools, tire size documentation, and your calibration log. Confirm tire pressures and tread are within spec before starting.
Tip: Double-check tire size and wear; misreporting here skews results. - 2
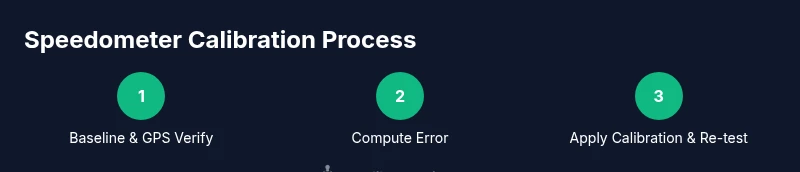
Baseline GPS measurement
Drive a measured distance at a steady, moderate pace. Compare GPS-recorded speed with the instrument cluster reading to establish an initial offset. Repeat at two or three speeds for reliability.
Tip: Use a long, straight road with minimal traffic for consistency. - 3
Compute speedometer error
Calculate the difference between GPS speed and indicated speed. Note any consistent offset and determine whether the error grows with speed or remains constant.
Tip: Log data for multiple speeds to identify patterns rather than a single reading. - 4
Check tire size impact
If tires were changed, compute the theoretical error introduced by the new circumference. Prepare to adjust the calibration factor or ECU mapping to compensate.
Tip: OEM tires ensure the baseline is valid; aftermarket tires require re-validation. - 5
Apply calibration adjustment
Using the available toolset, input the calculated correction factor into the speedometer system or ECU map. Follow manufacturer steps to apply and save changes.
Tip: Document the exact steps and software version used to avoid future ambiguity. - 6
Re-validate post-calibration
Repeat GPS-based speed checks at several speeds to confirm the adjustment delivers consistent results. Ensure odometer alignment within an acceptable range.
Tip: If results are inconsistent, re-check data entry and repeat measurements. - 7
Document results
Create a calibration log with baseline data, adjustment factors, and post-calibration results. Include vehicle details, tire sizes, and tool versions.
Tip: Store the log with service records for traceability. - 8
Decide on follow-up plan
Set reminders for periodic re-validation, especially after tire changes or service visits. Decide whether to repeat checks annually or after major maintenance.
Tip: Regular checks help catch drift early before it affects odometer accuracy.
Questions & Answers
Do I need to recalibrate my Tacoma's speedometer after changing tire size?
Yes. Changing tire size alters the wheel circumference, which shifts speedometer readings and odometer accuracy. Re-validate with GPS checks and adjust the calibration factor or ECU mapping as needed.
Yes. Changing tire size shifts your speedometer and odometer; recheck with GPS data and adjust accordingly.
Is it legal to modify speedometer calibration?
Legality varies by jurisdiction. Many places require accurate speedometer readings for safety and enforcement. Use manufacturer-approved methods and document changes to stay compliant.
Legality varies by area; ensure accuracy and document changes to stay compliant.
How long does calibration take?
Time depends on tools and tire changes but typically ranges from an hour to a few hours, including verification and documentation.
Expect about an hour or more, depending on tools and tire changes.
Can I calibrate a speedometer without professional tools?
Basic GPS-based verification can be done DIY, but ECU-level adjustments often require professional tools and manufacturer guidance. Always follow warranty rules.
You can do GPS checks yourself, but ECU adjustments may require professional tools.
Will speedometer calibration affect odometer accuracy?
Yes, both are linked. Proper calibration aligns speedometer readings with GPS data and ensures odometer accuracy across speeds.
Calibration affects both speedometer and odometer when synchronized correctly.
Watch Video
Key Takeaways
- Document baseline speeds with GPS for accuracy.
- Account for tire size when calibrating speedometer.
- Validate results at multiple speeds to ensure consistency.
- Record every change and tool version for traceability.
- Re-test after any tire change or service.