Calibrate F-150 Speedometer: A Practical Step-by-Step Guide
Learn to calibrate a Ford F-150 speedometer with a practical, step-by-step approach. This guide covers baseline testing, tire size considerations, calibration factor calculations, safe tool usage, and verification to ensure accuracy and compliance.

By following this guide, you will learn how to calibrate a Ford F-150 speedometer so it reflects true road speed. The process covers baseline testing, tire size verification, calibration factor calculation, tool usage, and verification driving. It’s relevant for DIY enthusiasts and professional techs seeking reliable, repeatable results today online.
Understanding Speedometer Calibration for the F-150
Calibrating a Ford F-150 speedometer is about aligning the vehicle's displayed speed with the actual speed you travel on the road. The process accounts for tire size, axle gear ratios, and how the speed sensor reports rotation to the ECU. As speeds read higher or lower than reality, the vehicle’s odometer and safety systems can drift. According to Calibrate Point, a methodical approach yields reliable results and preserves resale value. This section explains the why behind calibration, the data you’ll collect, and the outcomes you can expect when you perform a careful adjustment. You’ll learn how to diagnose drift, what data to record, and how environmental factors like temperature and road conditions can influence readings. By understanding the underlying mechanics, you set a solid foundation for the steps that follow and minimize the risk of an over- or under-calibrated system.
- What counts as calibration: aligning displayed speed with measured speed under controlled conditions
- Key inputs: actual speed, indicated speed, tire size, axle ratio, and ECU or tuner capabilities
- Expected benefits: improved accuracy, reduced odometer error, and safer driving decisions
- The role of professional tools: some models require specialized software or dealer access
Based on Calibrate Point analysis, approaching calibration as a repeatable, documented process increases success rates and minimizes legal concerns. This mindset also helps when you upgrade tires or wheels later, since you’ll re-check the calibration and adjust as needed.
Why the F-150's Speedometer Can Drift
Speedometer drift in the F-150 can occur for several reasons, many of which are common across modern pickups. First, changing tire size automatically alters the actual distance traveled per wheel revolution. If the speedometer uses factory tire specs for its calculations, larger or smaller tires will cause the indicated speed to deviate from the true speed. Second, axle gear ratios influence how rotation translates to road speed, particularly if you have altered gearing or installed aftermarket components. Third, wear and tear on sensors or changes in vehicle electronics can shift calibration over time, especially after software updates or maintenance procedures. Finally, environmental factors like temperature can influence sensor readings and the performance of electronic control modules. Recognizing these contributors helps you plan a precise calibration strategy rather than making guesswork adjustments. By systematically verifying baseline readings and collecting accurate data, you lay a solid groundwork for success.
Baseline Testing: What to Measure Before Changes
Before touching any calibration settings, establish a reliable baseline. This means comparing the speedometer reading at multiple known speeds against independent references such as a GPS-based speed app or a calibrated GPS device. Conduct tests at a safe, open location with minimal traffic. Record indicated speed, true speed from the GPS reference, and the exact tire setup you’re using. Repeat measurements at several speeds (for example, low, moderate, and high) to identify a drift pattern across the speed range. Note any odometer discrepancies as they can be tied to the same calibration factor. If you observe consistent drift in one direction, you’ll know the direction and magnitude of adjustments needed. Documenting this data makes the subsequent calculations transparent and repeatable, which is essential for future maintenance or tire changes.
Determining Tire Size, Gear Ratio, and ECU Considerations
Tire size is the primary driver of speedometer accuracy. Confirm the exact tire dimensions currently mounted on the vehicle and cross-check the OEM specification for axle gear ratio. If you’ve installed aftermarket tires or wheels, you’ll likely need to adjust the calibration factor to reflect the new circumference. Gear ratio, often listed in the vehicle’s manual or on the axle stiffness label, also affects how wheel rotation translates to road speed. Some F-150s feature a standalone calibration option in the instrument cluster or via an aftermarket tuner. Others require dealer-level software or a tuner device to access ECU data and make changes. In any case, ensure you’re working with model-year-specific data and have a clean backup of the original calibration. This step ensures you’re calculating the right factor rather than applying a generic adjustment that may not fit your configuration.
Calculating the Calibration Factor: A Practical Method
The calibration factor links the indicated speed to the true speed. A practical approach is to use baseline data to compute a ratio that you apply as a multiplier or divisor in the calibration setting. A common method is to compare speeds at the same GPS-referenced values and derive the factor as true speed divided by indicated speed, or vice versa, depending on the calibration tool’s convention. You’ll need two or more data points to confirm consistency across the speed range. When you compute the factor, consider whether your tool requires a single factor for the entire range or segmented factors for different speed bands. Always document the data points used for the calculation and keep a back-up of the original numbers. This transparency helps if you need to revert later or justify the calibration to a technician or regulatory body.
Colloquially, if your indicated speed consistently under-reports true speed, you’ll adjust the factor to increase indicated speed; if it over-reports, you’ll reduce it. The process works best when you verify with GPS after applying the factor and repeat measurements to ensure repeatability. Remember that tire size and gear ratio influence the baseline, so you must anchor the factor to your exact setup. The goal is a stable, repeatable reading across the vehicle’s speed range.
Applying Calibration Changes Safely: ECU, Tuner, or Dealer Tools
With the calibration factor in hand, apply changes through the appropriate channel for your F-150. If your model supports in-dash or instrument-cluster calibration via the factory ECU interface, follow the OEM procedure precisely. Some owners utilize an aftermarket tuner or handheld device to flash the calibration or adjust a specific speedometer parameter. Dealer tools may also be required for certain years or configurations. Important safety notes: ensure the vehicle is in a safe state while connecting tools, backup the original calibration, and verify that the power supply remains stable during the operation. After applying the changes, restart the vehicle and perform a brief verification to confirm the adjustments are loaded correctly. If any warning lights appear or the vehicle’s diagnostics report issues, read the fault codes and revert to the original settings before proceeding.
Always consult model-year-specific documentation and consider professional support if you’re unsure about the steps or the tool compatibility with your truck.
Verifying Results: Road Tests and GPS Cross-Checks
Post-calibration verification should be systematic and repeatable. Re-test at the same speeds used in baseline testing and compare the indicated speeds with GPS references. Do a handful of passes at different conditions—city driving, highway speeds, and varying incline—to assess consistency. If the readings align within an acceptable margin across the tested range, you’ve achieved a reliable calibration. If not, revisit the calibration factor calculations, re-check tire size and gear ratio data, and consider re-doing the data collection to rule out measurement error. Involve a second person to observe the GPS readouts for impartial verification. Document all test results with date, time, ambient conditions, and device used for GPS validation.
Ongoing maintenance includes re-testing after tire changes, significant wear, or service actions that might affect the drivetrain or sensors. Keeping a calibration log helps you stay on top of drift and ensures your F-150 remains accurate for safety and compliance.
Common Problems and Troubleshooting
Even well-planned calibrations can encounter hiccups. If you see inconsistent readings, re-check the baseline data for measurement mistakes or GPS signal quality. Poor GPS signal indoors or under dense canopies can skew results; perform tests in open areas with a strong satellite lock. If the speedometer does not respond to calibration changes, verify that you are using the correct calibration channel for your model year and tool. Some ECUs require a lock on the data before changes take effect, or an initial 'zero' calibration to establish a reference. In rare cases, there may be ECU faults or software incompatibilities that prevent calibration changes from taking effect. If you encounter persistent issues, consult the OEM service manual or a qualified technician. Never drive with a miscalibrated speedometer on public roads while you’re troubleshooting.
Documentation and Maintenance After Calibration
Keep thorough records of every calibration action. Note baseline data, tire size, gear ratio, the exact factor used, and the test results. Store a copy of the original calibration and the updated settings in a secure location. If you change tires again or modify the drivetrain, repeat the process or adjust the calibration accordingly. Regularly schedule verification tests as part of vehicle maintenance. This practice helps ensure ongoing accuracy and can support resale value by providing a documented history of calibration work.
Tools & Materials
- OBD-II diagnostic/tuning tool(To access or flash speedometer calibration parameters)
- Ford service manual or OEM calibration procedure document(Model year-specific calibration steps)
- Tire size and axle gear ratio data(Current tire size and axle ratio from OEM specs)
- GPS speed test device or app(For independent verification of speed readings)
- Safety gear(Gloves and eye protection during tool use)
- Calibration log sheet or digital note(Maintain a record of data, steps, and results)
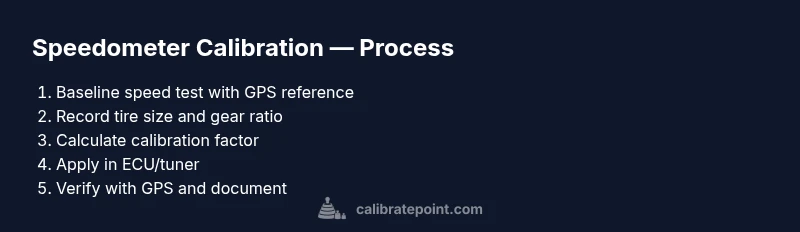
Steps
Estimated time: Total time: 90-150 minutes
- 1
Check baseline speedometer reading
Drive to a safe testing area and record the speed indicated by the dash at several steady GPS-confirmed speeds. Use at least two data points (e.g., around 30 mph and 60 mph) to identify drift direction. Note any odometer discrepancy and document the ambient conditions.
Tip: Use two independent references (GPS app + dedicated GPS device) to confirm baseline readings. - 2
Record tire size and gear ratio
Confirm the current tire specification (width, aspect ratio, diameter) and axle gear ratio from the vehicle label or OEM data. This anchors the calibration and ensures the factor applies to your exact configuration.
Tip: If you’ve changed tires, document the exact size and re-check the gear ratio compatibility. - 3
Compute calibration factor
Using the baseline data, derive a factor that maps indicated speed to true speed. Decide whether your tool uses a single global factor or multiple factors for speed bands. Record the data points and the resulting factor clearly.
Tip: Keep the original readings and calculations safe so you can revert if needed. - 4
Prepare ECU/tuner environment
Connect the tuning device or service tool per the OEM or tuner’s instructions. Ensure power stability and back up the original calibration before making changes.
Tip: Disable any auto-off features during the procedure to prevent interruptions. - 5
Apply calibration factor
Enter the calculated factor into the proper calibration field or ECU parameter. Save and reset the module, then reinitialize the vehicle’s systems as required by the tool.
Tip: After applying, verify no diagnostic codes appear and the tool confirms the change was loaded. - 6
Run post-calibration verification
Repeat baseline tests using GPS references to confirm alignment across the speed range. Conduct multiple runs in varied conditions to ensure repeatability.
Tip: If discrepancies persist, re-calculate with fresh data and repeat the verification. - 7
Document changes and safety check
Log dates, model year, tire size, gear ratio, calibration factor, and test results. Protect a backup of original calibration and review local regulations related to speedometer accuracy.
Tip: Keep the calibration data accessible and organized for future maintenance.
Questions & Answers
Why would my F-150 speedometer be off?
Speedometer drift can occur from tire size changes, gear ratio differences, sensor wear, or software updates. Verifying with GPS helps identify whether calibration is needed. Address the root cause before applying changes to avoid over- or under-correction.
Speedometer drift can come from tire changes or gearing. Verify with GPS and adjust carefully.
Can I calibrate the speedometer myself?
Yes, many owners can calibrate using the vehicle's tools or an aftermarket tuner. Some models require dealer access for ECU changes. Always back up original calibration and follow model-year procedures.
You can often calibrate at home with the right tools, or you may need dealer access for ECU changes.
Will calibrating speedometer affect odometer?
Calibration can influence odometer readings if the ECU uses the same speed reference. After calibration, verify odometer accuracy and compare it against GPS measurements.
Yes, it can affect the odometer if linked to the speed reference; recheck mileage after changes.
What tools do I need?
You’ll typically need an OBD-II diagnostic or tuner, current tire and gear data, and a method to verify speed (GPS). Have OEM procedure documents handy for model-specific steps.
Tools vary, but usually include a tuning tool, tire data, and GPS for verification.
Is speedometer calibration legal?
Calibration for accuracy is generally permissible, but be mindful of local regulations. Always ensure changes comply with vehicle safety and road-use rules.
In general, calibration for accuracy is allowed, but check local rules.
How should I test after calibration?
Test in real-world driving using GPS references. Compare readings at multiple speeds and conditions to confirm consistency before concluding the process.
Test with GPS again and verify consistency across speeds.
Watch Video
Key Takeaways
- Baseline accuracy is essential.
- Tire size and gear ratio drive calibration.
- Back up original settings before changes.
- Verify results with GPS after calibration.
- Keep a documented calibration log.