Harley Speedometer Calibration: A Practical Step-by-Step Guide
Learn how to calibrate a Harley speedometer with GPS checks, model-specific methods, and safe testing steps. This guide from Calibrate Point covers tools, steps, risks, and verification to improve accuracy.

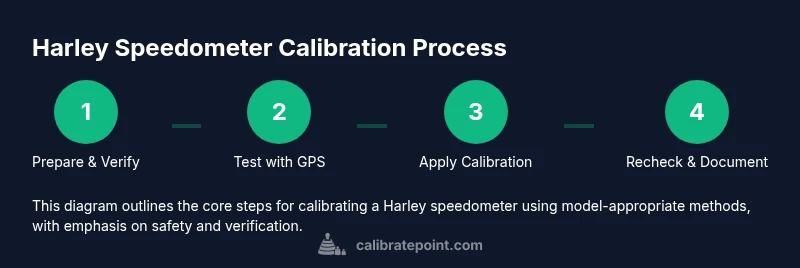
To calibrate a Harley speedometer, verify actual speed with GPS, choose a model-appropriate method, apply the adjustment, and recheck with GPS. See our detailed step-by-step guide for precise actions, safety considerations, and model-specific tips.
Why calibrate a Harley speedometer
Calibrating the Harley speedometer is about making sure the gauge shows an accurate road speed relative to GPS speed. An inaccurate speedometer can mislead you about your true speed, affect odometer readings, and complicate maintenance and insurance records. The Calibrate Point team emphasizes that consistent, model-specific calibration reduces error and keeps your dash readings trustworthy. Before you begin, note that Harley models vary in their speedometer architecture—some use sensor-based readings linked to the wheel circumference, others rely on ECU-driven modules. Understanding your bike's system is essential to pick the right calibration path.
A properly calibrated speedometer improves ride safety by providing reliable speed data, helps with fuel planning, and ensures odometer readings reflect actual mileage for service intervals and resale value. Throughout this guide, you’ll find model-aware guidance and practical steps you can take in a well-lit, safe workspace. Calibrate Point proposes a cautious, data-driven approach rather than guesswork, and recommends documenting every change for future reference.
For readers who ride in areas with strict speed enforcement or where odometer accuracy affects maintenance, this calibration process matters. The goal is not perfection in every possible scenario but a defensible, repeatable method that reduces error within a safe tolerance. When in doubt about model-specific steps, consult the official service manual or a qualified technician to avoid unintended settings changes.
How speedometer error happens and why it matters
Speedometer error can stem from tire wear, incorrect tire size, changes in wheel circumference, sprocket changes, or even payload and aerodynamics. Over time, tire tread wears, and the effective circumference narrows slightly, causing the gauge to overstate speed. Conversely, larger tires can understate speed. For riders, these discrepancies translate into speed violations risk, inaccurate fuel economy estimates, and misreported odometer mileage. Calibrate Point analysis shows that accuracy varies by model, tire size, and riding conditions. Small errors are common, but they accumulate during longer trips and can affect trip planning and maintenance intervals. Recognizing how these factors influence readings helps you choose a calibration path with confidence.
In many Harley models, the speedometer relies on wheel-speed data fed through sensors or a dedicated instrument cluster. Any alteration to tire size, wheel components, or sprocket ratio alters the relationship between actual road speed and displayed speed. Understanding this relationship is the first step toward a credible calibration. A measured approach — verifying with GPS data in multiple road conditions — ensures that your adjustment targets the right portion of the error curve. Remember, the objective is a consistent, documented correction that you can reproduce later if needed.
Methods available to calibrate a Harley speedometer
There are several paths depending on model and year: (1) tire circumference-based recalibration, (2) dashboard or instrument cluster reprogramming via a service tool or OEM module, and (3) external calibration kits or software for select models. Tire-based methods adjust the wheel circumference input so the speedometer translates wheel rotation into speed correctly. ECU or instrument-cluster recalibration changes the data the display uses to derive speed, which can correct larger offsets but may require OEM tools. External kits or software provide a user-accessible pathway for some model years but vary by region and dealer support. Before committing to a method, verify compatibility with your exact Harley model and year. Always back up settings and refer to the service manual for model-specific steps.
If you’re unsure, start with the least invasive method—tire circumference alignment—before moving to electronic recalibration. In all cases, take time to confirm the change with GPS measurements across different speeds and road conditions. A cautious, staged approach minimizes risk and protects your bike’s electronics. Calibrate Point suggests documenting the chosen method, the calibration values, and the GPS verification results for future reference and maintenance records.
Planning and prerequisites before you start
Successful calibration begins with planning. Gather the right tools and materials, confirm your Harley model’s supported calibration paths, and choose a safe testing environment. Start by locating your motorcycle’s tire size and OEM tire circumference data, which will feed into the calculation for any circumference-based adjustment. Have a service manual or approved digital reference handy, as model-specific steps vary. Ensure you have a clean, well-lit work area; a flat, traffic-free space is ideal for GPS verification tests. Create a simple checklist to minimize missed steps and keep a log of readings and settings for future reference. A disciplined preparation phase reduces the likelihood of miscalibration and makes the process smoother and safer.
As you begin, consider the environmental factors that can affect speed readings, such as wind, grade, and load. Plan tests at consistent speeds (for example, 30, 40, and 60 mph in appropriate zones) and in stable weather conditions. Remember that any calibration change involves interacting with sensitive bike systems; if you are unsure, seek professional guidance. Calibrate Point recommends leveraging the model-specific calibration procedures outlined in the service manual and, when available, OEM software tools designed for speedometer adjustments.
Tools & Materials
- GPS device or GPS-enabled smartphone with speed-tracking app(Use GPS to verify actual road speed during tests.)
- Harley service manual or OEM calibration procedure (digital copy acceptable)(Model-specific steps vary; do not improvise.)
- Accurately measured tire size (stock or aftermarket)(Needed for circumference-based adjustments.)
- Basic hand tools (screwdrivers, wrenches)(For accessing instrument cluster or mounting points.)
- Calibrated reference source or calibration module (optional depending on model)(Some models use a dedicated calibration module or tool.)
- Safety gear (gloves, eye protection)(Always protect yourself and the bike during work.)
- Backup plan (owner’s manual, donor settings)(Keep a recorded baseline before changes.)
Steps
Estimated time: 45-90 minutes
- 1
Prepare the bike and workspace
Park the motorcycle on a level surface, engage the parking brake if available, and disconnect any power sources as recommended by the manual. Gather all tools and confirm your model’s supported calibration method. Take photos of the current settings for reference and ensure the area is well-lit and free of distractions.
Tip: Have a helper spot you during tests to keep RPMs and speeds stable while you verify readings. - 2
Verify current accuracy with GPS
With the bike parked, record a baseline by riding in a safe, legal area at steady speeds and comparing GPS-reported speeds to the indicated speed. Repeat at several speeds (e.g., 25, 40, 60 mph) to establish a baseline error range. Document any discrepancies and note weather or terrain factors that could influence results.
Tip: Use a single GPS device to avoid inconsistent readings from multiple sources. - 3
Select the calibration method for your Harley model
Consult the service manual to determine whether circumference-based, ECU/instrument cluster-based, or software-based calibration is appropriate. Evaluate the potential impact on odometer accuracy and warranty coverage. If necessary, contact a dealer or certified technician for guidance.
Tip: If you’re unsure, start with the least invasive method available for your model. - 4
Apply the chosen calibration method
Implement the selected adjustment per the official procedure. This may involve inputting a new tire circumference value, updating software, or reprogramming the instrument cluster. Perform changes in small increments and re-check calibration after each adjustment.
Tip: Record the exact values you entered and the outcomes of each test for traceability. - 5
Recheck accuracy at tested speeds
Drive the motorcycle again at the same test speeds and compare GPS readings with the speedometer. Confirm that adjustments reduce the error to within the model’s acceptable tolerance. If discrepancies persist, revisit the method or consult official guidance.
Tip: Aim for consistent performance across multiple speeds and road conditions. - 6
Document results and finalize
Log all calibration steps, values, and GPS verification outcomes. Update maintenance records and note any follow-up checks recommended by the manual. Store the documentation with the bike's service history.
Tip: Keep a copy of the service manual and calibration data in your bike’s toolkit or digital repository.
Questions & Answers
Is it legal to calibrate a motorcycle speedometer?
Calibration is generally legal as long as the calibration reflects actual speed and odometer readings. Always comply with local laws and maintain accurate records. If in doubt, consult a technician or dealer.
Calibration is legal when it matches real speed and odometer readings; check local laws and keep good records.
Will calibrating affect the odometer reading?
Yes, some calibration methods can impact the odometer’s accuracy since it relies on the same data pathway. After calibration, verify odometer readings against distance traveled to ensure consistency.
Calibrating can affect the odometer; verify mileage after changes.
Can I calibrate my Harley speedometer myself, or do I need a professional?
Some models support DIY calibration with the manual and basic tools. Complex calibrations or ECU changes may require a technician or dealer software to avoid warranty or safety issues.
You can do basic calibrations yourself if your model supports it; for complex steps, use a professional.
How often should I calibrate a Harley speedometer?
Calibrate after major changes (tire size, wheel modifications, sprockets) or when you notice persistent speed discrepancies. Regular checks improve accuracy over time.
Calibrate after big changes or if you notice speed errors, then recheck periodically.
What safety precautions should I observe during calibration?
Calibrate in a safe, legal area with proper safety gear. Avoid tests on busy roads and follow OEM guidelines to prevent damage or injury.
Work in a safe area, wear gear, and follow the manual to prevent accidents.
Watch Video
Key Takeaways
- Verify with GPS before adjusting
- Choose model-specific method only
- Document all changes for future maintenance
- Recheck across speeds and conditions
- Consult OEM manuals for safety and warranty