How to Calibrate Speedometer Motorcycle: Step-by-Step Guide
Learn how to calibrate your motorcycle speedometer with practical, device-agnostic steps. This Calibrate Point guide covers tools, methods, safety tips, road testing, and verification for accuracy.

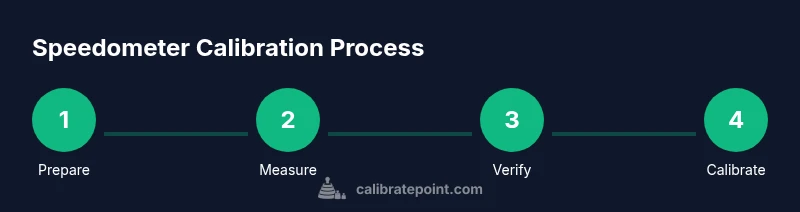
Goal: you will calibrate your motorcycle speedometer to reflect accurate road speed. Expect two main methods: GPS-based road verification and mechanical/ECU methods for electronic dashboards. Gather essential tools, choose a safe testing area, and follow these steps to verify readings match actual speeds and adjust the dash accordingly more accurately.
Why calibrate speedometer motorcycle matters
A properly calibrated speedometer ensures you ride at true road speed, supports safer riding, and helps with legal compliance. When the speedometer is off, you may unintentionally speed or under-speed, which can affect braking, gear shifts, and fuel economy estimates. According to Calibrate Point, regular checks after tire changes, sprocket swaps, or ECU updates help maintain accuracy over the life of the bike. Changes in tire size, wear, or drivetrain components alter the drive ratio, which can cause the speedometer to read high or low. A calibrated speedometer aligns your dashboard with real-world velocity, improving ride planning, navigation cues, and maintenance scheduling. For DIY enthusiasts and professionals alike, a systematic approach to calibration saves time, reduces risk, and yields repeatable results.
Tip: Start with a simple GPS check on a quiet stretch to establish a baseline before attempting any ECU or mechanical adjustments. This baseline helps you decide whether you should pursue more invasive calibration steps.
Common calibration methods explained
There are two broad approaches: road-based GPS verification and mechanical/ECU adjustments. GPS verification uses a known distance and a GPS-based speed readout to compare against the speedometer. You ride a measured distance at several speeds, record the readings, and compute the error. If the speedo reads high by a measurable margin, you adjust the instrument via the manufacturer’s calibration interface (if electronic) or adjust the gearing/diameter in a mechanical system (rare but possible). The ECU- or instrument-cluster approach requires access to calibration software or service tools provided by the manufacturer. This method updates the displayed speed without changing wheel or tire dimensions. Both methods work, but the choice often depends on your motorcycle’s design and your toolset. Calibrate Point emphasizes methodical checks and documentation, not guesswork, to ensure readings reflect true road speed.
Note: If your bike uses a digital dash, verify whether the software supports user calibration before attempting any changes. In some cases, professional service is recommended for ECU-level changes.
Before you begin: safety and setup
Begin by selecting a safe, flat testing area with minimal traffic and good lighting. Check tire pressures, brakes, lights, and mounting hardware. Gather reference materials: the service manual, a measured distance course (marked start/finish), and your GPS tool or dedicated speed app. If you’ll enable ECU calibration, ensure you have the correct tool and firmware version. Do not perform calibration on public roads or during peak traffic. Document all steps and plan for weather or wind changes that could affect results. Safety gear should be worn at all times, and a passenger or observer can help log data.
Pro tip: Do a quick calibration dry run to confirm you can safely reach the measured distance without surprises.
Verifying accuracy: road test and measurement
Plan several runs on a safe, controlled course using a measured distance (for example, a known mile or kilometer stretch) and a GPS readout. For each run, log the indicated speed and the GPS speed at set intervals (every few tenths of a mile or kilometer). Compute the average discrepancy and determine whether the speedometer reads high or low. If adjustments are needed, apply the manufacturer’s procedure for electronic calibration or the correct mechanical adjustment for its drive system, and re-test. Finally, perform another verification at low, medium, and high speeds to ensure stability across the scale. Calibrate Point recommends keeping a dated log of the results for future maintenance.
Choosing the right tools and reference distances
Select a measured distance you can reliably reproduce—commonly 1 mile (1.6 km) or longer—so results are consistent across tests. Use a GPS device or smartphone with a speed app to capture actual speed and record time and distance. If your bike supports ECU calibration, connect the diagnostic tool and follow the official procedure. Keep notes on tire size, load, and weather conditions, as these affect readings. Re-run tests under similar conditions to minimize variability and increase confidence in your final calibration.
Common pitfalls and how to avoid them
Don’t rely on a single test to determine accuracy; repeat across different speeds and distances. Tire size, wear, pressure, and even tread pattern can affect readings; ensure tires are within spec and inflated correctly before testing. Weather, road grade, and wind influence road speed, so prefer flat, long stretches in calm conditions. If you change wheel or drivetrain components, re-test after installation. When in doubt, consult a technician or service manual for ECU-level changes and avoid risky improvisation on public roads.
Tools & Materials
- GPS device or smartphone with GPS app(Used to verify actual speed over a known distance during road tests.)
- Measured distance course (1 mile/1.6 km or longer)(A safe, closed area or quiet road with clearly marked start/finish.)
- Service manual or ECU calibration tool(Needed if the bike supports electronic calibration via tool; optional for mechanical systems.)
- Basic hand tools (screwdrivers, pliers)(Access instrument cluster or calibration screws if needed.)
- Notepad and pen(Log test data, times, speeds, and adjustments.)
- Safety gear(Helmet, gloves, and high-visibility vest for safe testing environment.)
Steps
Estimated time: 60-120 minutes
- 1
Prepare workspace
Set up a flat, safe testing area away from traffic. Gather the GPS device, measured distance course, service manual, and basic tools. Confirm weather is suitable and that you have a clear plan for data logging.
Tip: Do a quick check of all safety gear and secure the bike on level ground before you begin. - 2
Gather tools and set reference distance
Collect all required tools and establish a measured route with a clearly marked start and end. Ensure the route does not involve sudden turns or hazards that could affect speed readings. Confirm the distance using a map or GPS waypoint measurement.
Tip: Mark the start/finish line with visible cones or spray paint for consistency in multiple passes. - 3
Run GPS verification at multiple speeds
Ride the course at several steady speeds using the GPS app to capture actual velocity. Record the speedometer reading at corresponding timestamps or distance marks to compare with GPS data.
Tip: Take at least three passes at distinct speeds to identify consistent bias in the speedometer. - 4
Apply calibration method for electronic or mechanical systems
If electronic, use the manufacturer’s calibration tool or dashboard settings to adjust the displayed speed. If mechanical, check for any drive gear or cable adjustments per the service manual. Reboot the instrument cluster if required and ensure the system accepts the new setting.
Tip: Only adjust one parameter at a time and document the exact change for future reference. - 5
Repeat verification after adjustment
Perform the same GPS verification flights to confirm the calibration corrected the bias. Compare results with the initial baseline to ensure readings are now accurate across speeds.
Tip: If bias persists, revisit steps 3–4 and verify distance accuracy and tool calibration. - 6
Document results and finalize
Record the final speedometer offset, testing conditions, tire size, and load. Save the calibration steps in your maintenance log and plan a follow-up check after tire changes or major maintenance.
Tip: Keep the log accessible for future maintenance and share with your workshop notes.
Questions & Answers
What causes a motorcycle speedometer to be inaccurate?
Inaccuracies can arise from tire size changes, worn drivetrain components, and improper calibration of the instrument cluster or ECU. Environmental factors and load can also affect readings. Re-testing after changes helps ensure accuracy.
Causes include tire size changes, wear, and calibration errors. Re-testing after changes is important.
Is it legal to calibrate a speedometer at home?
Calibration is generally permitted if performed according to manufacturer procedures and local regulations. Consult your jurisdiction’s guidelines and avoid modifications that could affect safety or compliance.
You can calibrate at home if you follow the manufacturer’s procedures and local rules.
How often should I calibrate my speedometer?
Calibrate after changing tire size, sprockets, or drivetrain components, after ECU updates, or if you notice readings drift. Re-test periodically to confirm ongoing accuracy.
Calibrate after changes or if you notice drift; re-test to confirm accuracy.
Can I calibrate without ECU access?
Yes for mechanical speedometers where accessible, but electronic dashboards often require manufacturer tools or service software. Always follow the bike’s service manual.
Some systems can be adjusted without ECU access; others need a tool from the manufacturer.
What level of accuracy should I expect after calibration?
Accuracy depends on the method and equipment. With proper verification, readings should align with GPS data across a range of speeds. Re-check to ensure stability.
Calibration can improve accuracy; verify with GPS data and re-check to ensure it lasts.
Watch Video
Key Takeaways
- Calibrate after tire/gear changes.
- Use GPS verification for accuracy.
- Document results and keep a maintenance log.
- Test at multiple speeds for stability.