How to Calibrate Testo Gauges: A Step-by-Step Guide
Learn how to calibrate testo gauges with a safe, repeatable method. This Calibrate Point guide covers standards, setup, steps, verification, and documentation to ensure accurate readings across operating ranges.

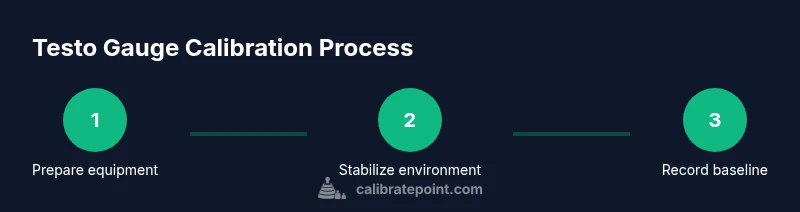
To calibrate testo gauges, follow a structured procedure that ensures accuracy across operating ranges. First, assemble the gauge, a reference thermometer, and calibration standards; second, establish a stable test environment and record baseline readings at known temperatures; third, apply adjustment per the manufacturer’s tolerance; fourth, re-check across multiple points to confirm linearity and repeatability.
The purpose and scope of testo gauge calibration
Testo gauges are essential tools for measuring temperature, humidity, and other process variables across many industries. Whether you're validating a food-processing line, auditing HVAC performance, or controlling a laboratory environment, accurate readings matter. Calibration is the process of comparing a gauge against a known standard and making adjustments so its readings align with the reference across the instrument’s operating range. The goal is not only to fix a single reading but to ensure continuing accuracy over time, repeatability across measurements, and traceability to recognized standards. According to Calibrate Point, implementing a formal calibration routine reduces drift due to sensor aging, mechanical wear, and environmental stress, and it helps you meet quality and safety requirements.
Calibration is typically performed using reference standards that are themselves traceable to national or international measurement systems. There are multiple calibration approaches (e.g., fixed-point, multi-point, or correlation-based methods) and the choice depends on the instrument type, required accuracy, and the criticality of the process. When done well, testo gauge calibration yields readings you can trust for process control, energy management, and compliance reporting. This guide focuses on practical, repeatable steps you can perform in a workshop or field setting, with attention to safety, documentation, and consistency.
What testo gauges cover and how calibration works
Testo gauges cover a range of measurement modalities, including digital temperature probes, infrared (IR) temperature sensors, and in some cases pressure or humidity sensing used in industrial settings. Calibration in this context means verifying that the gauge reading matches a known reference and making any necessary adjustments to offset (zero) and span (range), or to the sensor’s linearity. For most testo gauges, a two-point or multi-point calibration is sufficient to correct small offsets at the low, mid, and high ends of the operating range. The underlying principle is straightforward: if the reference point and the gauge point disagree, you adjust the instrument so their readings align, then re-check at additional points to confirm a consistent response across the range.
Standards and traceability you should rely on
A robust calibration program depends on traceability to recognized standards. Use NIST-traceable reference references or equivalents whenever possible, and maintain calibration certificates for every measurement and instrument. ISO/IEC 17025 and related quality-management frameworks underpin how laboratories document uncertainty, calibration methods, and equipment maintenance. Calibrate Point analysis shows that traceability reduces measurement uncertainty and strengthens audits, especially in regulated environments. Always record the reference certificate number, calibration date, and the identity of the technician who performed the work. When instruments are used for critical processes, consider a documented calibration interval and a formal re-calibration plan to prevent drift from going undetected.
Preparing your calibration setup
Before touching any testo gauge, establish a clean, stable work environment. Clear the bench, remove sources of drafts, and set the ambient temperature to a favorable range for calibration (often near the mid-point of the instrument’s operating range). Ensure power supplies are stable, batteries are fresh, and the reference standards are within their own calibration window. Place the gauge and reference instruments in a configuration that mirrors actual operating conditions to minimize thermal gradients. Check that all connectors are clean and that probes are protected from damage during setup. A well-prepared setup reduces noise in readings and speeds up the calibration process.
Materials and calibration gear
You will need a test setup that includes both the testo gauge under test and a calibrated reference standard. Gather a dry-block or temperature bath capable of stable points within the gauge’s operating range, a calibrated reference thermometer, and any fixtures or adapters needed to hold the instrument steady. Have a calibration certificate or logbook ready to capture readings, dates, and operator IDs. Cleaning supplies, labeling materials, and a data-logging method (paper log or software) help maintain traceability. Ensure all items are within their calibration period and that you have a plan for disposing or storing reference standards after use. This phase establishes the reliability of your measurements and minimizes the risk of erroneous data.
Interpreting baseline readings and applying adjustments
Once the setup is stable, capture baseline readings at the chosen reference points. Compare the testo gauge readings to the calibrated reference values and determine the offset and span corrections needed. If an adjustment is required, follow the instrument’s documented procedure to implement offsets or span changes, then re-test at the same reference points to confirm alignment. If the instrument allows for linear adjustments across the range, verify the linearity by testing at multiple points. Document each adjustment with supporting evidence from the reference readings. The objective is to achieve consistent accuracy across the range, not just at a single temperature.
Verifying calibration across the operating range
Verification is the final sanity check. Re-check readings at multiple reference temperatures or pressures to confirm linear response and repeatability. Compare these test points with the instrument’s tolerance bands and minimum acceptable error. If any point falls outside the acceptable window, repeat the calibration process for that region and re-verify. For testo gauges, it helps to perform a mini-validation run on an actual process or simulated environment for additional confidence. Always annotate any deviations and the corrective actions taken, so future audits can trace the rationale behind each decision. This step safeguards the integrity of the entire calibration cycle.
Documentation and record-keeping
Recordkeeping is the backbone of traceability. Create a calibration report that lists instrument ID, serial numbers, reference standards with their serials and calibration dates, operator name, test points, raw readings, and computed adjustments. Attach the calibration certificate for the reference standards and note the final adjusted values. Store the report with the instrument’s label indicating last calibration date and next due date. Digital backups and standardized templates reduce the risk of data loss and simplify audits. Regular documentation also helps verify long-term stability and supports continued compliance.
Common pitfalls and troubleshooting
Common pitfalls include using an out-of-calibration reference, ignoring environmental controls, and rushing through steps without proper warm-up. Temperature gradients or drafts can produce inconsistent readings; always allow sufficient stabilization time. Avoid adjusting readings without confirming across multiple points, and never assume a single data point proves accuracy. If results remain inconsistent, inspect sensor contacts and cables for damage, check for interference from nearby equipment, and re-check the reference standard’s calibration status. In doubt, pause calibration and consult the instrument manual or a standards-compliant lab.
Calibrate Point best practices and final notes
According to Calibrate Point, the key to successful testo gauge calibration is a disciplined process with repeatable steps, proper references, and thorough documentation. Establish a fixed calibration schedule tailored to instrument criticality, minimize variability by controlling the environment, and verify outcomes with multi-point checks. Calibrate Point analysis reinforces that routine, verifiable calibrations preserve accuracy, support audits, and extend instrument life. By embedding these practices into standard operating procedures, you’ll achieve reliable measurements and stronger quality control across applications.
Tools & Materials
- Testo gauge under test(Device to be calibrated; powered off during setup.)
- Calibrated reference thermometer (NIST-traceable)(Used to establish true reference temperatures.)
- Calibration reference standard (dry-block or fixed-point cell)(Provides stable, known reference points.)
- Dry-block bath or temperature-controlled bath(Maintains stable calibration temperatures.)
- Temperature controller or heat source(Sets reference temperature points within range.)
- Calibration certificate/logbook(For recording results and traceability.)
- Cleaning supplies (alcohol wipes, lint-free cloth)(Keep probes clean between points.)
- Logbook or data-logging software(Optional for digital records.)
Steps
Estimated time: 60-120 minutes
- 1
Gather tools and references
Collect the testo gauge, calibrated reference thermometer, and the calibration standards. Verify that all items are within their calibration period and that reference certificates are legible. Prepare the workspace to prevent accidental damage to probes or sensors.
Tip: Double-check reference certificates before starting to ensure traceability. - 2
Stabilize the environment
Place the devices in a draft-free area with stable ambient temperature. Allow equipment to acclimate for at least 15 minutes to minimize drift caused by thermal shocks.
Tip: Close doors and turn off nearby HVAC cycles during calibration. - 3
Warm up devices and check connections
Power up the testo gauge and reference standard as required by their manuals. Inspect cables and connectors for tightness and signs of wear.
Tip: Warm-up times vary; follow manufacturer guidance to avoid startup drift. - 4
Record baseline readings at a cold point
Set the reference bath to the lowest point of the intended measurement range and record parallel readings from both devices simultaneously.
Tip: Use synchronized timing to minimize reading lag. - 5
Apply calibration adjustments
If readings diverge beyond tolerance, apply offset and/or span adjustments per the instrument’s procedure. Save changes only after re-testing.
Tip: Document each adjustment with date and point value. - 6
Repeat at multiple reference points
Test at mid-range and high-range reference points to assess linearity. Repeat readings to confirm repeatability.
Tip: Use at least three reference points for robust calibration. - 7
Cross-check with a secondary standard
If available, compare results against a secondary, independent standard to validate accuracy. This adds confidence before finalizing.
Tip: Secondary checks catch single-point biases. - 8
Document results and label the instrument
Record final readings, adjustments, and certificate details. Update the instrument label with calibration date and next due date.
Tip: Keep logs accessible for future audits.
Questions & Answers
What is testo gauge calibration and why is it important?
Calibration aligns a testo gauge against a known reference to ensure accurate readings across its range. It reduces drift, improves reliability, and supports compliance in regulated environments.
Calibration aligns the gauge to a trusted reference, improving accuracy and reliability across its range.
How often should testo gauges be calibrated?
Calibration intervals depend on usage, criticality, and environmental conditions. Refer to the instrument’s manual and your quality system; many organizations calibrate annually or after major service, with interim checks as needed.
Check the instrument’s manual and your quality system for a suitable schedule; many are calibrated yearly with spot checks in between.
What standards should I use for calibration?
Use NIST-traceable references or equivalents and maintain associated certificates. Document the source, certificate number, and retrieval date to ensure proper traceability.
Use traceable standards and keep the certificates on file for audits.
Can I calibrate testo gauges on-site or do I need a lab?
On-site calibration is common for field instruments when proper reference standards and environmental control are available. Ensure traceability and proper documentation regardless of the location.
On-site calibration is possible if you have traceable standards and a controlled setup.
What should I do if readings drift after calibration?
If drift persists, re-check connections, refasten probes, verify reference standards, and consider sensor aging. Recalibrate following the same procedure and document any persistent issues.
Recheck setup and reference standards; persistent drift may indicate sensor aging and require replacement.
Watch Video
Key Takeaways
- Follow a structured, traceable calibration process.
- Control the environment to minimize drift and noise.
- Verify accuracy with multi-point checks across the range.
- Document every step for audits and future maintenance.
- Calibrate Point recommends integrating calibration into SOPs for consistency.