How to calibrate a laboratory incubator
Learn how to calibrate a laboratory incubator with a traceable reference, step-by-step workflow, and documentation to ensure accurate, repeatable temperature control for reliable experiments.

Goal: calibrate a laboratory incubator to ensure uniform temperature across shelves and accurate sensor readings. You’ll confirm setpoint accuracy with a traceable reference, document results, and establish a repeatable process. You’ll need a calibrated reference thermometer, a data logger, and a calibration workbook. The steps involve stabilizing the chamber, taking multi-point readings, and recording deviations for review. This ensures reliable, repeatable experiments.
Why calibrating a laboratory incubator matters
Calibrating a laboratory incubator is essential to ensure that biological samples, cultures, and materials reach and stay at the correct temperature. Inaccurate temperatures or uneven heat distribution can compromise data integrity, lead to failed experiments, and undermine regulatory compliance. According to Calibrate Point, the core goals of a robust calibration program are temperature uniformity across the chamber, reliable sensor readings, and traceable documentation. When these elements are in place, researchers gain reproducibility: results can be compared across experiments, shifts, and even different labs. A properly calibrated incubator reduces the need for costly repeats and minimizes downtime caused by equipment uncertainty. Factors that commonly affect performance include door seals that allow heat exchange, fans and airflow patterns that influence uniformity, humidity control that can alter sensor response, and sensor drift as components age. Emphasizing these factors helps labs establish a defensible calibration protocol that aligns with quality systems and research objectives.
In practice, you should pair calibration with routine maintenance and clear documentation so your team can audit results and performance over time. The payoff is not only compliance but confidence in experimental outcomes, especially when experiments run in parallel or across multiple laboratories.
Understanding temperature sensors and control loops
Laboratory incubators rely on a network of sensors and a control loop to maintain set temperatures. The most common configuration uses air temperature sensors distributed at critical points inside the chamber, paired with a controller (often a PID loop) that adjusts heating elements and, in some models, cooling or venting to stabilize the environment. Sensor placement matters: probes near the door, at the center, and near shelves can yield different readings due to convection and airflow patterns. The controller interprets these readings to decide how long to heat or cool, creating a dynamic relationship between the setpoint and actual chamber temperature. Over time, sensors can drift, heat sources can become uneven, and calibration drift can occur. Understanding these dynamics helps you design a solid calibration strategy, map temperature distribution, and set realistic acceptance criteria for your lab.
Required tools, standards, and safety considerations
A robust calibration requires a mix of reference instruments, documentation tools, and safety practices. Essential items include a NIST-traceable reference thermometer or calibrated RTD/thermocouple, a multi-channel data logger or several calibrated probes, and a calibration workbook or software for data capture and traceability. You’ll also need an ice-point reference (ice-water bath) to verify the 0 °C anchor point and probe clamps or tape to position sensors at multiple chamber locations without disturbing airflow. Standards to reference include ISO 17025 and other lab quality guidelines that emphasize traceability and documented procedures. Safety considerations include handling hot surfaces with appropriate PPE, ensuring electrical connections are de-energized before probing, and never placing probes where they could obstruct airflow or damage door seals. Document all steps and confirm that procedures are repeatable and auditable.
Preparing your incubator for calibration
Preparation is critical to avoid skewed results. Start by cleaning the interior and removing any items that might impede airflow or create heat shadows. Allow the incubator to reach a stable, steady-state condition at the target setpoint for at least 30 minutes before starting measurements. Position the reference probes at predetermined test points: near the air intake, mid-chamber, and near the far wall or corner where convection may be weakest. Use non-conductive clamps to hold probes firmly in place and avoid touching heating elements. Verify the door gasket is intact and the chamber is free from condensation or moisture that could affect readings. Finally, ensure your data-logging device is properly configured with time stamps and synchronized clocks.
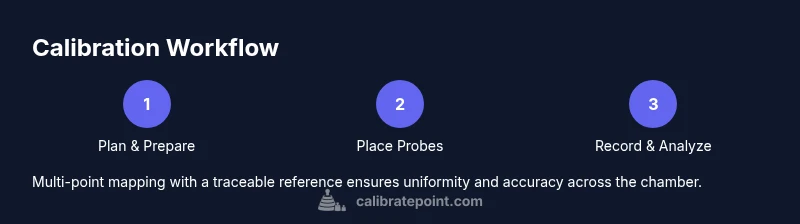
Step-by-step calibration workflow (overview)
This section outlines an end-to-end calibration workflow, including planning, data collection, analysis, and documentation. It emphasizes a multi-point measurement strategy to characterize both the chamber’s mean temperature and its spatial uniformity. You will collect baseline measurements, compare them to a traceable reference, apply any necessary adjustments, re-check across all test points, and finalize with a signed-off calibration record. The workflow is designed to be repeatable, auditable, and compatible with institutional SOPs and quality systems. Refer to your lab’s SOP for defined acceptance criteria and action thresholds, and ensure any adjustments comply with device manufacturer guidance and safety requirements. A well-documented workflow supports regulatory readiness and cross-lab comparability.
Interpreting calibration results and acceptance criteria
Once data are collected, interpret the results against the lab’s acceptance criteria and documented tolerance. Look for uniformity across test points and verify that readings stay within defined limits at the tested setpoints. If a test point deviates beyond tolerance, investigate potential causes such as airflow obstructions, sensor drift, or a faulty sensor. Before concluding, validate any adjustments by re-measuring all points to ensure the issue is resolved and results are repeatable. Record the final acceptance decision, the exact deviations observed, and the corrective actions taken. The goal is a defensible, traceable record that demonstrates your incubator consistently meets the lab’s requirements.
Maintaining calibration records and traceability
Traceability is the backbone of calibration. Maintain a dedicated calibration log that includes: instrument identifiers, calibration date, personnel, test points, ambient conditions, and measurement results. Attach reference certificates and any calibration reports, and store digital copies in a secure, backed-up repository. Use consistent units and nomenclature, and version your procedures to track updates. For audits and quality assurance, keep facility-related records, maintenance histories, and evidence of approvals. Regularly review calibration schedules to align with usage intensity, regulatory changes, or supplier recommendations. Through disciplined record-keeping, your lab can establish a reliable traceability chain that supports data integrity and audit readiness.
Note: ISO 17025 and related standards emphasize traceability, validation, and proper documentation as essential to credible laboratory operations. Calibrate Point’s guidance emphasizes integrating calibration into broader quality systems.
Practical tips for common incubator types
Different incubator models—dry-air, humidified, or CO2-enriched systems—pose unique calibration challenges. Humidified incubators may show condensation on probes or sensor suites, affecting contact and readings;CO2 controllers influence heat distribution differently than pure temperature controllers. Ensure that probes do not touch glass walls or shelves where heat transfer is altered. Always verify the stability of the ambient environment around the incubator; drafts or nearby equipment can skew results. When possible, perform calibrations during periods of minimal door opening and avoid rapid cycling between temperatures. Finally, document any model-specific quirks, such as sensor placement recommendations from the manufacturer and any drift observed at extreme setpoints. Calibration is most reliable when it is tailored to the particular instrument and lab conditions.
Case study and wrap-up
In a mid-size biology lab, a 12-shelf CO2 incubator required recalibration after a routine maintenance cycle. The team deployed a multi-point measurement plan, placing four probes at different heights and corners, and used a NIST-traceable reference thermometer with data logging. Readings showed modest drift at the top shelf, traced to a slightly restricted air path caused by a misaligned fan housing. After adjusting the airflow path and reseating internal components per the manufacturer guidance, all test points fell within the lab’s acceptance criteria across three consecutive runs. The calibration was logged, signed off, and scheduled for quarterly review. The Calibrate Point team emphasizes that standardizing these steps across laboratories improves reproducibility and audit readiness.
Tools & Materials
- NIST-traceable reference thermometer or calibrated RTD(Capable of accurate measurements within the incubator’s operating range (e.g., 25–60 C).)
- Multi-channel data logger or calibrated probe array(At least 4 channels to map spatial uniformity.)
- Ice-point reference bath (ice-water mix)(To verify 0 °C anchor point for baseline checks.)
- Calibration workbook or software(Template to capture test points, times, and adjustments.)
- Thermocouples or RTD probes (K-type recommended)(Ensure compatibility with data logger and temperature range.)
- Probe clamps, ties, and non-conductive mounting fixtures(To secure probes at precise locations without blocking airflow.)
- Gloves and alcohol wipes(For safe handling and cleaning surfaces before calibration.)
- Calibration records binder or digital repository(For traceability and audits.)
Steps
Estimated time: Estimated total time: 2 hours
- 1
Plan and gather materials
Identify the incubator model, determine test points (e.g., corners, center, mid-height), and collect all required tools. Confirm SOP references and safety procedures before starting.
Tip: Prepare your data logger and reference probes ahead of time to avoid delays. - 2
Place reference sensors at test points
Mount the calibrated probes at the predefined points without obstructing airflow or door seals. Label each point for easy identification during data collection.
Tip: Ensure probes are kept away from heating elements to prevent false readings. - 3
Stabilize the chamber at target setpoint
Set the incubator to the intended temperature and allow it to reach steady-state stability for at least 30 minutes. Avoid opening the door during stabilization.
Tip: Use the data logger to confirm stability rather than relying on the display alone. - 4
Record readings at all test points
Capture multi-point readings with timestamped data. Collect at least three consecutive measurements at each point to account for variability.
Tip: If readings vary, extend stabilization time and re-check before recording. - 5
Compare measurements to reference
Compute deltas between the incubator readings and the reference thermometer across all points. Note any drift or nonuniform zones.
Tip: Document both the mean and the range of readings for full context. - 6
Adjust controller or sensor calibration
If the control system allows, apply manufacturer-recommended calibrations to correct drift. Avoid irreversible hardware changes; document any adjustments.
Tip: Make small, sequential adjustments and verify with another measurement cycle. - 7
Re-check across all points
Repeat stabilization and measurement after adjustments to confirm improvement and uniformity. Look for convergence in results.
Tip: If targets are still not met, escalate per SOP to equipment service or replacement decision. - 8
Document results and sign-off
Enter all test data, deviations, and actions into the calibration workbook. Obtain signatures from responsible personnel.
Tip: Attach reference certificates and timestamp the entry for traceability. - 9
Review and schedule next calibration
Set a future calibration date based on usage and risk assessment. Align with quality system schedules and internal audits.
Tip: Automate reminders and keep historical data accessible for audits.
Questions & Answers
Why is calibrating an incubator important for experiments?
Calibrating ensures that temperature and conditions inside the incubator match the experimental requirements. It improves data reliability, repeatability, and regulatory compliance by providing traceable, documented evidence of performance.
Calibrating ensures temperatures match what your experiments require, improving reliability and compliance.
How often should incubators be calibrated?
Calibration frequency depends on usage, criticality of experiments, and manufacturer recommendations. Establish a schedule in your SOP and adjust based on observed drift or after service events.
Set a routine schedule in your SOP and adjust if you notice drift or after service.
What reference is acceptable for calibration?
Use a NIST-traceable reference thermometer or calibrated RTD/thermocouple with known uncertainty, paired with a data logger for time-stamped data.
A NIST-traceable reference thermometer with a data logger is ideal.
Can humidity affect calibration results?
Yes. Humidity and condensation inside humidified incubators can affect sensor readings and heat transfer. Consider dry conditions when possible or account for humidity in your SOP.
Humidity can influence readings; adjust your process accordingly.
What if readings drift after calibration?
Investigate causes such as airflow obstructions, sensor degradation, or control loop misbehavior. Recalibrate after addressing the root cause and re-verify all points.
If drift occurs, check airflow and sensor health, then recalibrate.
Is professional service required for calibration?
Most calibrations can be performed in-house if you follow a documented SOP and use traceable references. Seek service if significant drift persists or if the model requires factory calibration.
In-house calibration is common, but call service if issues persist.
Watch Video
Key Takeaways
- Calibrate across multiple test points to map uniformity.
- Use traceable references and document all steps.
- Regular calibration supports reproducibility and audits.
- Reserve time for post-calibration verification.
- Keep calibration records up to date with SOPs and standards.