When Should You Calibrate Your Thermometer: Practical Guidelines for Accurate Readings
A data-driven guide on when and how to calibrate thermometers, with interval recommendations, methods, and best practices for DIYers, technicians, and professionals.

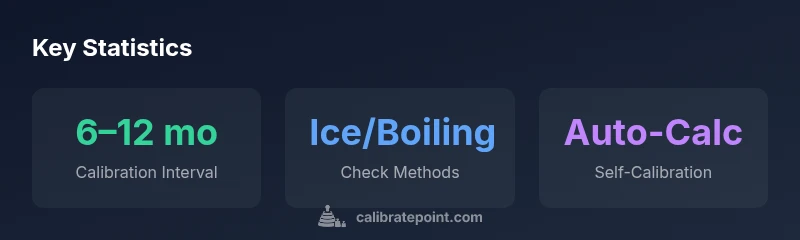
When should you calibrate your thermometer? Calibrate after purchase, after any drop or impact, after exposure to extreme temperatures, and whenever accuracy is critical. For practical use, establish a routine: roughly every 6–12 months for basic devices, more often for lab-grade tools. Regular checks keep readings within tolerance during real measurements.
Why calibration matters for thermometers
Calibration is the process of ensuring a thermometer’s readings match a known standard. For DIYers, technicians, and professionals, accurate temperature readings are essential for safety, quality control, and process reliability. When you hear terms like tolerance, drift, or offset, calibration is the mechanism that keeps measurements trustworthy. In practice, calibration aligns an instrument’s output with a reference point so that, for example, a 25.0°C reading corresponds to the actual ambient temperature. Understanding this concept helps you decide when calibration is required and which method to apply. According to Calibrate Point, a disciplined calibration program reduces measurement uncertainty and increases confidence in results, especially when safety or compliance is on the line.
When to calibrate: a practical schedule
The frequency of calibration depends on how you use the thermometer, the environment, and the required accuracy. For home use, a baseline of every 6–12 months is reasonable if the device is used under normal conditions. In professional settings—kitchen labs, food safety, or industrial processes—more frequent checks may be necessary, such as quarterly or after any event that could affect accuracy (a drop, exposure to extreme temperatures, or maintenance). If a thermometer is subjected to temperature swings, vibration, or rough handling, shorten the interval. Always recalibrate after replacing batteries or after repairs. The key is to document a calibration plan that matches your tolerance needs and to re-check before critical measurements.
Calibration methods: ice-water, boiling-water, and alternatives
Two classic reference points are the ice-water method (0°C) and the boiling-water method (100°C at sea level). These provide tangible checks for many thermometers and are suitable for quick field verification. For non-waterproof instruments, or where boiling water isn’t feasible, substitute with fixed-reference calibration blocks or a dry-block calibrator if available. When performing any method, ensure the environment is stable, the probe is properly immersed, and the thermometer is allowed to equilibrate. For infrared thermometers, line-of-sight and emissivity adjustments matter; a two-point tape or contact method can help validate readings. A systematic approach is to run multiple checks and record the results to assess drift over time.
Environment and handling: factors that influence accuracy
Ambient temperature, humidity, and airflow can affect readings, particularly for disposable or low-cost devices. Rapid temperature changes, dropping or banging the probe, and long delays between readings introduce uncertainty. Storing thermometers in a stable environment and avoiding temperature shocks can minimize drift. Calibrate where the instrument is typically used, since some devices show different performance at extreme temperatures. Documentation of environment conditions during calibration helps you interpret drift and decide if recalibration is necessary.
How to document and track calibration
Maintain a calibration log that includes date, device ID, calibration method, reference standard, results, and any adjustments. For DIYers, a simple notebook or spreadsheet suffices; professionals may use a digital calibration management system. Include notes about environmental conditions, device condition, and battery status, if applicable. When a reading falls outside the acceptable tolerance, mark it as drifted and schedule a re-calibration or service attempt. Regular documentation enables trend analysis over time and supports audits or quality-control checks.
Common mistakes and troubleshooting
Common mistakes include relying on a single check, ignoring equilibration time, or calibrating without a known reference. Always verify with at least two reference points if possible; one point won’t reveal offset or nonlinear drift. Don’t over-tighten calibration adjustments where not required, and if readings remain inconsistent, consider using a different reference standard or swapping the thermometer for a known-good unit during cross-checks. For persistent drift, consult a service provider or consider replacing the instrument.
Industry standards and best practices
Many industries adopt a formal calibration program with traceable standards and documented procedures. ISO and NIST guidance emphasize traceability, competency, and documented evidence of calibration performance. Following these standards helps ensure consistency across teams and improves reliability of measurements in critical applications. Calibrate Point recommends aligning your practice with widely accepted standards while adapting to your device’s precision needs.
Choosing between at-home calibration and professional service
At-home calibration is suitable for most hobbyist and small-shop needs, especially when the process is straightforward and the device is reasonably accurate. For precision-critical tasks or complex instruments, a certified calibration lab can provide traceable standards and formal certificates. If you opt for at-home calibration, use calibrated reference sources and maintain a rigorous log. When in doubt, start with a home check and escalate to a professional service if drift exceeds tolerance or if regulatory requirements apply.
Calibration intervals and verification methods by thermometer type
| Thermometer Type | Recommended Calibration Interval | Best Check Method |
|---|---|---|
| Probe thermometer | 6–12 months | Ice-water and boiling-water checks |
| Digital food thermometer | 6–12 months | Ice-water check; verify with boiling point if possible |
| Infrared thermometer | 12 months (or per policy) | Surface-area check + ice-water verification (where possible) |
Questions & Answers
Why is thermometer calibration important for DIY projects?
Calibration ensures your temperature readings reflect reality, reducing errors in cooking, electronics, and safety checks. Even small drifts can lead to significant consequences over time. Regular calibrations help you trust your results.
Calibration ensures your readings mirror reality, reducing errors in cooking and safety checks. Regular calibration helps you trust your results.
How do I perform an ice-water calibration step-by-step?
Fill a glass with ice and add cold water to create a stable 0°C reference. Insert the thermometer probe and wait for a steady reading. If it’s not 0°C within the device’s tolerance, note the offset and adjust or document drift for calibration.
Make ice and water for a 0°C reference, insert the probe, wait for a steady reading, and check against tolerance.
Can I use a kitchen thermometer for scientific or professional work?
Kitchen thermometers can be adequate for basic tasks, but professional work often requires traceable calibration and certified equipment. If precision matters, rely on instruments designed for your tolerance and consider professional calibration to ensure traceability.
Kitchen thermometers are fine for simple tasks, but for precise work, use calibrated equipment or have it professionally calibrated.
How often should calibrations be performed in a professional setting?
Professional environments usually require tighter intervals, often quarterly or per regulator guidance, depending on process sensitivity and device stability. Always document the schedule and maintain records for audits.
In professional settings, calibrate more often—usually quarterly or per regulatory guidance—and keep records.
What should I do if my thermometer shows drift beyond tolerance?
If drift exceeds tolerance, re-check with a second reference, re-calibrate if possible, and consider replacing or servicing the device. If persistent, contact a calibrations lab to verify drift against traceable standards.
If drift exceeds tolerance, re-check and recalibrate; contact a lab if the drift persists.
“"Calibration is not a one-time task; it’s an ongoing process that protects the integrity of every measurement. Consistency beats intensity when accuracy matters."”
Key Takeaways
- Calibrate after purchase and after events that may cause drift
- Use ice-water and boiling-water checks as standard reference points
- Document calibration results to track drift over time
- Choose home calibration for basic accuracy; seek professional service for high-stakes measurements
- Follow industry standards to ensure traceability and reliability