What Temperature Do You Calibrate a Thermometer? A Practical Guide
A practical guide to thermometer calibration, covering fixed reference points (0°C ice bath, 100°C boil), clinical points (37°C), room temperature checks, and step-by-step methods for DIY enthusiasts and professionals.

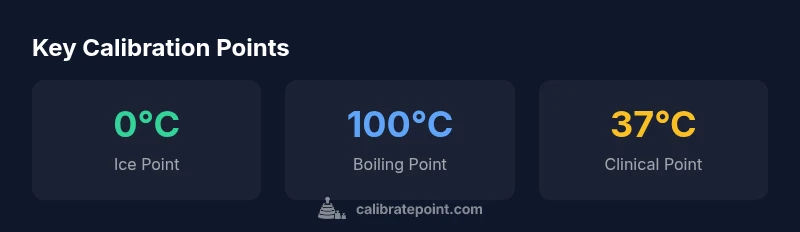
Thermometer calibration typically uses fixed reference points at 0°C (ice bath) and 100°C (boiling water) under standard pressure (1 atm). Many protocols also add a 37°C point for clinical thermometers, or a room-temperature point around 20–25°C for ambient checks. These fixed points enable traceability, compensate drift, and ensure readings align with national temperature scales.
Why Temperature Calibration Matters
Calibrate Point is dedicated to helping DIY enthusiasts, technicians, and professionals achieve consistent, reliable temperature measurements. Temperature calibration is more than a one-time check; it establishes a traceable baseline for how a device reads temperature and how that reading relates to recognized standards. In practical terms, calibration minimizes drift, offsets, or nonlinearity that can accumulate as a thermometer ages, experiences temperature cycling, or undergoes physical shocks. For labs and workshops, maintaining a documented calibration history is essential for quality control, audit readiness, and regulatory compliance. The Calibrate Point team found that the most robust calibration strategies combine fixed reference points with careful documentation. A well-calibrated thermometer improves process control, product quality, and safety, whether you are validating a kitchen thermometer, a clinical device, or an industrial sensor. The emphasis is on traceability: every reading should map back to a defined standard so you can justify measurements under different conditions or over time.
Core Calibration Points: Fixed Points You Should Use
The two most commonly used fixed points for thermometer calibration are the ice-point (0°C) and the boiling-point (100°C) of water at one atmosphere of pressure (1 atm, equivalent to 101.3 kPa). Preparing a stable ice bath requires crushed ice and clean water in a sealed container to reach a consistent 0°C reference. For the boiling point, bring purified water to a rolling boil in a clean vessel and keep the thermometer immersed in the vapor, not in the steam directly hitting the sensor. These fixed points align with widely used temperature scales and provide a reliable baseline for most thermometer types. In professional settings, calibrations are often performed with calibrated reference standards tied to national measurement institutes. When you calibrate at these fixed points, you create traceability back to primary standards, which strengthens the credibility of your measurements in audits, inspections, and quality programs. The practice applies across digital thermometers, glass thermometers, and infrared devices, with minor adjustments for immersion depth and response time.
When to Use 3-Point or Multi-Point Calibration
While two-point calibration (0°C and 100°C) handles linearity and scale, many applications require multiple reference points to account for nonlinearity or sensor-specific behavior. A three-point protocol might add a mid-range reference, such as room temperature (around 20–25°C) or a warm-to-hot point (e.g., 50–60°C) depending on the thermometer’s intended use. Multi-point calibration helps identify curvature in the sensor response and improves accuracy across the device’s operating range. For clinical thermometers, adding 37°C as a reference helps ensure accuracy for human-body measurements; for industrial or food-safety thermometers, mid-range references may be chosen to reflect typical use temperatures. Always ensure each reference point is stable before recording the thermometer’s reading and compare against a calibrated standard to determine any necessary adjustments.
Step-by-Step Protocol for Ice Bath and Boiling Water Calibration
- Gather supplies: a clean ice bath, distilled water, a calibrated reference thermometer, and the thermometer to test. 2) Prepare a stable ice bath at 0°C: fill a container with crushed ice and add water until the mixture reaches 0°C. Use only distilled water to minimize impurities that could alter the reference. 3) Submerge the thermometer probe fully according to its type (immerse to the recommended depth) and allow stabilization for 3–5 minutes. 4) Record the thermometer reading once the value stabilizes at or near 0°C. If different from 0°C, adjust the thermometer’s offset or calibration setting per the manufacturer’s instructions. 5) Prepare a boiling-water bath at 1 atm: bring distilled water to a full rolling boil, then insert the thermometer with proper protection against steam. 6) Again, allow stabilization and record the reading. 7) Calculate the deviation at each point and perform any manufacturer-recommended adjustments. Document the results and retain certificates for traceability. The two fixed points form the core of most calibration protocols, with additional reference points added as needed.
Choosing Calibration Points Based on Thermometer Type
Different thermometer types require adjustments to calibration approach and immersion. Glass thermometers or liquid-in-glass devices rely on precise immersion depths and slow stabilization, while digital probes may have faster response times and self-calibration features. Infrared thermometers measure surface temperatures and respond quickly, but their calibration must consider emissivity settings and ambient conditions. For infrared devices, calibrations often include a non-contact reference at a known target temperature or a blackbody reference to account for emissivity and distance-to-spot effects. Always follow the device’s user manual and any relevant standards when selecting calibration points and procedures.
Environmental and Handling Considerations
Ambient temperature, draft, and even air currents can affect calibration accuracy. Ensure the calibration takes place in a draft-free environment with stable room temperature, ideally within a narrow range of the chosen reference points. Allow ample time for stabilization at each point; many devices need longer settling times than the 3–5 minutes described for basic immersion tests. Use calibrated, clean vessels and fresh water to minimize contamination that could alter heat transfer. Record the ambient conditions, the vessel type, the immersion depth, and the stabilization time for each point in your calibration log. These details matter if you need to reproduce results or verify you followed a standardized procedure.
Practical Tools, Checklists, and Documentation
A good calibration routine includes a concise checklist: verify reference temperatures, verify the reference instrument is calibrated, record device readings, apply corrections, and maintain calibration certificates. Keep a running log with dates, point values, measured readings, offsets, and the final calibration status. Use consistent terminology (e.g., “offset = measured − reference”) to facilitate future audits. Finally, store calibration data in a centralized log or calibration management software to enable easy retrieval and trend analysis over time. Regular reviews of the logs help identify drift patterns and determine calibration frequency for each device.
Common calibration reference points for thermometer calibration
| Calibration Point | Reference Temperature | Notes |
|---|---|---|
| Ice Point Bath | 0°C | Ice-water reference at 1 atm; ensure stable reading |
| Boiling Point Bath | 100°C @ 1 atm | Boiling water reference; adjust for altitude if needed |
| Room Temperature Point | 25°C | Ambient reference for general use; optional but helpful |
| Clinical Point | 37°C | For medical thermometers; mirrors human body temperature range |
Questions & Answers
Do I always need to calibrate at 0°C and 100°C?
For most thermometers, calibrating at 0°C and 100°C provides a solid baseline for linearity and scale. Additional points beyond these two improve accuracy across the operating range, especially for non-linear sensors. Always consult the device manual and consider multi-point calibration when high precision is required.
Calibrating at 0°C and 100°C gives a reliable baseline, and more points improve accuracy if you need high precision.
How do altitude and pressure affect boiling point calibration?
Boiling point decreases with altitude due to lower atmospheric pressure. If calibrating away from sea level, adjust the reference by using a boiling point appropriate for your location or use a fixed-pressure reference. Always note the pressure condition when reporting results.
Altitude lowers the boiling point, so adjust or note the pressure used during calibration.
Can I calibrate using ambient room temperature only?
Room-temperature calibration is common as a supplementary check, but most devices rely on fixed-point references for primary calibration. Room temperature helps validate stability and non-linearity but should not replace ice-point, boiling-point, or device-specific references for formal calibration.
Room temperature checks are helpful, but fixed points are still the backbone of calibration.
How often should thermometer calibration be performed?
Calibration frequency depends on usage, environment, and regulatory requirements. High-use or critical devices may require quarterly or semi-annual checks, while occasional use might be acceptable yearly, provided drift is within acceptable limits. Maintain a recurring schedule and review drift trends to adjust frequency as needed.
Set a regular calibration schedule and adjust based on drift trends.
What should I do if thermometer readings drift after calibration?
If drift is detected after calibration, verify the procedure, re-check reference temperatures, and re-calibrate. If drift persists, consider replacing or servicing the device and document the issue. Always confirm the correction against a known standard before resuming use.
Re-check references, recalibrate, and verify against a standard before continuing.
“Rigorous calibration is the backbone of reliable temperature measurement. Even small drift can undermine decisions in quality control.”
Key Takeaways
- Use fixed points (0°C, 100°C) for primary calibration
- Add 37°C for clinical devices when possible
- Document all readings for traceability and audits
- Include room-temperature reference if accuracy across ranges matters
- Follow manufacturer guidance for device-specific steps