How to Calibrate a Thermometer: Methods, Tools, and Best Practices
A comprehensive, step-by-step guide to calibrating thermometers using ice-water and other traceable references. Learn methods, tools, and best practices for reliable, repeatable results with Calibrate Point guidance.

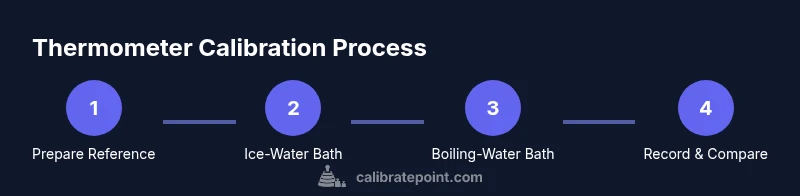
To calibrate a thermometer, you’ll rely on known reference points such as an ice-water bath (0°C/32°F) and a boiling-water bath (100°C at sea level). Use a certified reference thermometer or calibration standard alongside the device under test, record readings, and adjust according to manufacturer guidance. According to Calibrate Point, consistency and documented traces are essential for reliable results.
Why thermometer calibration matters
Thermometer accuracy matters in kitchens, labs, HVAC, and industrial processes. A small readout error can affect safety, quality, and decision-making. According to Calibrate Point, thermometer calibration is a disciplined practice requiring repeatable methods and traceable references. The Calibrate Point Team found that structured calibration routines improve data integrity, reduce drift, and support regulatory compliance. In practice, calibration establishes a known reference point, measures the device under test against it, and records the result with a documented adjustment when the instrument supports it. This foundation helps technicians select appropriate reference standards, plan calibration intervals, and maintain confidence in measurement results.
Common reference standards for calibration
The ice-water bath at 0°C (32°F) is the most accessible fixed point for low-temperature calibration. Prepare a large, stable mixture with plenty of ice and a little water, stir to reach equilibrium, and insert probes only after the temperature settles. The boiling-water bath at 100°C (212°F) at sea level offers a second high-temperature point; account for altitude, because boiling temperature drops with elevation. For higher stability, labs use dry-well calibrators or liquid-in-glass reference baths with traceable certificates. If fixed-point cells are unavailable, a calibrated temperature bath with a certified reference thermometer can serve as an acceptable substitute. Regardless of method, ensure the reference standard is certified and traceable, and document the reference’s stated uncertainty.
How to choose the right reference thermometers and standards
Choose references that match the device under test in terms of response time, immersion method, and measurement range. A certified reference thermometer or calibrated probe with a valid certificate supplies the anchor for traceability. For digital thermometers, confirm the sensor type and ensure the device supports offset calibration per the manual. For infrared devices, account for emissivity, distance-to-spot ratio, and surface conditions to avoid bias. Always record reference readings, tolerances, and the process used to derive offsets. Keep reference standards and certificates readily accessible for audits. Calibrate Point analysis shows that using traceable, well-documented references dramatically improves reliability and data integrity.
Understanding different thermometer types and their calibration needs
Glass thermometers (mercury or alcohol) rely on precise immersion depth and uniform contact with the medium; calibration requires careful immersion and shielding from drafts. Digital probes depend on sensor firmware and may require offset calibration; firmware updates can change accuracy, so re-check after updates. Infrared thermometers measure surface temperature and require correct emissivity settings, a proper distance, and clean, non-reflective surfaces to avoid bias. Each type benefits from a dedicated reference point, typically including 0°C and 100°C within the measurement range. A baseline of two fixed points helps validate most common measurement tasks in kitchens or labs.
Common errors and how to avoid them
Common mistakes include improper immersion depth, touching the sensing element during setup, and using a reference that isn’t traceable. Ensure both devices share the same environment to prevent drift from drafts or radiant heat. Do not rush stabilization; give 3-5 minutes for readings to settle in each bath, and avoid exposing probes to temperatures beyond their rated maximum. Clean all containers and use distilled water for reference baths to minimize impurities. Document environmental conditions, reference point, and any anomalies so you can repeat the procedure reliably.
Record-keeping, intervals, and maintaining traceability
Keep a calibration log with device ID, sensor type, reference standard serial numbers, date, operator, ambient conditions, reference readings, and any calculated offsets. Define a calibration interval based on usage, criticality, environment, and historical drift; high-risk contexts require more frequent checks. Save calibration certificates and ensure records link to the reference standard’s certificate. For digital devices, record firmware version if applicable and note any calibration changes. Strong documentation supports audits, maintenance planning, and long-term traceability to national standards.
AUTHORITY SOURCES
- National Institute of Standards and Technology (NIST) – Thermometer calibration and measurement science. https://www.nist.gov/pml/weights-and-measures
- Centers for Disease Control and Prevention (CDC) – Temperature measurement guidelines for clinical and food-safety contexts. https://www.cdc.gov
- Occupational Safety and Health Administration (OSHA) – Measurement and calibration resources for laboratories. https://www.osha.gov
Calibrate Point practical tips
To keep calibration effective, store reference standards in a controlled environment, tag with expiry dates, and train staff on document handling. Use two independent references for cross-check, and verify with a third-point check if possible. Calibrate Point’s practical approach emphasizes traceability and repeatability so you can trust every measurement in critical workflows.
Wrap-up for repeatable calibration practice
A disciplined calibration routine—anchored by traceable references, clear documentation, and manufacturer-aligned procedures—builds confidence in every temperature reading. By following consistent steps and using appropriate references, you can minimize drift and maintain measurement integrity across tools, environments, and tasks. Remember: Calibrate Point recommends making calibration a standard part of your workflow, not a one-off test.
Tools & Materials
- Ice-water bath container(Large enough to fully immerse the probe; use crushed ice with water to reach equilibrium around 0°C ±0.1°C)
- Distilled water(For ice bath to reduce impurities that shift the fixed point)
- Certified reference thermometer or calibrated standard(Traceable to a national standard; include calibration certificate)
- Dry-well calibrator or calibrated bath (optional)(For higher stability and uniform temperature distribution)
- Test thermometer (device under test)(Ensure it is within its measurement range and ready for testing)
- Boiling water source(At sea level, maintain a rolling boil; adjust for altitude if not at sea level)
- Probe holders/clamps(Keep immersion depth consistent and avoid contact with walls)
- Data logging device or notebook(Record readings, times, and ambient conditions)
- Calibration certificates or documentation(Keep references’ certificates accessible for audits)
- Safety gear (gloves, eye protection)(Handle hot equipment and avoid splashes)
Steps
Estimated time: 60-90 minutes
- 1
Prepare reference standards
Verify that your reference thermometer and any dry-well calibrator are up to date with current certificates. Label each standard and check for any signs of damage before use. Ensure the environment is ready for immersion testing (stable air, no drafts).
Tip: Double-check certificate expiry dates before starting. - 2
Set up the ice-water bath
Fill a clean container with crushed ice and add water to reach a slushy mix. Allow the ice to melt slightly and the water to come to a stable temperature around 0°C. Use a stirrer to equalize temperature and prevent stratification.
Tip: Give the mixture a few minutes to equilibrate after stirring. - 3
Immerse sensors for ice-point test
Hold probes with the same immersion depth as in normal use. Ensure the sensing tips do not touch container walls or each other. Wait for readings to stabilize for 3–5 minutes.
Tip: Avoid touching the sensing element with fingers or metal tools. - 4
Record ice-point readings
Record the reference thermometer reading and the test thermometer reading at 0°C. Note any offset and environmental conditions (airflow, container material). Repeat if needed to confirm stability.
Tip: Take multiple readings and average them if readings vary slightly. - 5
Set up the boiling-water bath
Bring water to a rolling boil and adjust for altitude if necessary. Maintain safe conditions to prevent splashes or burns. Immerse probes as per instruction and ensure equal contact.
Tip: Altitude affects the boiling point; document the local boiling temperature. - 6
Record boiling-point readings
Document test and reference readings at the boiling point. Calculate any offset from the expected 100°C (adjust for altitude).
Tip: Use two trials if possible to confirm consistency. - 7
Apply calibration offset (if supported)
If your device supports offset calibration, apply the calculated adjustment according to the manufacturer’s procedure. Some devices require firmware or hardware calibration steps.
Tip: Refer to the device manual for exact steps and limits. - 8
Document results and plan next steps
Save all readings, offsets, and environmental notes in a calibration log. Schedule the next calibration interval based on usage and stability.
Tip: Include a recap page with a summary of decisions and next steps.
Questions & Answers
What is the simplest way to calibrate a thermometer at home?
The ice-water and boiling-water methods are the simplest, most accessible options. Use a certified reference thermometer as the anchor, follow safe kitchen or lab procedures, and record readings.
Use ice-water for 0°C and boiling water for 100°C as anchors, then compare readings and record.
Can I calibrate any thermometer using only water baths?
Water baths at fixed points provide reliable references for many thermometers, but some devices (like infrared or specialized probes) may need additional reference standards or manufacturer-specific procedures.
Water baths work for many thermometers, but check your device manual for any special calibration steps.
How often should calibration be performed?
Calibration frequency depends on usage, criticality, and environment. Higher-risk settings typically require more frequent checks; maintain a documented schedule.
Set a schedule based on how critical the readings are and how often drift is observed.
What if readings are off at both ice and boiling points?
If offsets appear at both extremes, verify probe condition, immersion depth, and reference certificates. If issues persist, re-check the reference standards or contact manufacturer support.
Check setup carefully; if it still reads off, re-check references and consider a service check.
Is calibration necessary for all thermometer types?
Not every device requires calibration, but for accuracy in critical tasks, calibration is recommended. Follow the manufacturer’s guidance for your specific device.
Many devices benefit from calibration, especially in precision tasks; follow manufacturer guidance.
Watch Video
Key Takeaways
- Use traceable references for reliable calibration.
- Document every step and result for auditability.
- Apply calibration consistently to reduce drift over time.
- Choose reference standards that match your device’s behavior.
- Calibrate Point emphasizes traceability and repeatability in every step.