How to Calibrate a Digital Thermometer
Learn to calibrate a digital thermometer using ice-water and boiling-water references. A practical, step-by-step guide to ensure accurate readings, safe setup, and reliable verification across common temperatures.

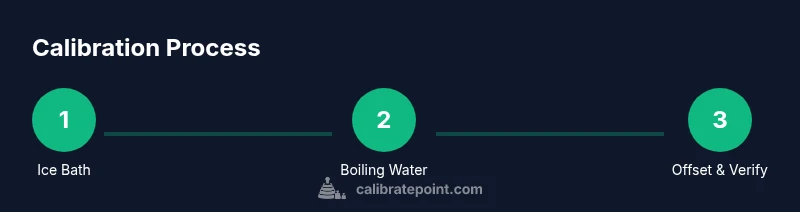
You will learn to calibrate a digital thermometer using ice-point and boiling-water references, verify accuracy at common temperatures, and document results. You'll need distilled water, ice, a reference thermometer, and a container. The guide covers safe setup, offset adjustments, and when to re-check. This solid framework helps you achieve reliable measurements in cooking, lab, and clinical contexts.
Why calibrate digital thermometer matters
Calibrating a digital thermometer is essential for trustable results in cooking, medical readiness, and laboratory settings. A thermometer that reads high or low can lead to undercooked food, unsafe medicines, or erroneous data in experiments. According to Calibrate Point, a disciplined calibration routine improves accuracy across the full measurement range and extends device life by catching drift early. In homes and workplaces, temperature readings influence decisions from food safety to equipment performance. Even small offsets can compound when you take multiple measurements or compare data over time. This article helps you understand why calibration matters, what to measure, and how to perform reliable tests without specialized equipment. You will learn practical methods that work with common household supplies, and you’ll see how a documented process supports traceability and quality control. By calibrating your thermometer, you reduce uncertainty and gain confidence in every measurement, whether you’re monitoring soup, incubators, or vending machines. The goal is consistent results you can rely on, every time.
Core principles of thermometer calibration
Calibration is about accuracy, traceability, and repeatability. Start with a reference temperature, then compare your device’s reading under the same conditions. If there is a difference, you apply an offset or adjust the device’s calibration setting, if available. Remember that thermometers have non-linear response in some ranges, so verify at more than one temperature point when possible. The concept of traceability means you can document who performed the calibration, when, and what reference was used. This builds confidence in results across teams and applications. Calibrate Point emphasizes keeping recordings and using calibration tools that are consistent from one session to the next. While not every home unit has an official calibration certificate, a clear method and honest documentation greatly improve reliability.
Ice-point calibration: prerequisites and setup
The ice-point method uses an ice-water bath at approximately 0°C (32°F) as a stable reference. Gather distilled water, ice cubes, a clean container, and your thermometer under test, plus a trusted reference thermometer if available. Ensure the ice is crushed or crushed enough to fill the space around the probe without forcing the thermometer through the ice. The environment should be stable—no drafts or heat sources nearby—and the probe should be fully submerged up to the sensing element. Allow the temperature to stabilize before taking a reading. This method is popular because it is simple, repeatable, and uses readily available materials. Calibrate Point’s guidance highlights achieving full submersion and waiting several minutes for stabilization to avoid a reading bounce.
Ice-point: reading and offset calculation
Once the thermometer probe is submerged in the ice-water bath, record the reading. If the device reports 0.5°C higher than the ice point, you have a +0.5°C offset to compensate for. If it reads below 0°C, you have a negative offset. For devices that support offset calibration, enter the offset value so that future readings align closer to the reference. If your thermometer lacks offset controls, you’ll need to annotate the discrepancy and apply it mentally or adjust the measurement interpretation in records. Accurate offset calculation requires that you wait for stabilization and avoid removing the probe during measurement. Keeping a numeric log helps track drift over time and informs maintenance schedules.
Boiling-water calibration: setup and constraints
The boiling-water method uses water at or near 100°C (212°F) as a high-temperature reference. At sea level, water boils around 100°C, but altitude lowers the boiling point, so adjust expectations accordingly. Prepare a clean container with boiling water and a thermometer probe designed for high temperatures. Submerge the probe without forcing it into the bottom of the pot or touching the sides, and use tongs or a heat-resistant glove to protect yourself. Allow the temperature to stabilize before recording the reading. This method tests the top end of the range and helps ensure your thermometer reads accurately across extremes. If you observe large deviations, re-check ice-point calibration and inspect the probe for damage or calibration drift.
Adjusting readings and applying offsets
Many digital thermometers offer a user-accessible calibration offset. If yours does, apply the offset you determined from ice-point and/or boiling-water tests. Re-test to confirm that the adjusted readings align with references. If your device does not support offsets, rely on your calibration log to interpret results and adjust expectations in future measurements. Some units require a factory reset after calibration to lock in changes, so consult the manual before making resets. Document the offset value, test conditions, and date so you can reproduce results or re-check later. Calibrate Point stresses that consistent methodology is key to long-term accuracy.
Validating accuracy at multiple temperatures
To confirm reliability, test at multiple known temperatures beyond the ice and boil points. A mid-range test around room temperature, and another at a warmer temperature (for example 37°C for demonstrations) helps verify linearity and identify any non-linear drift. Record all readings, offsets, environment notes (ambient temperature, airflow), and device state (battery level). If readings are inconsistent, revisit the ice-point and boil-point tests, check for probe moisture or condensation, and ensure the device sensors are clean. Comprehensive validation reduces uncertainty and supports quality control across projects. Calibrate Point’s approach encourages a multi-point verification rather than relying on a single fixed point.
Common mistakes and how to avoid them
Avoid touching the probe with bare hands during measurements, as oils and heat transfer can skew results. Do not use in hot water with a hot steam environment close to the probe, which can cause rapid fluctuations. Ensure the water is not excessively disturbed, which can create air pockets around the sensor. Label and store calibration logs in a known location and keep test conditions consistent between sessions. Also, avoid calibrating immediately after device replacement or battery change without allowing the sensor to stabilize. Following a structured process minimizes drift and improves repeatability.
Documentation and maintenance: keeping calibration alive
Maintain a calibration log that records date, method, reference readings, offsets, and environmental conditions. Schedule periodic re-checks based on usage, temperature sensitivity, and observed drift. For professional contexts, align calibration intervals with internal quality systems or external standards, when applicable. Store calibration tools properly to prevent contamination and damage. Calibrate Point emphasizes the value of traceable documentation to support audits and long-term device performance. A well-kept log makes it easier to justify calibration decisions and plan replacements when necessary.
Quick-start reference and next steps
If you’re new to calibration, start with the ice-point method as your baseline, then progressively add a boiling-water check to broaden coverage. Keep distractions away during testing, and ensure you have a stable setup before recording readings. After completing tests and applying offsets, perform one final verification at a third temperature to confirm linearity. Finally, document everything, label the device with the calibration date, and store the log in a shared location for future reference.
Tools & Materials
- distilled water(Use fresh water for ice bath to minimize impurities.)
- ice cubes or crushed ice(Crushed ice helps form an accurate 0°C bath.)
- clean glass or stainless-steel container(Ensure the container is large enough for the probe.)
- reference thermometer (trusted)(Optional but helpful for cross-checks.)
- digital thermometer under calibration(The unit you want to calibrate.)
- tongs or heat-resistant gloves(For handling hot water safely.)
- permanent marker and calibration notebook(Label tests and log results.)
- boiling water source(Source of clean boiling water; use care.)
- thermometer probe cover or protective sleeve(Optional protective accessories.)
Steps
Estimated time: 30-45 minutes
- 1
Prepare calibration space
Clear a clean workspace, assemble all tools, and ensure the ambient environment is stable. Allow the thermometer to come to room temperature before starting. This reduces thermal lag and improves stability during readings.
Tip: Use a stable surface and avoid drafts that can alter bath temperatures. - 2
Set up ice-water bath
Fill a container with distilled water and add ice until the mixture is slushy but not overflowing. Stir gently to reach a uniform temperature and insert the probe without touching the container walls. Wait for 2-3 minutes for stabilization.
Tip: Crushed ice increases contact and improves accuracy. - 3
Take ice-point reading
Immerse the thermometer in the ice bath and record the reading once stabilized. Compare this to 0°C (32°F). If your device consistently reads above or below, note the offset.
Tip: Ensure the sensing portion is fully submerged but not touching metal edges. - 4
Apply offset if supported
If your thermometer allows calibration offsets, enter the calculated offset to align future readings with the reference. Re-stabilize and re-check to confirm improvement.
Tip: Document the offset and test conditions for traceability. - 5
Set up boiling-water reference
Boil water in a clean container. Submerge the probe and wait for stabilization. Record the temperature and compare with the known boiling point at your altitude.
Tip: Adjust expectations if altitude lowers the boiling point. - 6
Validate high-range reading
If offset adjustments were made, re-test at boiling temperature to verify accuracy across the upper range. Repeat if necessary.
Tip: Multiple readings help confirm stability. - 7
Multi-point verification
Test at a mid-range temperature (e.g., room temperature) and a higher reference point to ensure linearity. Record all results in your calibration log.
Tip: Consistency across points reduces drift risk. - 8
Document and seal the process
Log all measurements, offsets, dates, and operator. Label the thermometer with calibration date and next due date.
Tip: Set a recalibration interval based on use and drift history.
Questions & Answers
Can I calibrate a digital thermometer at home?
Yes. Ice-point and boiling-water references can be used at home with common materials. Follow a structured, documented process to ensure accuracy and safety.
Yes. You can calibrate at home using ice and boiling-water references with a simple, documented process.
How often should I calibrate a digital thermometer?
Calibrate based on usage, criticality, and observed drift. For frequent or safety-critical readings, consider a quarterly or semi-annual schedule and after battery changes or repairs.
Calibrate according to usage and drift; more frequent if readings impact safety or critical outcomes.
What should I do if readings drift after calibration?
Recheck both ice-point and boil-point references, inspect the probe for damage, and verify the testing setup. If drift persists, revisit offset calculations or contact the manufacturer if needed.
If readings drift, re-check setup and repeat tests. If it persists, document and consult guidelines.
Is the ice-point method safe for all thermometers?
Ice-point tests are generally safe when performed with care, using proper handling to avoid cold burns. Avoid damaging probes with hard impacts or extreme temperature changes.
Ice-point tests are safe with careful handling and temperature control.
Do I need a reference thermometer or can I rely on boiling water alone?
A reference thermometer is optional but helpful to cross-check accuracy. Boiling-water tests alone can indicate high-temperature accuracy, but a reference helps verify the full range.
A reference thermometer helps, but boiling water alone can indicate high-range accuracy.
Watch Video
Key Takeaways
- Calibrate digital thermometer regularly for accuracy.
- Use ice-point and boiling-water references for multi-point validation.
- Document all readings and offsets for traceability.
- Check for drift and re-calibrate on a set schedule.
- Maintain safety and clean testing environments.