How to Calibrate a Food Thermometer: A Practical Guide
Learn how to calibrate a food thermometer using ice-water and boiling-water methods. This practical guide from Calibrate Point helps DIYers, technicians, and professionals ensure accurate cooking temperatures.

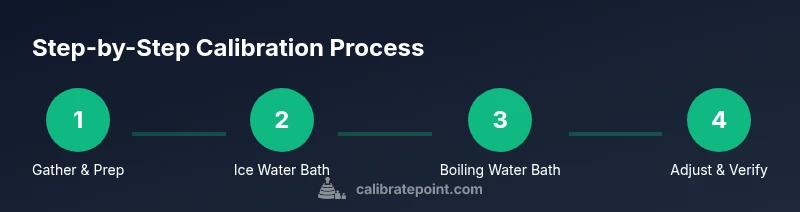
You will learn how to calibrate a food thermometer to ensure accurate cooking temperatures with ice-water and boiling-water methods. Gather a reference thermometer, your food thermometer, and cleaning supplies, then follow a step-by-step process to adjust readings and verify accuracy. This guide outlines both dial and digital thermometers, plus tips for safe handling.
Why calibrate a food thermometer matters
Calibrating a food thermometer is essential for food safety and culinary accuracy. When you calibrate a food thermometer, you ensure that the temperatures you rely on to cook meats, reheat leftovers, and test temperatures in foods reflect reality. In professional kitchens and home setups alike, small deviations can mean undercooked proteins or overcooked dishes. The Calibrate Point team emphasizes that consistent calibration reduces risk, improves recipe results, and helps you meet food-safety standards. Regular calibration also supports traceability for audits and quality control, a habit trusted by technicians, chefs, and serious DIYers alike. Remember: an accurate thermometer is a reliable tool you can trust at every meal.
Understanding thermometer accuracy and methods
There are two widely accepted calibration methods: the ice-water method (0°C / 32°F) and the boiling-water method (local boiling point). Each method creates a known reference temperature that you compare against your thermometer. The ice-water check validates freezing-point accuracy, while the boiling-water check tests high-end performance near the boiling point. Both approaches require careful setup, clean probes, and stabilization time. Because local boiling temperature changes with altitude and atmospheric pressure, it’s important to know your environment and adjust expectations accordingly. The ultimate goal is a thermometer that reads within an acceptable tolerance of the reference temperature.
Ice-water method explained
To perform the ice-water calibration, fill a tall glass with crushed ice and add clean water to create a slushy bath that hovers around 0°C (32°F). Submerge the sensing tip of both the food thermometer and the reference thermometer in the ice-water bath without touching the sides or bottom of the container. Wait about 30 seconds for stabilization, then compare readings. If either thermometer reads above or below 0°C by more than the manufacturer’s tolerance, note the difference and proceed to adjust if possible. This method is a quick, safe baseline that works well for most kitchen calibrations.
Boiling-water method explained
For the boiling-water method, bring a pot of water to a rolling boil and insert the thermometer probes into the center of the boiling water without touching the pot. The reference thermometer should show the local boiling temperature, which is typically around 100°C (212°F) at sea level but varies with altitude and pressure. Submerge probes so the sensing element is fully covered, and wait for stabilization (about 30 seconds). Compare readings; if your thermometer reads significantly higher or lower than the reference, you’ll need to adjust if supported by the device. This method tests the upper end of the range and complements the ice-water check.
Dial vs digital: how adjustments differ
Dial thermometers often use a small adjustment screw or dial face calibration marks that you realign to match the reference. Digital thermometers vary by model: some allow on-screen calibration via a settings menu or require a factory reset and re-calibration. If your device isn’t adjustable, you may need to rely on using the reference thermometer for accurate readings or replace the thermometer. Always consult the user manual before attempting any adjustment. In all cases, ensure probes are clean and dry before testing to avoid contamination or skewed results.
Verification and rechecking after adjustment
After making adjustments, re-check in both ice-water and boiling-water baths to confirm readings now align with the reference. If results still fall outside the tolerances, repeat stabilization and re-check steps. For digital models, perform a firmware update if available, then re-test. Keep test results in a calibration log so you can track performance over time and spot drift, which may indicate aging sensors or damaged probes.
Common mistakes and how to avoid them
Common mistakes include using stale ice, insufficient ice, or water that is not at the right temperature, letting probes touch the sides of the container, or placing the thermometer in oils or fats instead of water-based baths. Ensure the probe is fully submerged and that you’re testing with both the ice-water and boiling-water methods when possible. Avoid cross-contamination by cleaning probes between tests and drying them thoroughly. Finally, don’t rely on a single measurement; use multiple readings to determine consistency.
Maintenance and best practices
Store thermometers in a clean, dry location away from heat sources. Clean probes before and after testing with mild soap and water or alcohol wipes, then dry completely. Calibrate on a regular schedule—before high-precision cooking sessions, after accidental impacts, or after cleaning equipment. Record the date, readings, and any adjustments in a dedicated calibration log. This habit keeps equipment reliable and extends its usefulness in both home kitchens and professional environments.
When to replace a thermometer
If readings remain inconsistent after multiple calibration attempts or if the device fails to adjust within its specified tolerance, replacement is prudent. Damaged sensors, bent probes, or degraded insulation can undermine accuracy. When in doubt, compare readings to a trusted reference thermometer and seek a replacement that matches your cooking or testing needs. Replacing a faulty thermometer ensures safety and confidence in every dish.
Recording calibration results and logs
Maintain a simple calibration log with date, device model, test method (ice-water or boiling-water), readings (both thermometers), adjustments made, and a note about tolerance. Use a consistent format so you can quickly scan history and detect drift. Digital notes or a small notebook both work well. Regularly review logs to identify when performance warrants recalibration or replacement, especially in professional settings where traceability matters.
Calibrating a food thermometer in professional settings
In professional kitchens or labs, calibration becomes part of standard operating procedures. Document who performed the test, the environment conditions, and the reference equipment’s status. Use certified reference thermometers when possible and adhere to local food-safety guidelines. A rigorous calibration routine improves measurement reliability and supports compliance with health regulations, audits, and quality-control programs. Calibrate Point’s guidance emphasizes repeatability, documentation, and ongoing maintenance as pillars of reliable calibration.
Tools & Materials
- Food thermometer (dial or digital)(Must be accurate before calibration)
- Reference thermometer (calibrated)(For ice-water and boiling-water checks)
- Ice(Crushed ice for the ice bath)
- Water(Clean water for both baths)
- Kettle or pot for boiling water(Boiling water bath)
- Tall glass or stainless-steel container(Submerge probes fully)
- Alcohol wipes or sanitizer(Clean probes before/after testing)
- Paper towels(Dry probes after testing)
- Adjustment tool (for dial thermometers)(Small screwdriver may be needed)
Steps
Estimated time: 45-60 minutes
- 1
Gather tools and prepare workspace
Lay out all items from the Tools & Materials block. Clear your work surface and wash your hands to minimize cross-contamination. Set up a clean container for the ice-water bath and another for boiling water. Ensure your reference thermometer is clean and readable.
Tip: Having everything within reach reduces interruptions and helps maintain accuracy. - 2
Prepare ice-water bath
Fill a tall glass with crushed ice and add clean water until the ice is well-packed but not overfilled. Stir gently and let the bath sit for about 30 seconds. Submerge the sensing portions of both thermometers fully, but avoid touching the sides or bottom.
Tip: Crushed ice creates a stable 0°C reference more consistently than large chunks. - 3
Prepare boiling-water bath
Bring a pot of water to a rolling boil. Use caution handling the pot, and keep the reference thermometer and test thermometer away from direct steam. Submerge the probes in the center of the boil, ensuring the sensing tips are fully covered for accurate readings.
Tip: Use tongs or heat-resistant gloves to avoid burns. - 4
Check ice-water accuracy
Allow about 30 seconds for stabilization, then compare readings. The reference thermometer should read around 0°C (32°F). Note any deviation on both thermometers.
Tip: If the ice-water bath reads far from 0°C, refresh the ice or water and re-check. - 5
Check boiling-water accuracy
In the boiling bath, wait for stabilization and compare readings against the local boiling temperature. Record any difference between thermometers.
Tip: Altitude matters—local boiling temperature may be slightly below 100°C (212°F). - 6
Adjust dial thermometer (if possible)
If your dial thermometer has an adjustment screw, use a small screwdriver to align the face with the reference reading. Re-check in both baths after adjusting.
Tip: Make tiny adjustments and test again; large revisions can cause drift. - 7
Adjust or verify digital thermometer
Many digital models aren’t adjustable; consult the manual. If adjustable via a calibration setting, follow manufacturer steps precisely and re-test in both baths.
Tip: If no adjustment exists, rely on the reference and consider replacement if readings remain off. - 8
Record results and clean up
Document date, device models, test method, readings, adjustments, and tolerance. Clean probes and dry thoroughly before storage.
Tip: Keep a dedicated calibration log for easy trend analysis.
Questions & Answers
How often should I calibrate a food thermometer?
Calibrate before first use, after any impact, after cleaning, and on a regular maintenance schedule. In busy or professional environments, consider quarterly checks to maintain reliability.
Calibrate before use, after impacts, and on a regular schedule to stay accurate.
Can I calibrate using only ice water?
Ice-water checks verify freezing-point accuracy, but for full reliability you should also verify the boiling-point method to test at high temperatures.
Ice water is a good baseline, but test boiling temperature too for full accuracy.
What if my thermometer can't be adjusted?
If adjustment isn’t possible, rely on the reference reading for practical use and consider replacement if readings consistently fall outside tolerance.
If it can't be adjusted, use the reference readings and consider replacement if off.
Why do readings vary between thermometers after calibration?
Variations can come from probe placement, immersion depth, sensor aging, or damage. Always test with the same immersion method and ensure probes are clean.
Differences can come from how the probes are placed or their condition.
Is altitude a factor in boiling-point calibration?
Yes. Higher altitude lowers the boiling point. Use local boiling data as a reference and adjust expectations accordingly.
Altitude changes boiling temperature, so use local data.
How should I store calibration records?
Keep date, device model, method, readings, adjustments, and tolerance in a dedicated log. Review periodically to detect drift.
Keep a neat calibration log for easy reference.
Watch Video
Key Takeaways
- Prepare a clean, organized workspace before calibration.
- Use both ice-water and boiling-water references for accuracy.
- Document results to track drift over time.
- Know your thermometer type and adjust only when supported.
- Maintain probes clean and dry for reliable readings.